Set up OneSignal
Configure push notifications for:
- Customer App (Marketplace or Franchise App)
- Business App
- Driver App
Saving IDs in the Dashboard does not send a notification. Delivery still requires a OneSignal app, a registered device that granted permission, and an event that triggers a request.
Overview
Push notifications let the platform send alerts to users' devices, including when the app is not open.
They are commonly used to:
- Notify customers about order status updates
- Send promotions and special offers
- Inform users about new products or services
- Improve customer engagement and retention
Ordering.co manages these notifications through OneSignal, which handles communication with the device.
Once configured, notifications can be triggered by events such as:
- Order received
- Order accepted or rejected
- Order ready
- Order out for delivery
- Order completed
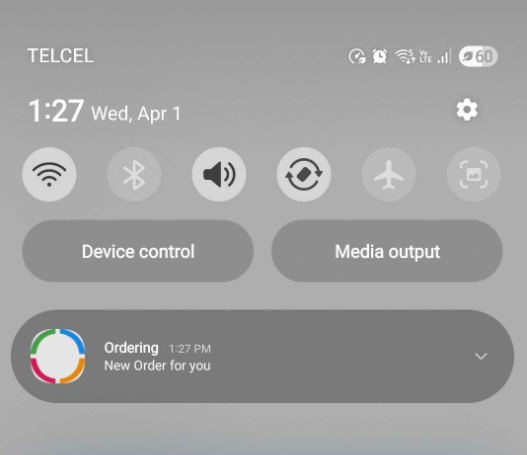
The event list above is what the integration is built to send. Checking a status on Push notifications still does not prove that OneSignal delivered that event to a device.
How push notifications work
- A user installs the mobile app.
- The user accepts push notification permissions.
- The device is registered with OneSignal.
- When an event occurs (for example, an order-status update), the platform sends a notification request.
- OneSignal delivers the notification to the user's device.
If the user declines permission, or the device never registers, later Dashboard saves do not create a delivery.
Benefits
Push notifications help businesses:
- Provide order updates as events occur
- Increase customer engagement
- Encourage repeat orders
- Send targeted promotions
- Improve the overall customer experience
Those outcomes still depend on permission, a valid App ID and REST API key, and OneSignal accepting the request.
Requirements
- A OneSignal account at https://onesignal.com/
- A Firebase project for Android at https://firebase.google.com/
- An Apple Developer account for iOS push notifications
OneSignal and Firebase accounts are created in those providers' consoles. An Apple Developer account is a separate provider requirement.
OneSignal Android configuration (Google)
Part 1: Firebase
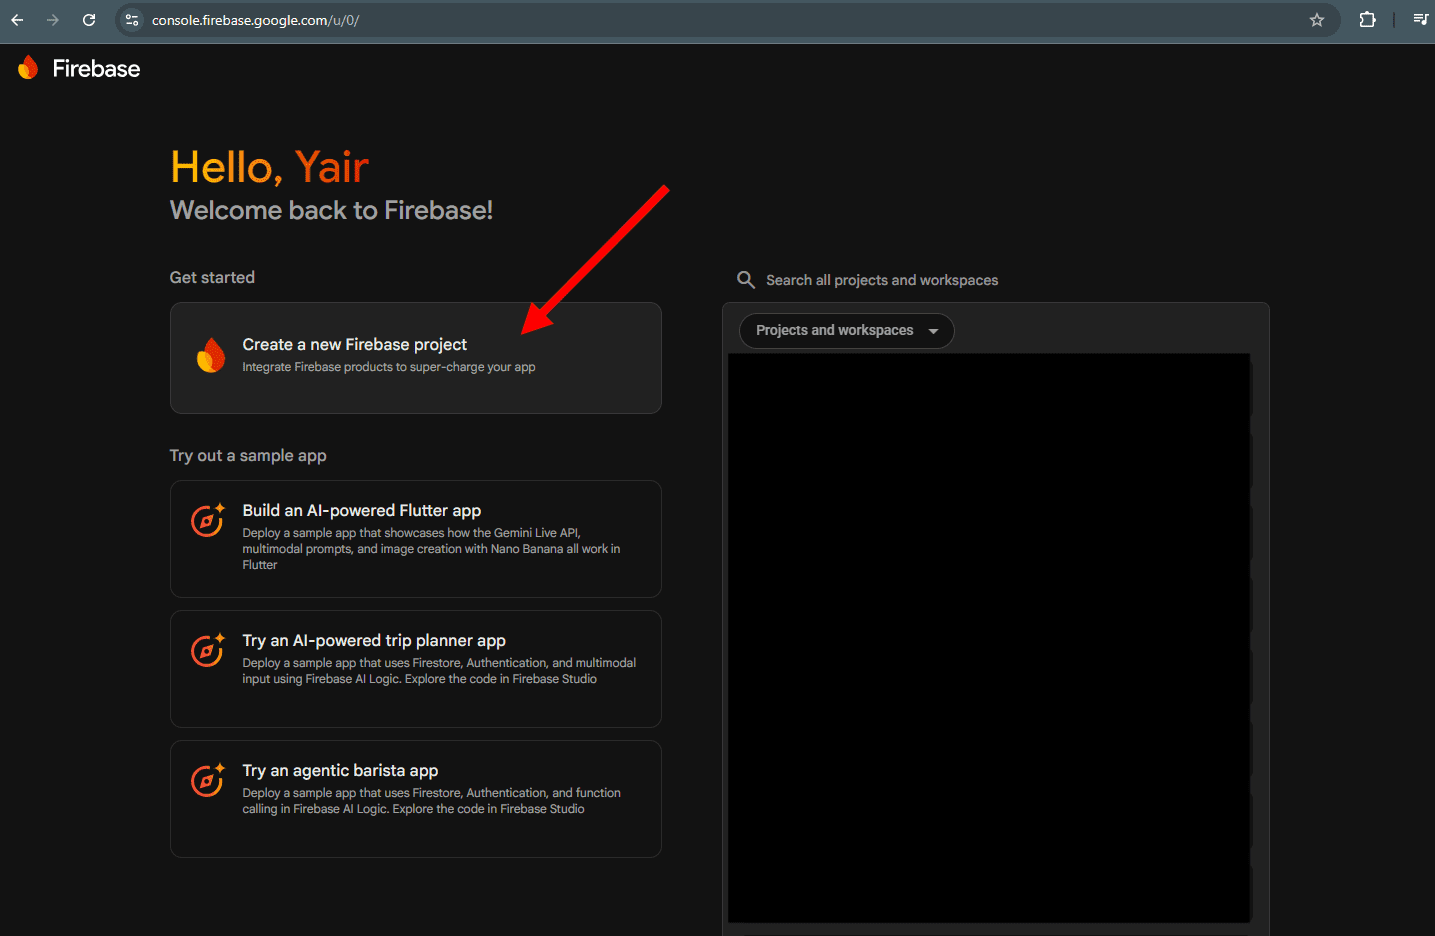
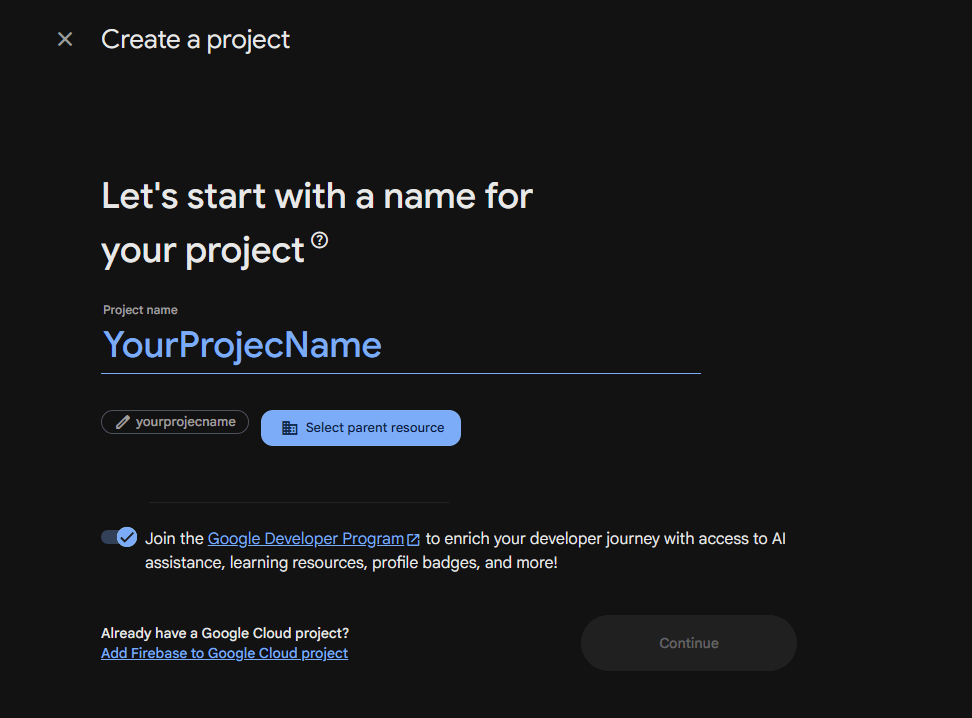
- Log in to your Firebase account and create a new project. One project is enough for all of your apps.
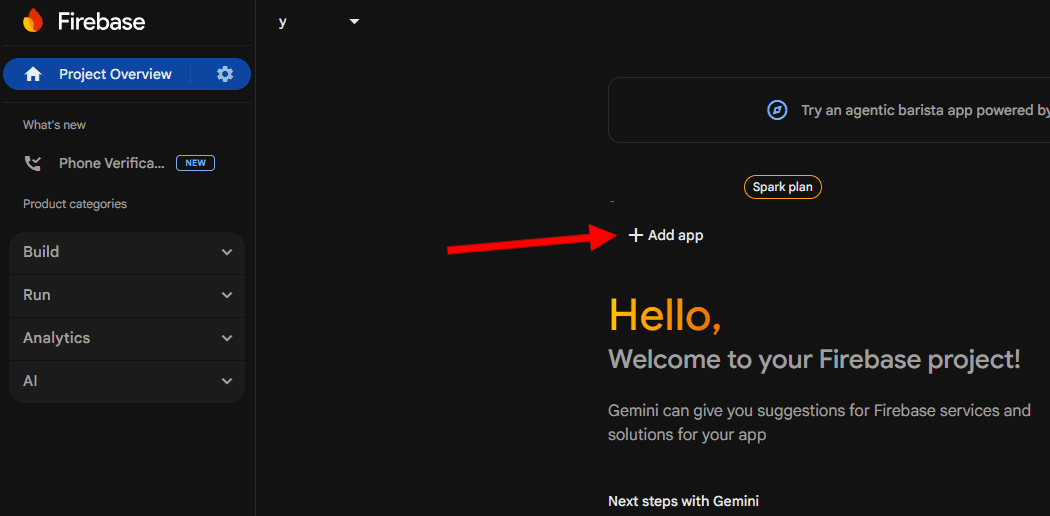
- Register your Android app and enter your app identifier.
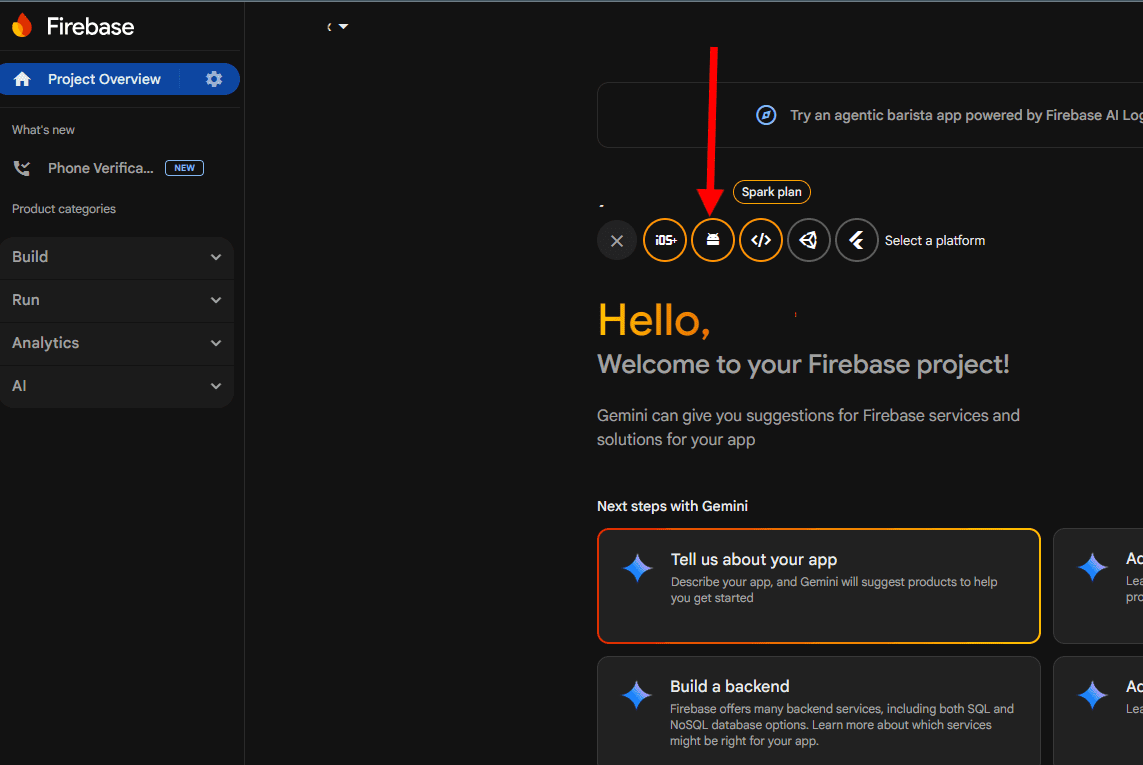
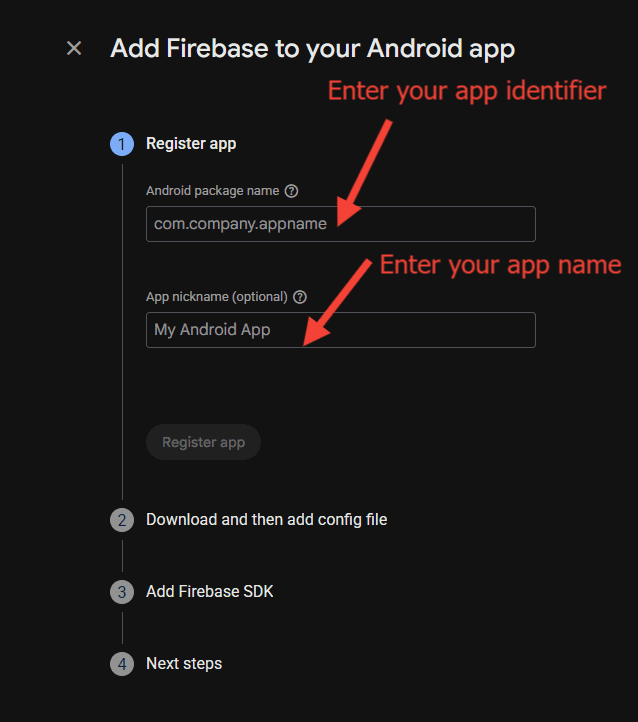
- Open the settings of your registered app.
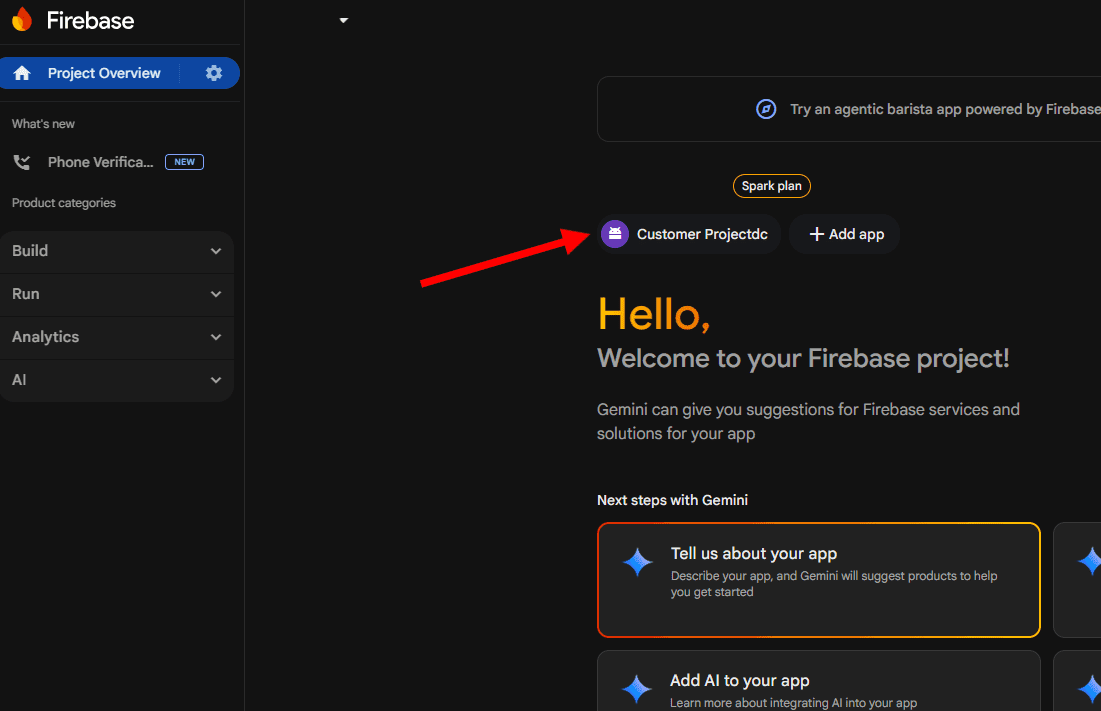
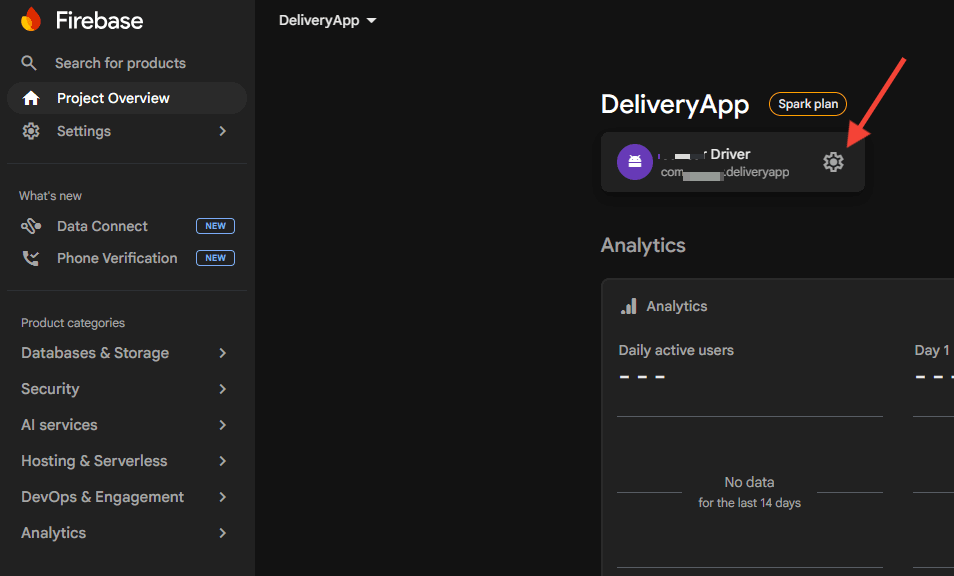
- Generate your Firebase Service Account and save it. You will upload it to OneSignal later.
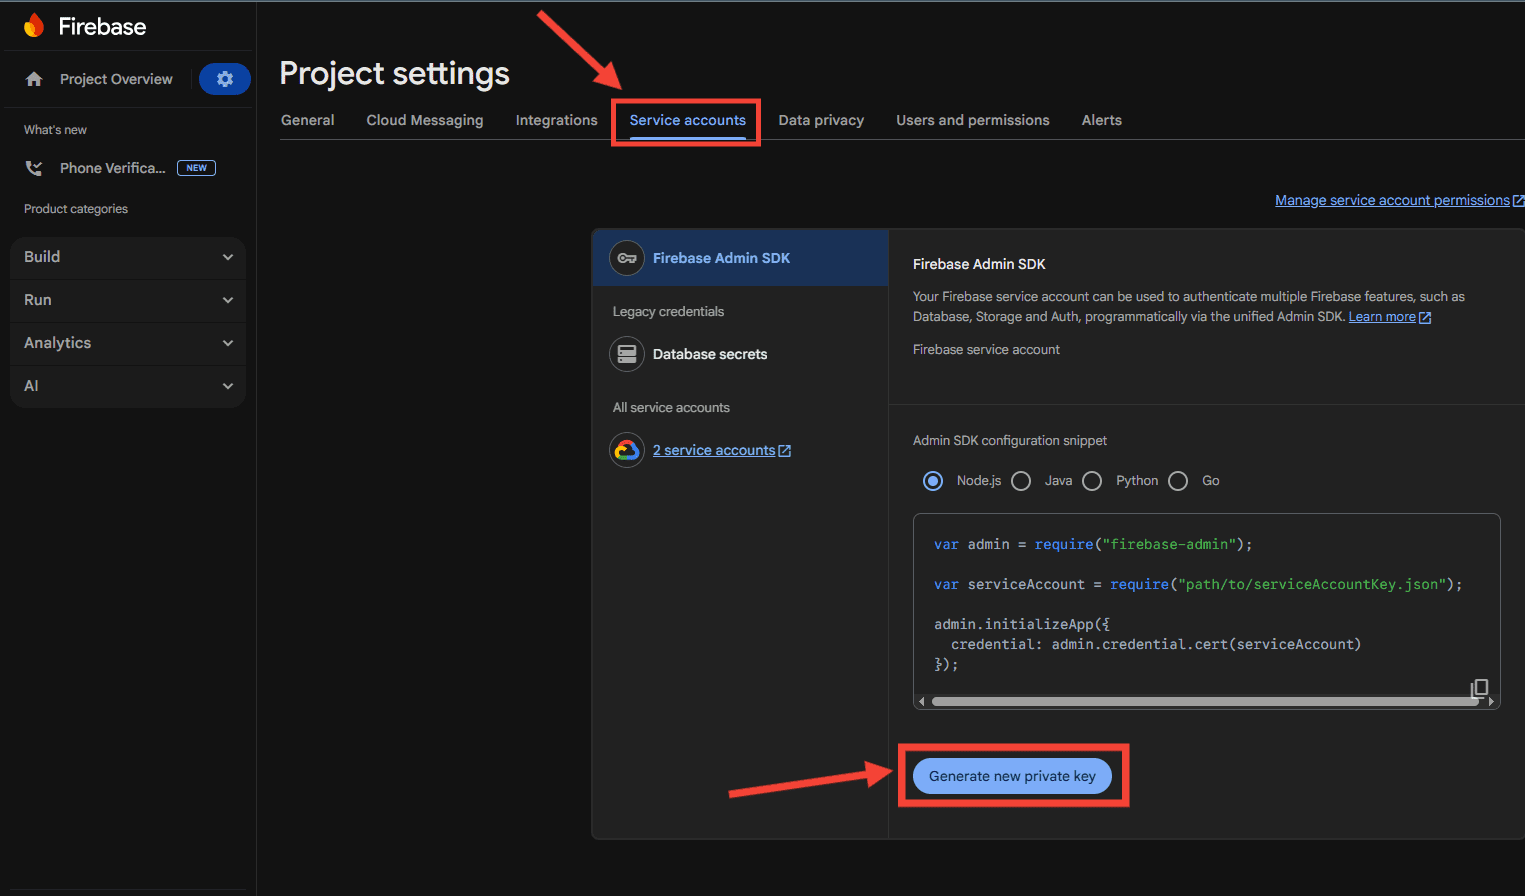
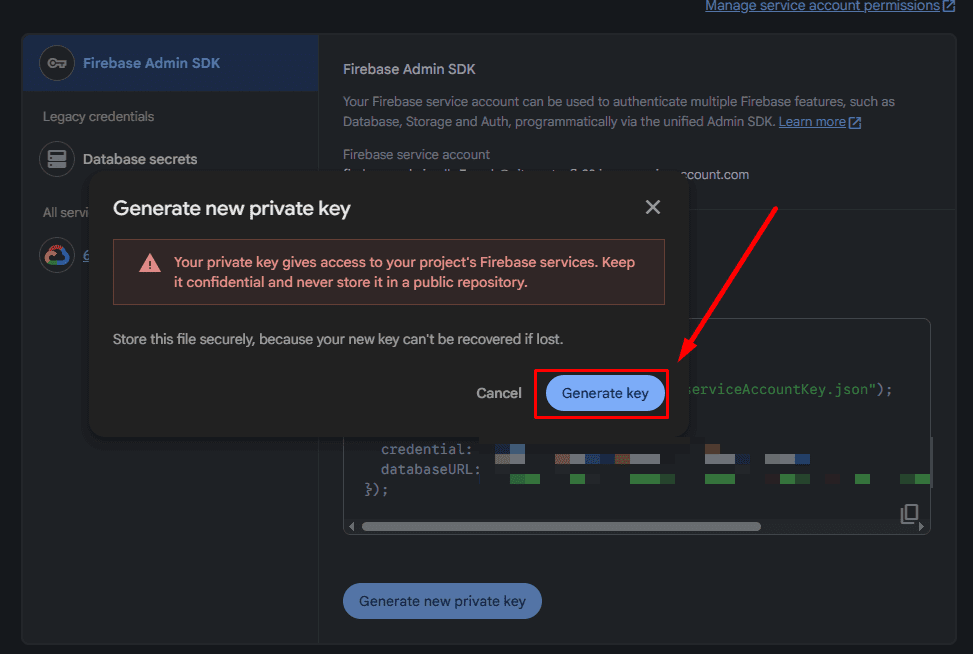
Treat the JSON file as a credential. Do not paste it into tickets or chat.
Part 2: OneSignal
- Log in to your OneSignal account and create a new app configuration.
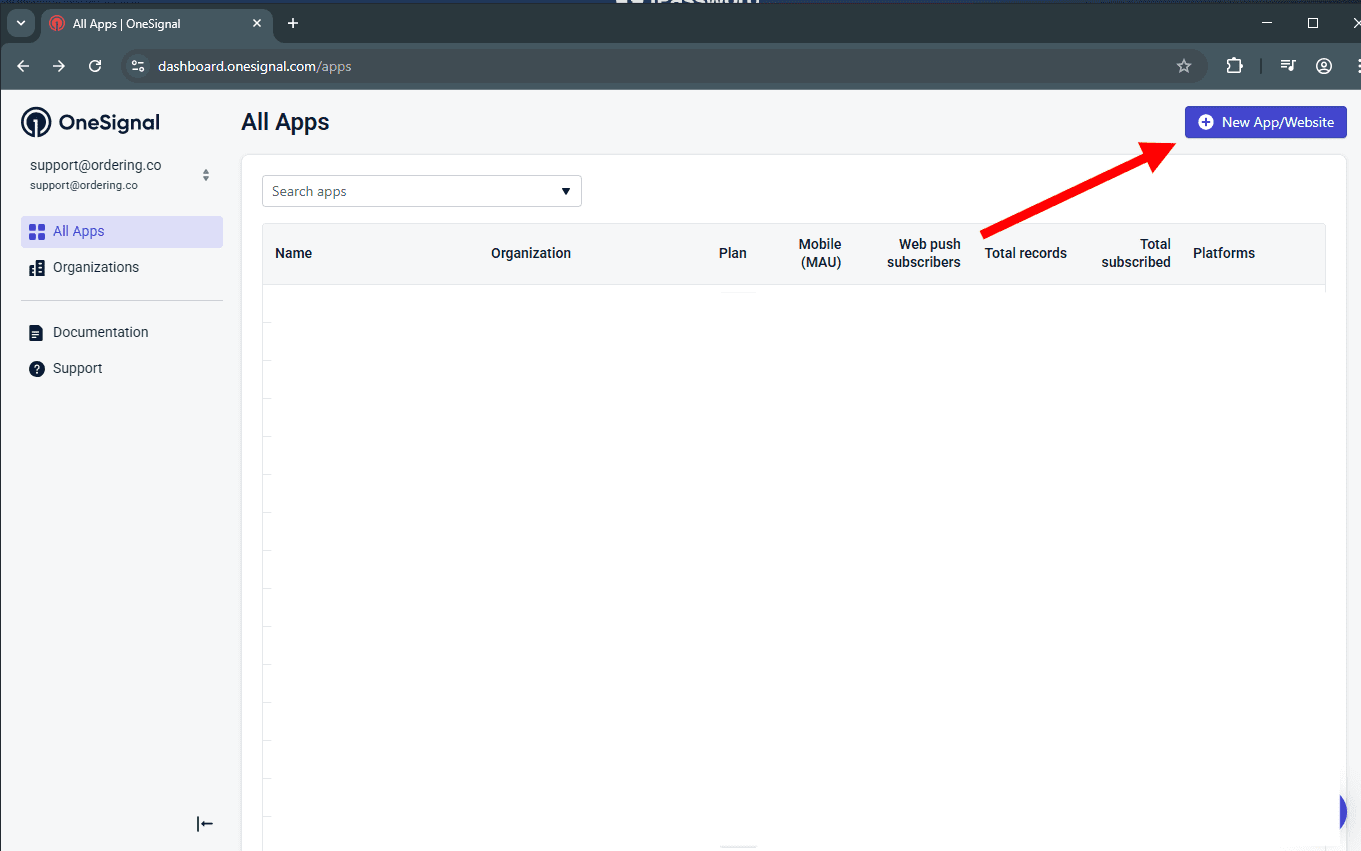
-
Enter your app name and select Google Android (FCM).
If the app setup already exists, go to Settings → Push in that app.
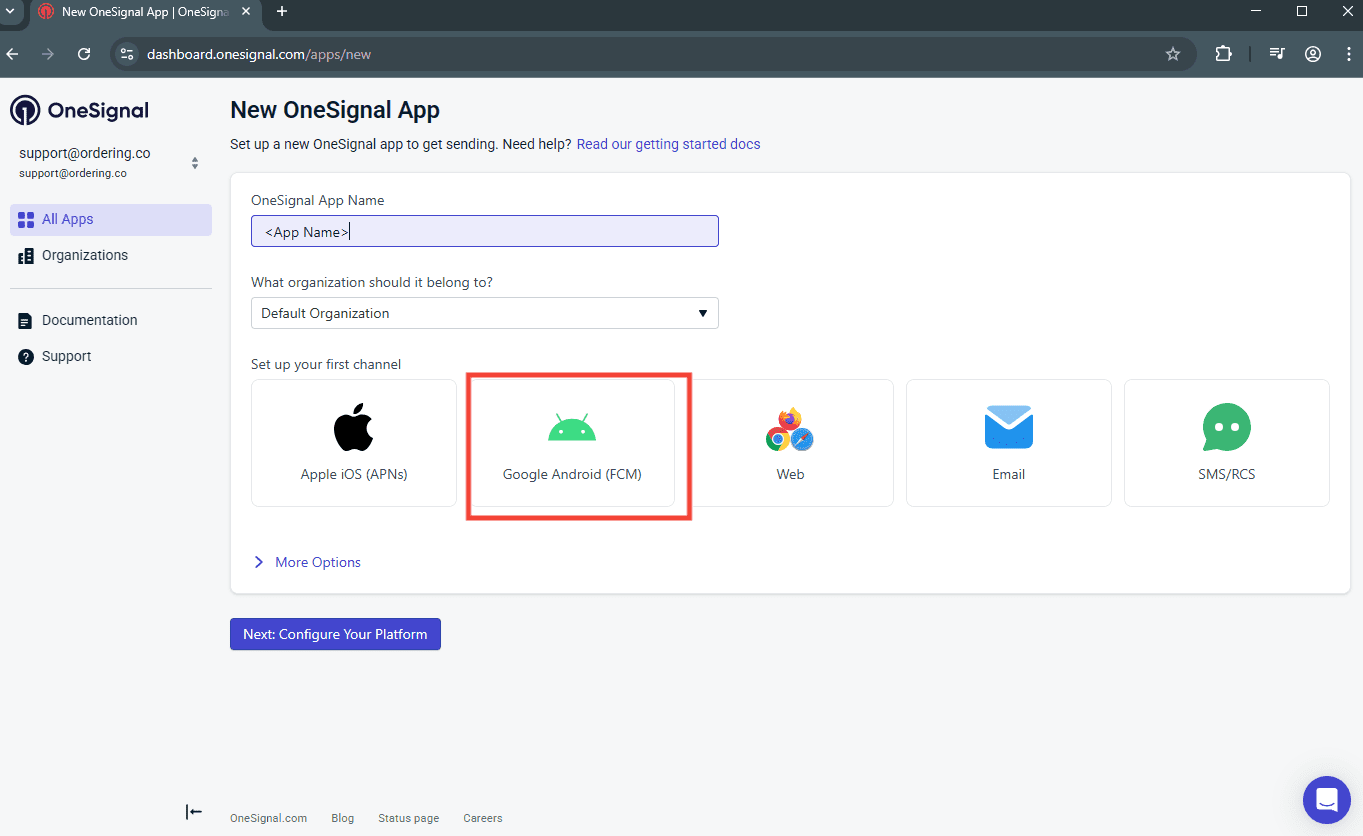
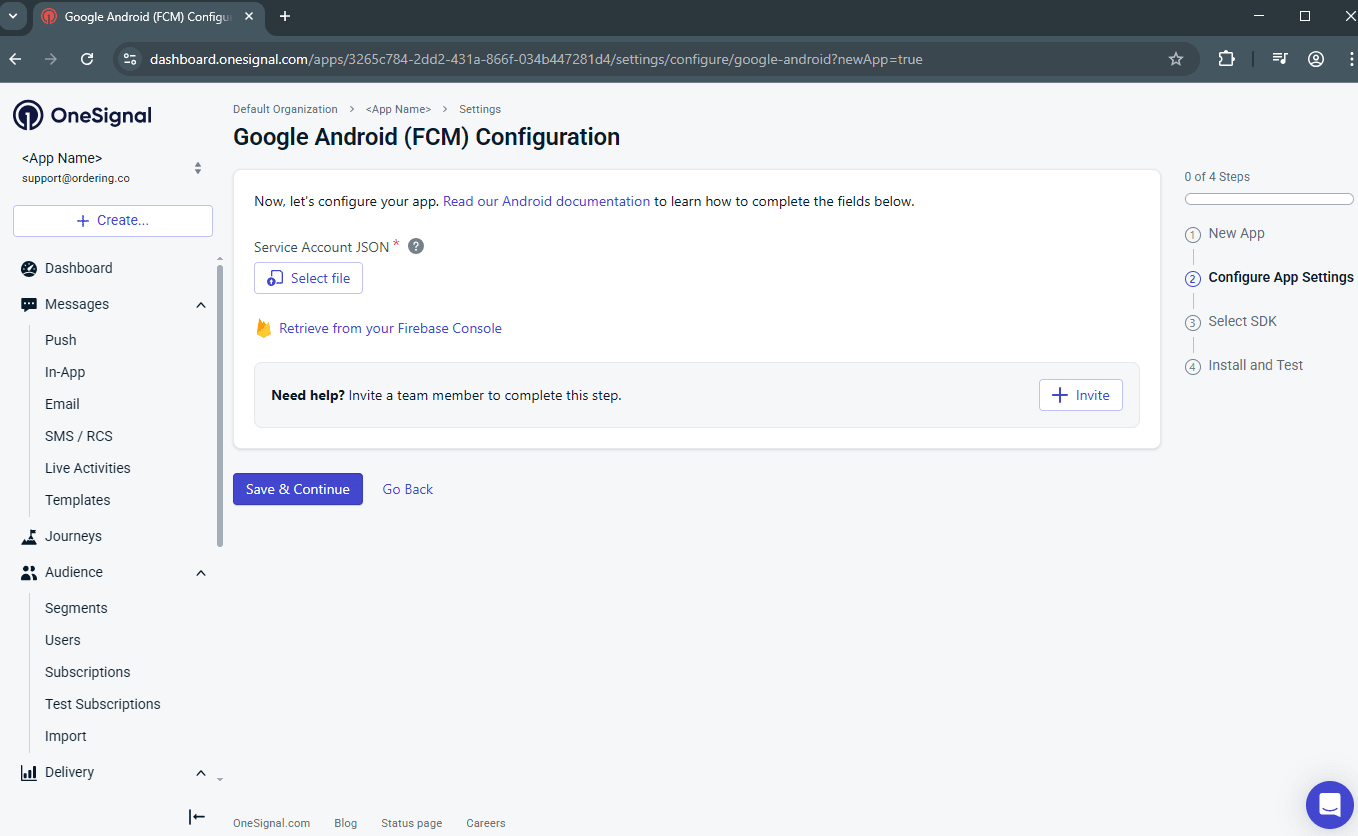
- Upload the Service Account JSON you downloaded from Firebase.
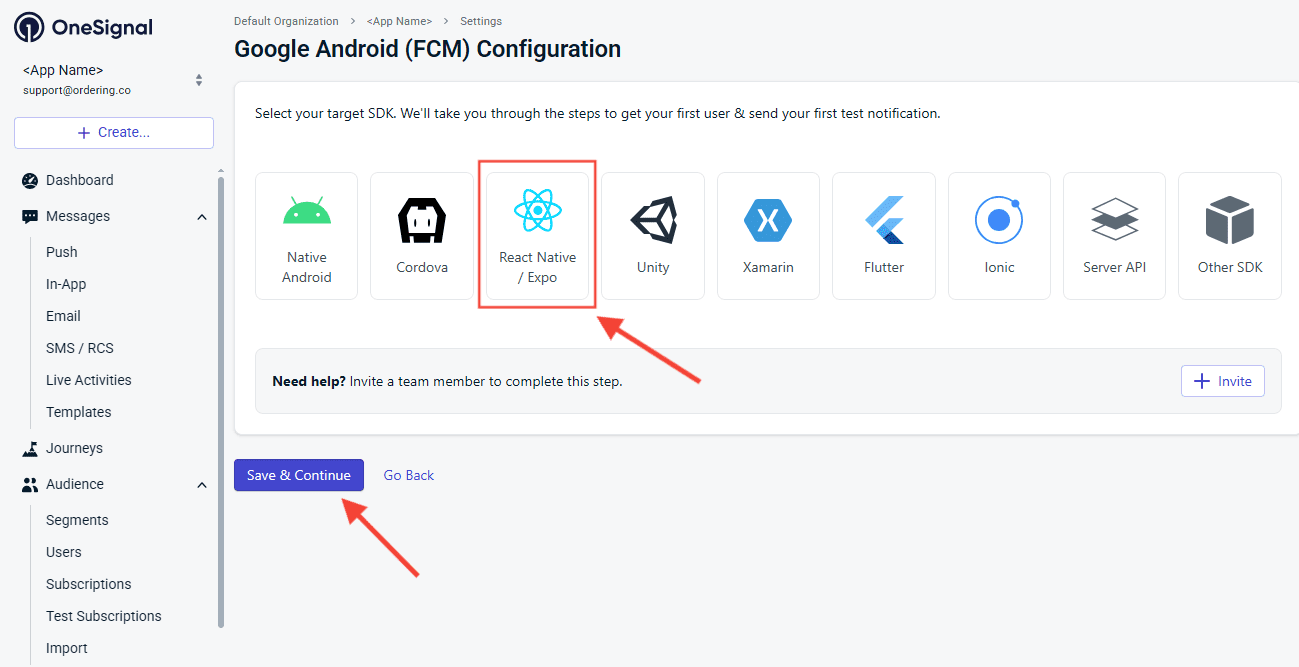
- Select your target SDK as React Native.
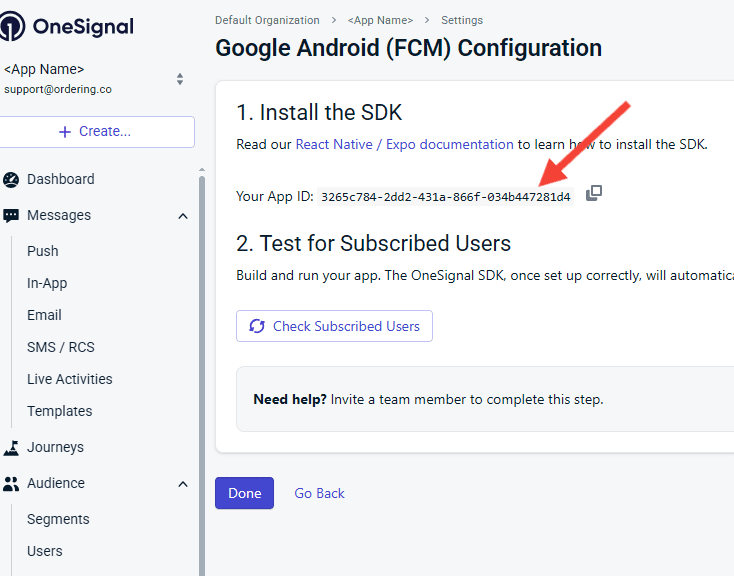
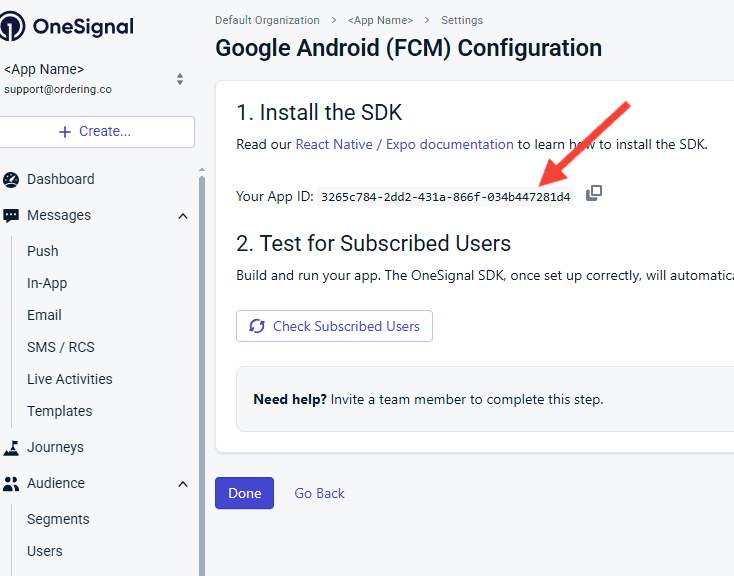
- Copy and save your App ID.
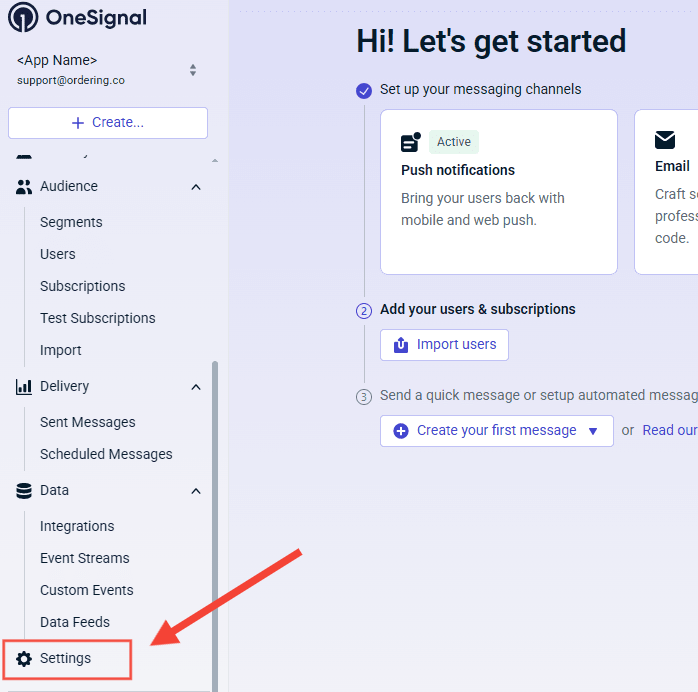
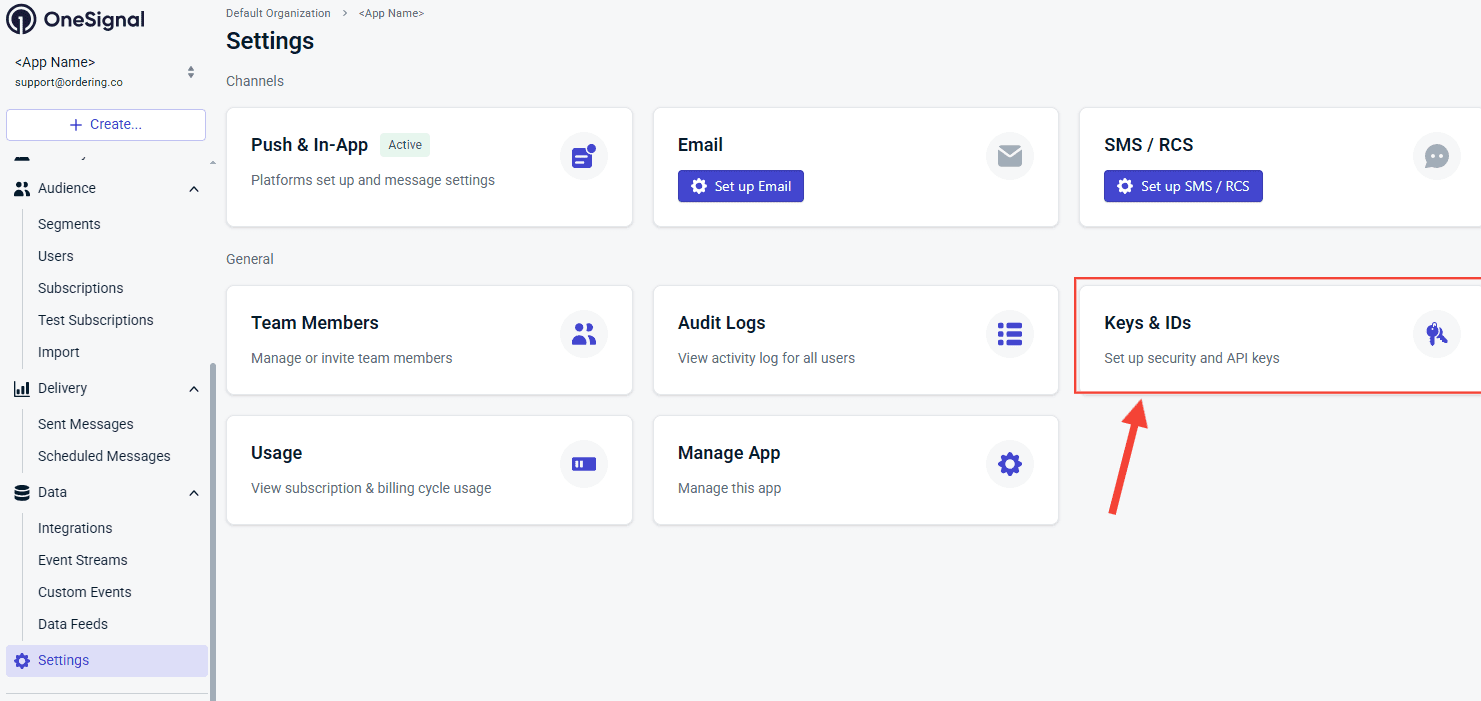
- Go to Settings in your OneSignal setup and select Keys and IDs.
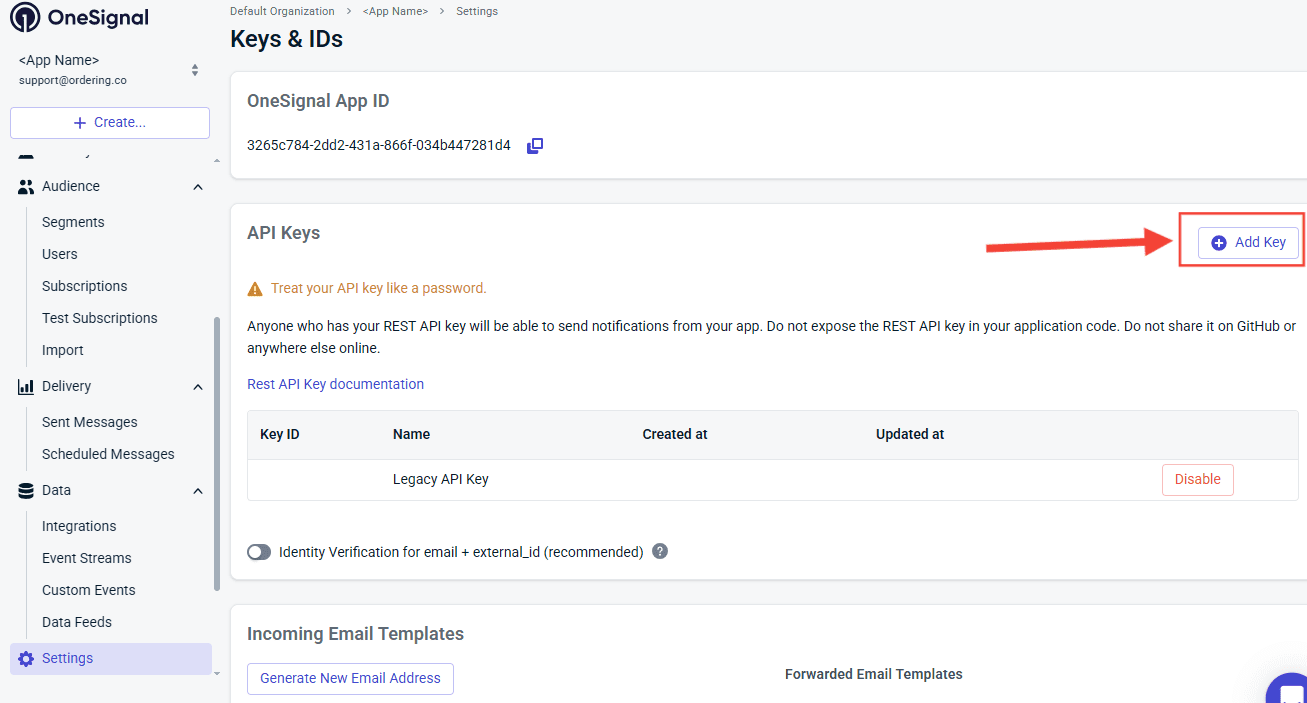
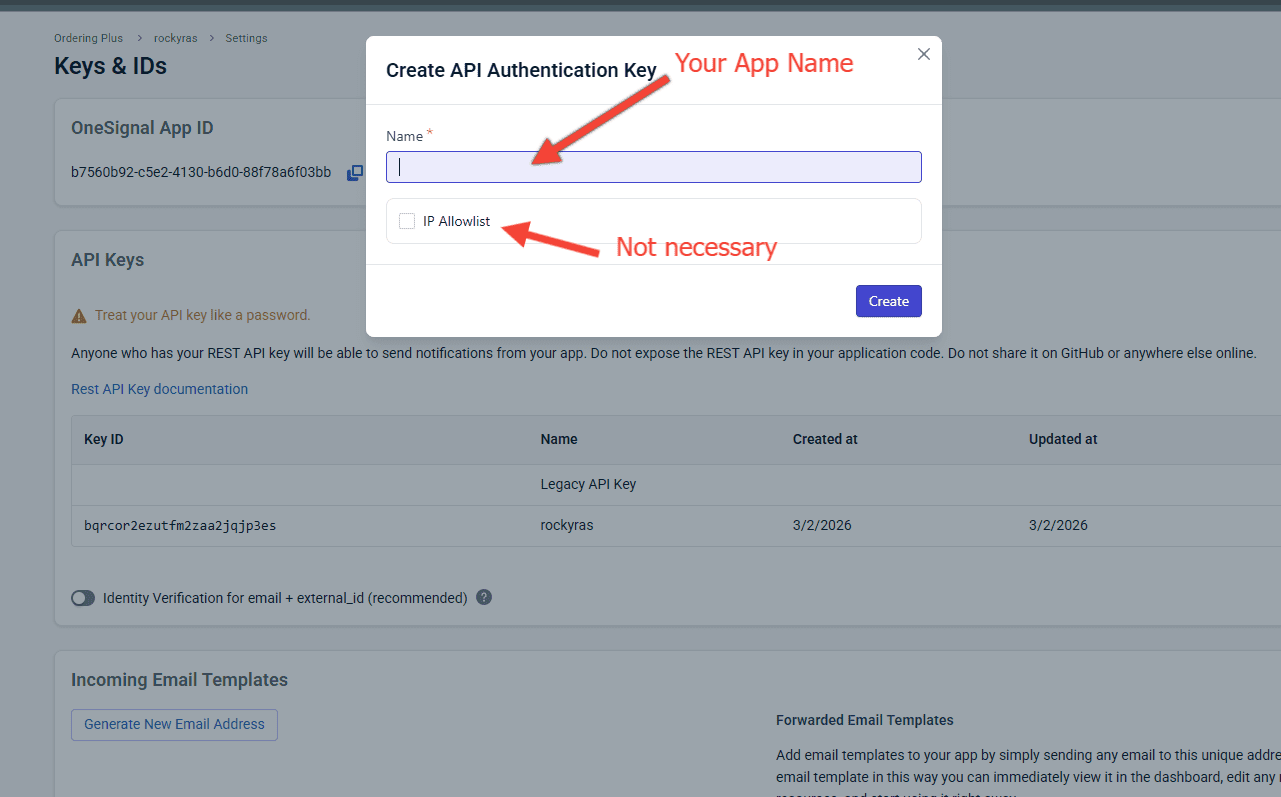
- Create an API Key, copy it, and save it securely. OneSignal can show this value only once.
- In the Ordering.co Dashboard, go to Settings → Pro → Push notifications. Add the OneSignal App ID from step 5 and the API Key from step 7, then Save.
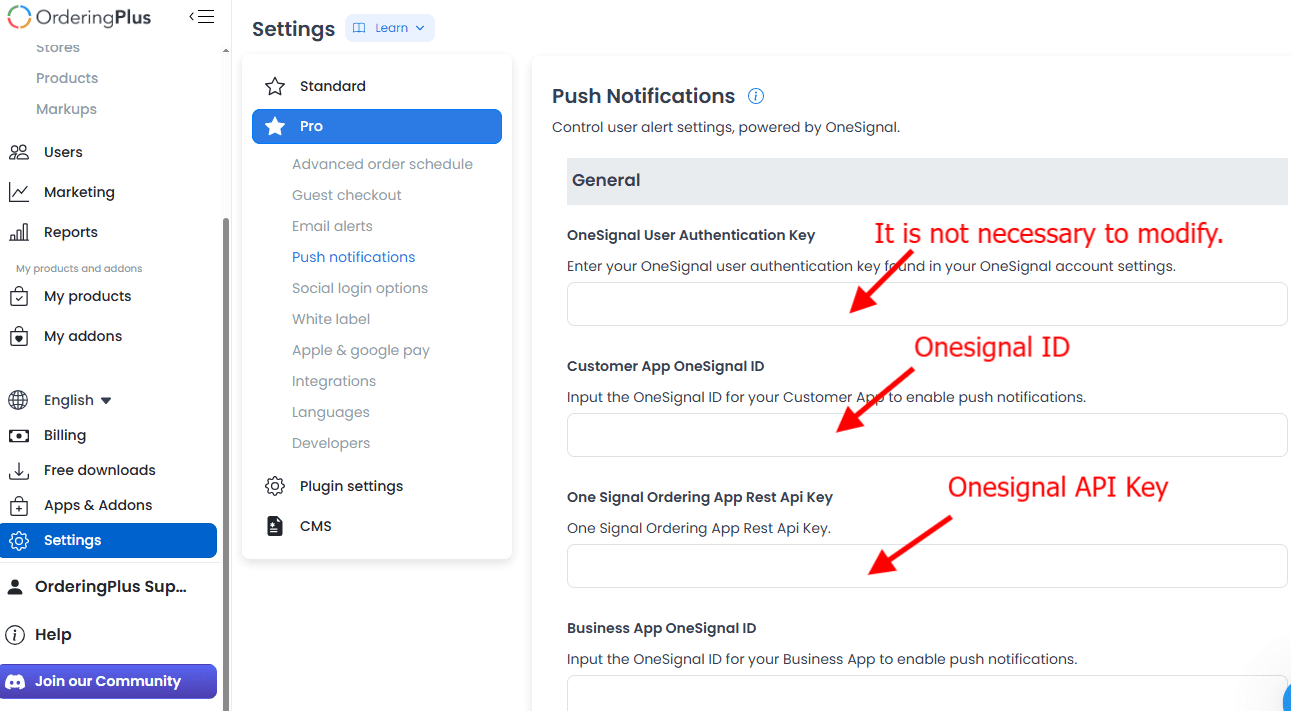
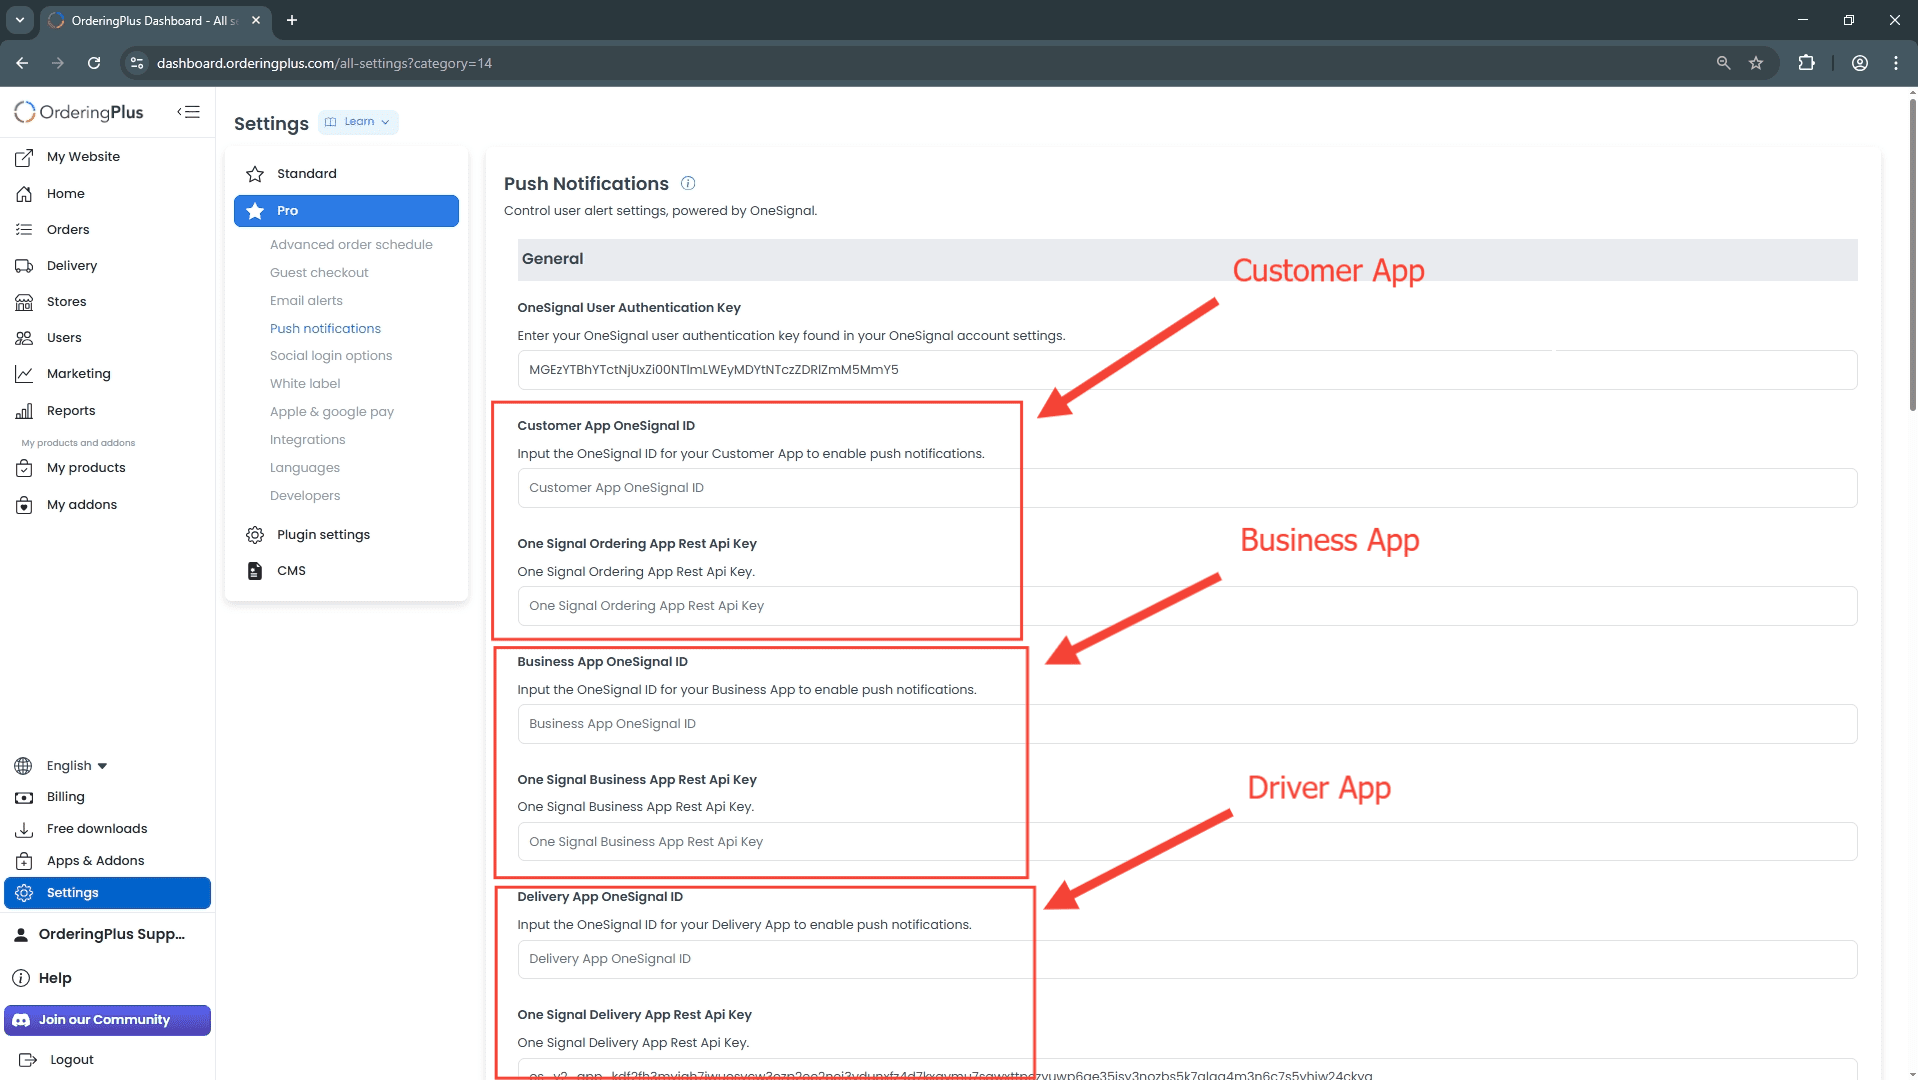
Set One Signal Default Enabled to No on that page so these custom credentials are used. See Push notifications.
OneSignal: Keys and IDs
OneSignal documents key types in Keys and IDs.
Repeat the app registration steps in Firebase and OneSignal for each application so you generate the corresponding keys for each app.
After you save the matching IDs and keys, you can test on a device. Saving is not a delivery.
OneSignal iOS configuration (Apple)
Create the OneSignal account before you start.
Part 1: Apple Developer
-
Sign in to your Apple Developer account at https://developer.apple.com.
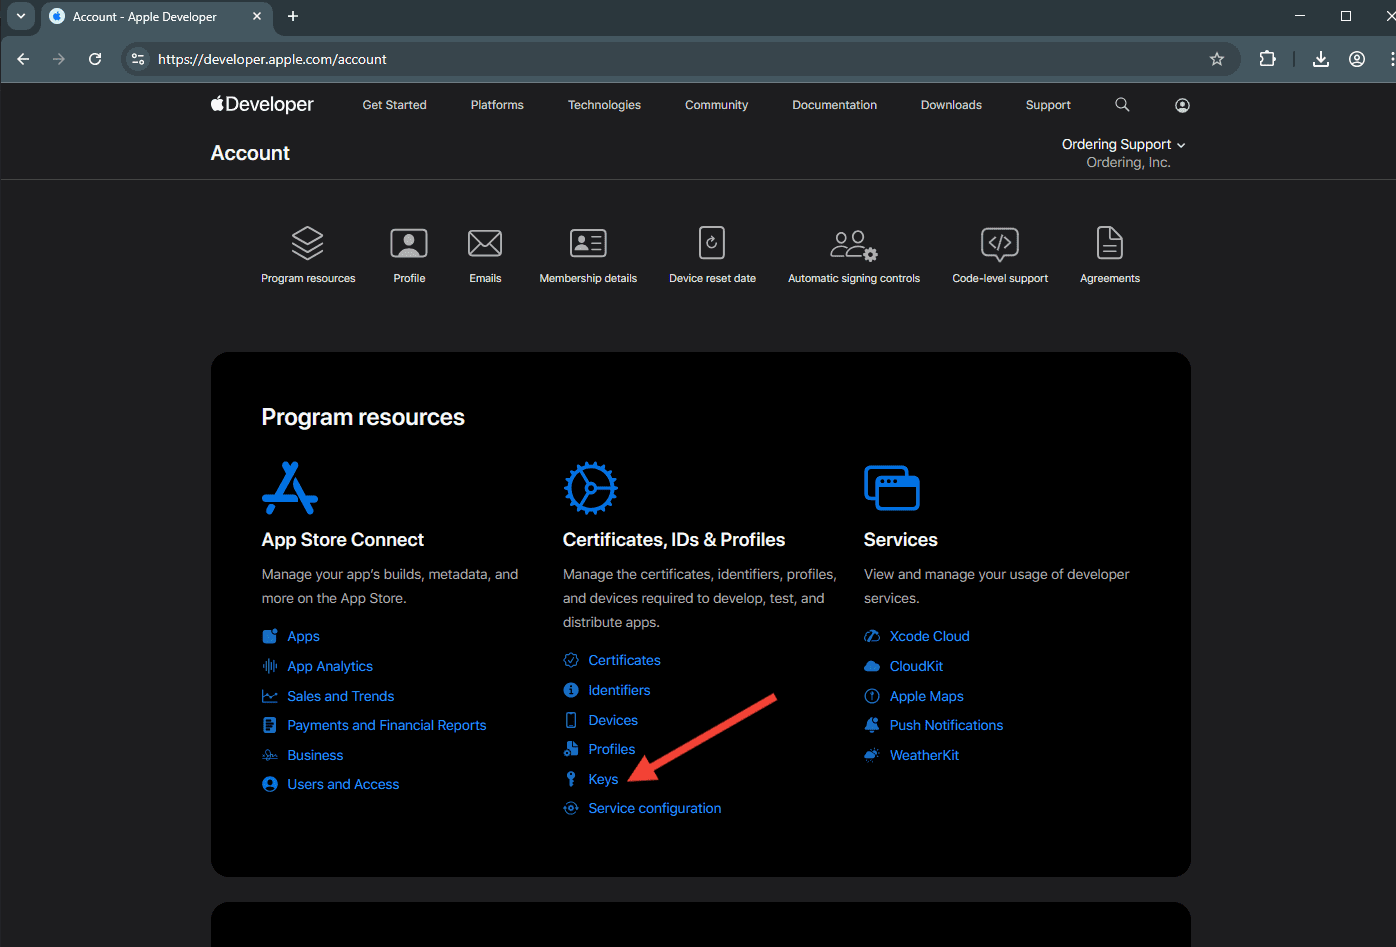
Go to Keys and select Add New Key. Direct list: https://developer.apple.com/account/resources/authkeys/list.
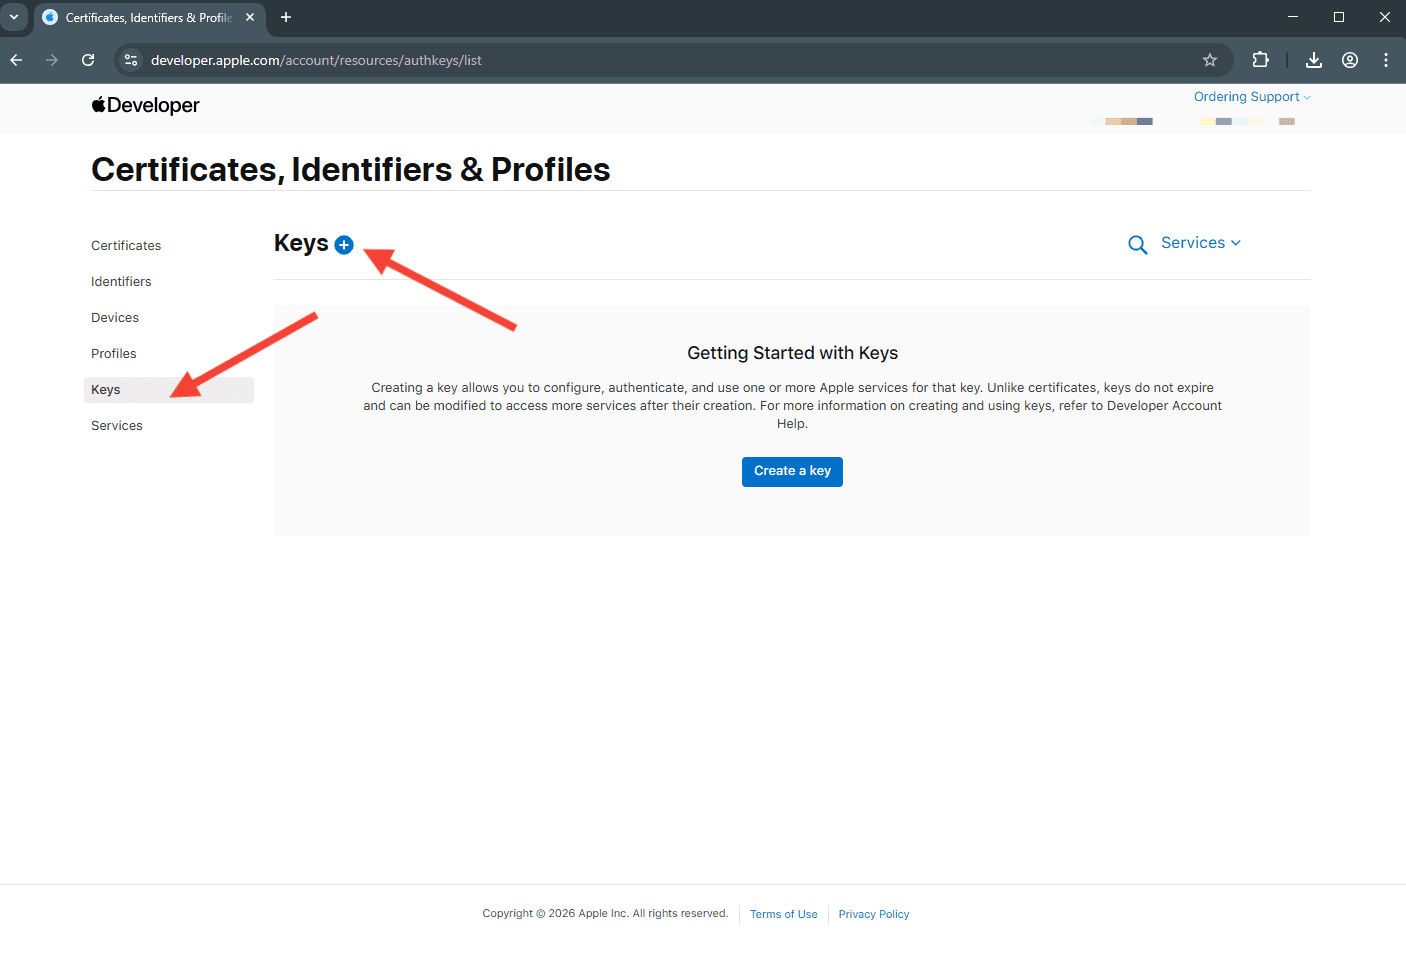
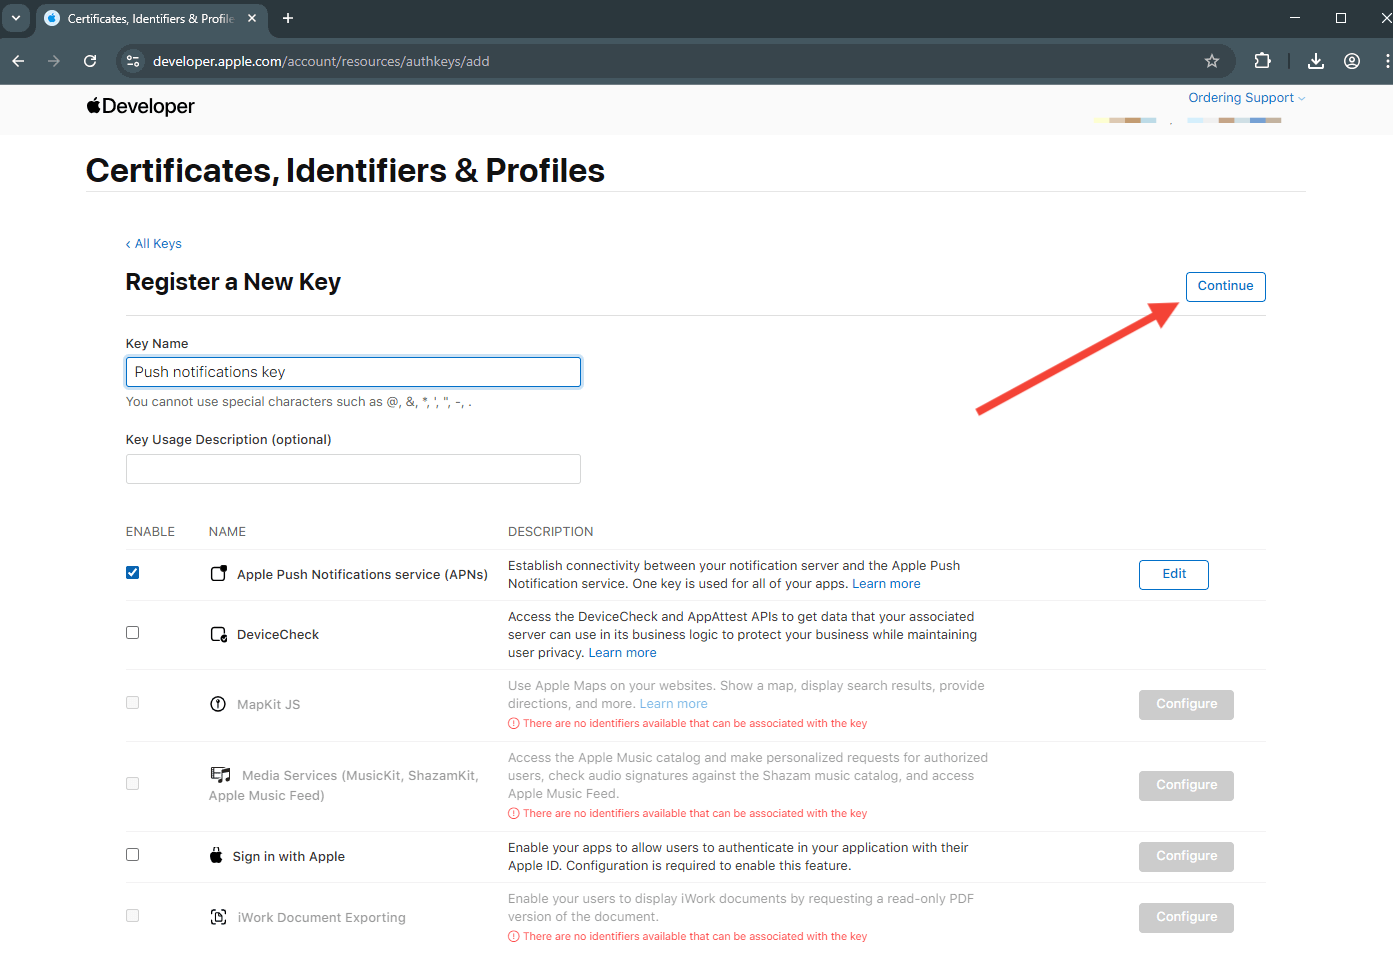
- Enter a name for your key, select Apple Push Notifications service (APNs), and select Configure.
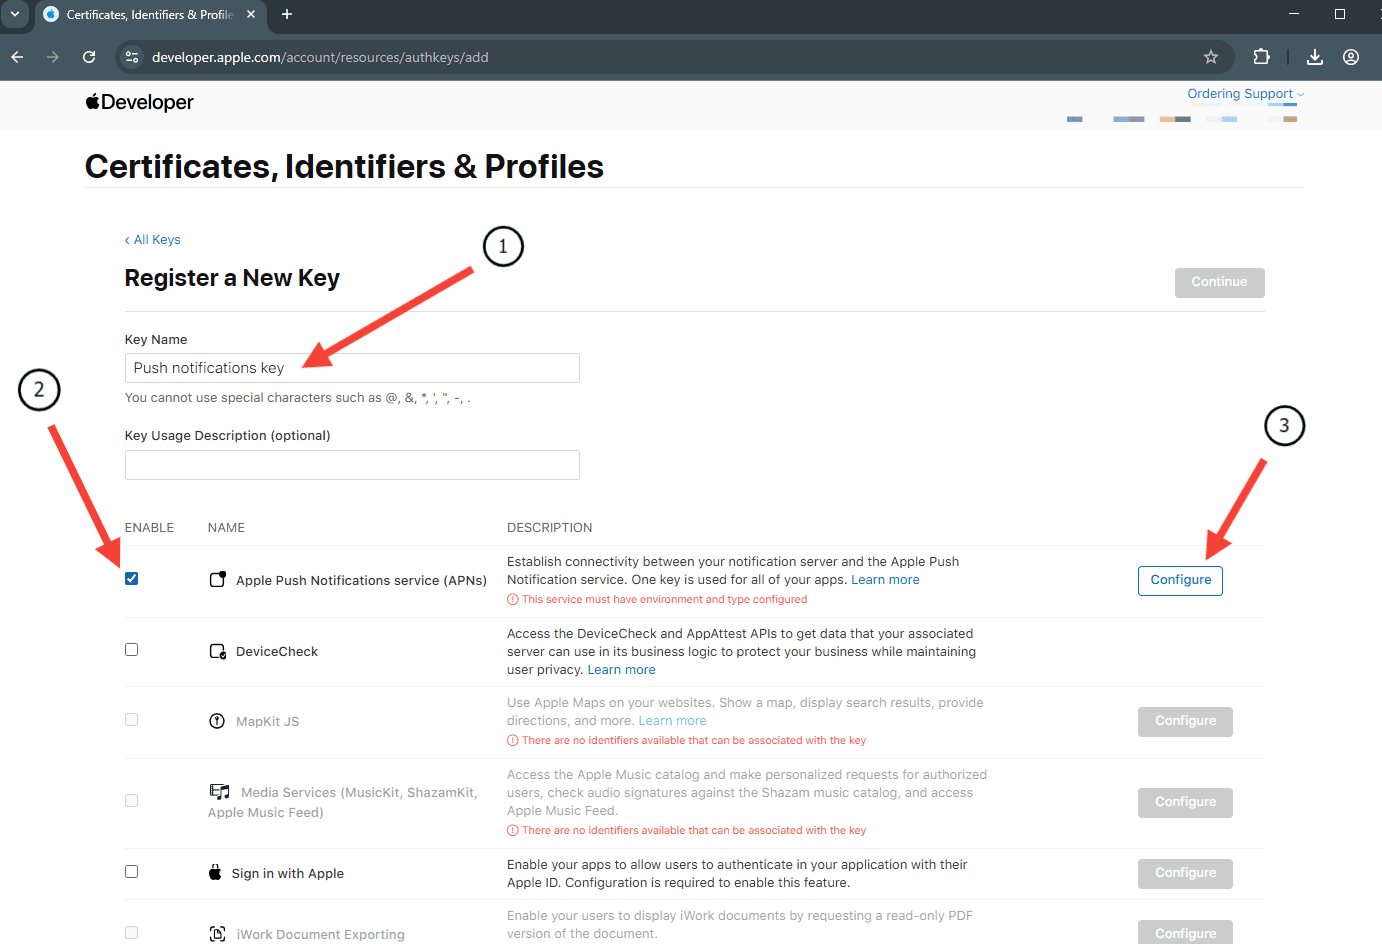
- Select Sandbox and Production in Environment and select Save.
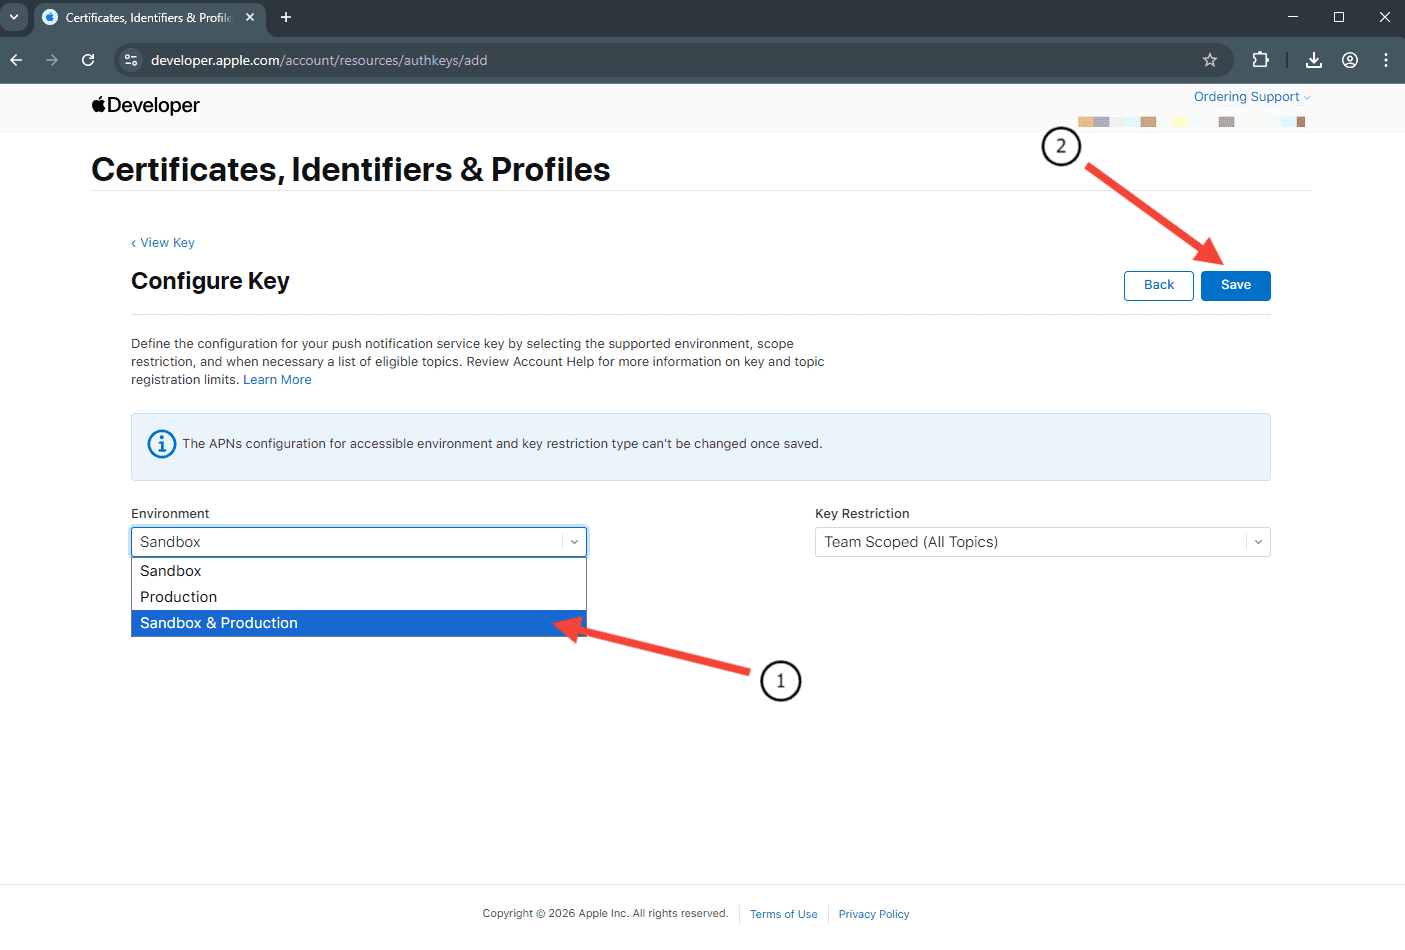
- Select Continue.
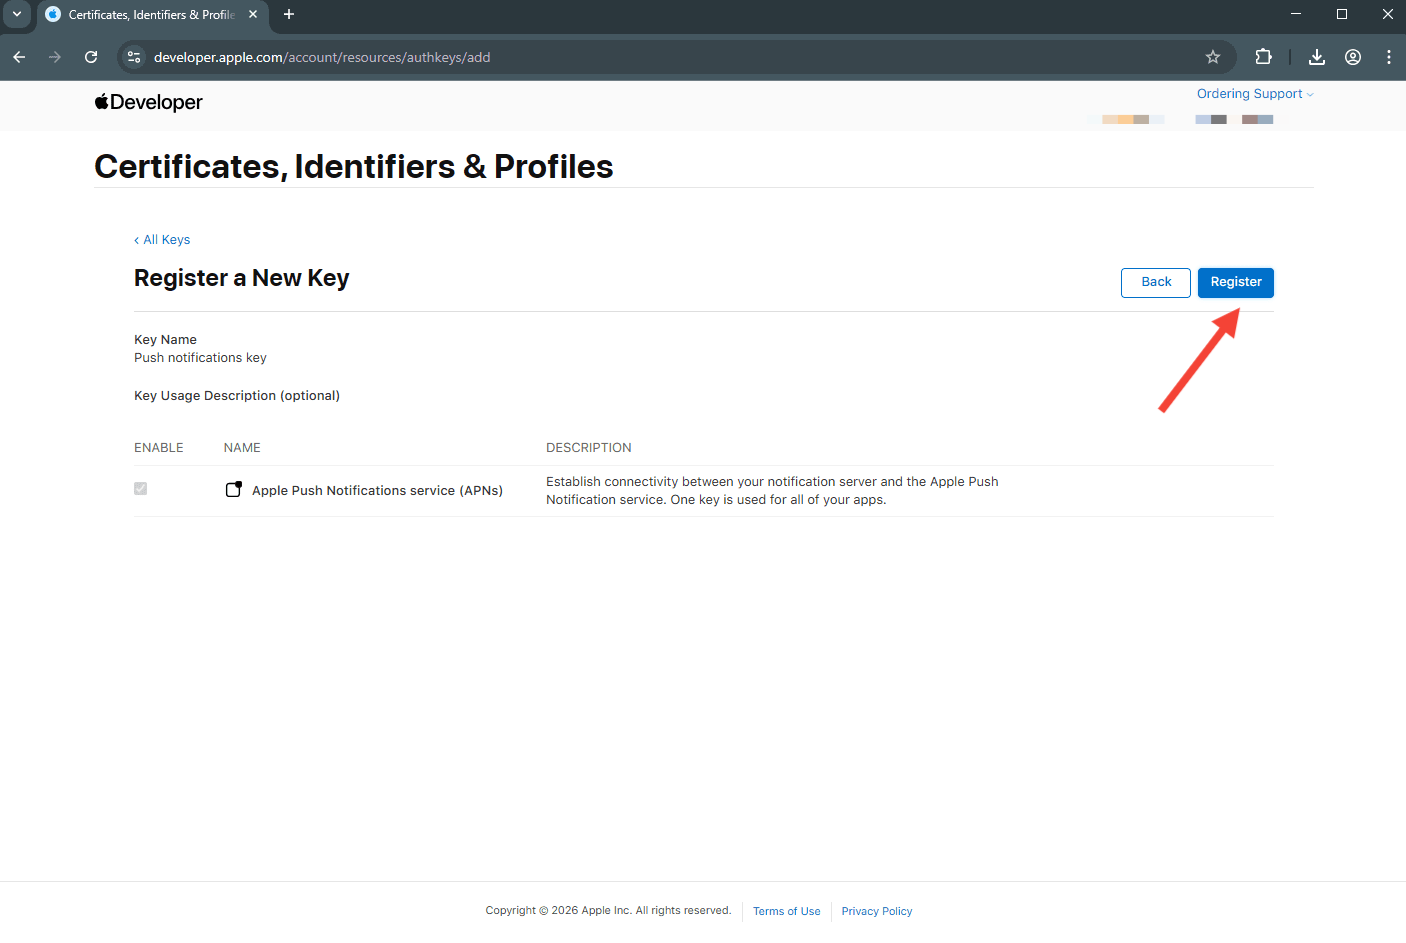
- Select Register.
- Download the .p8 key file and save it. Also copy Key ID (2) and Team ID (3).
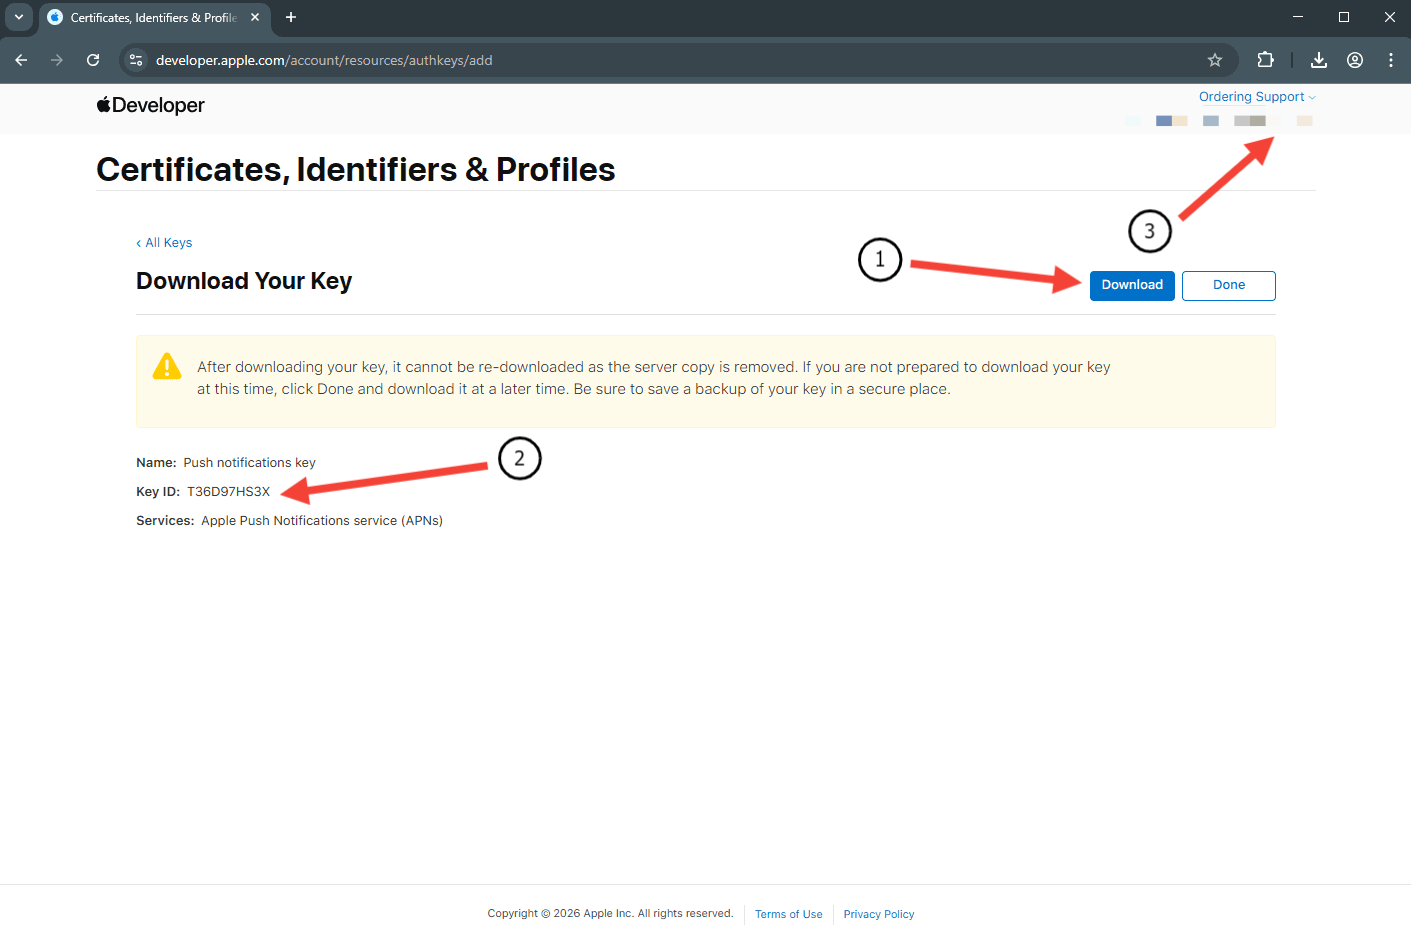
Apple shows the .p8 file once. Keep it private.
Part 2: OneSignal config
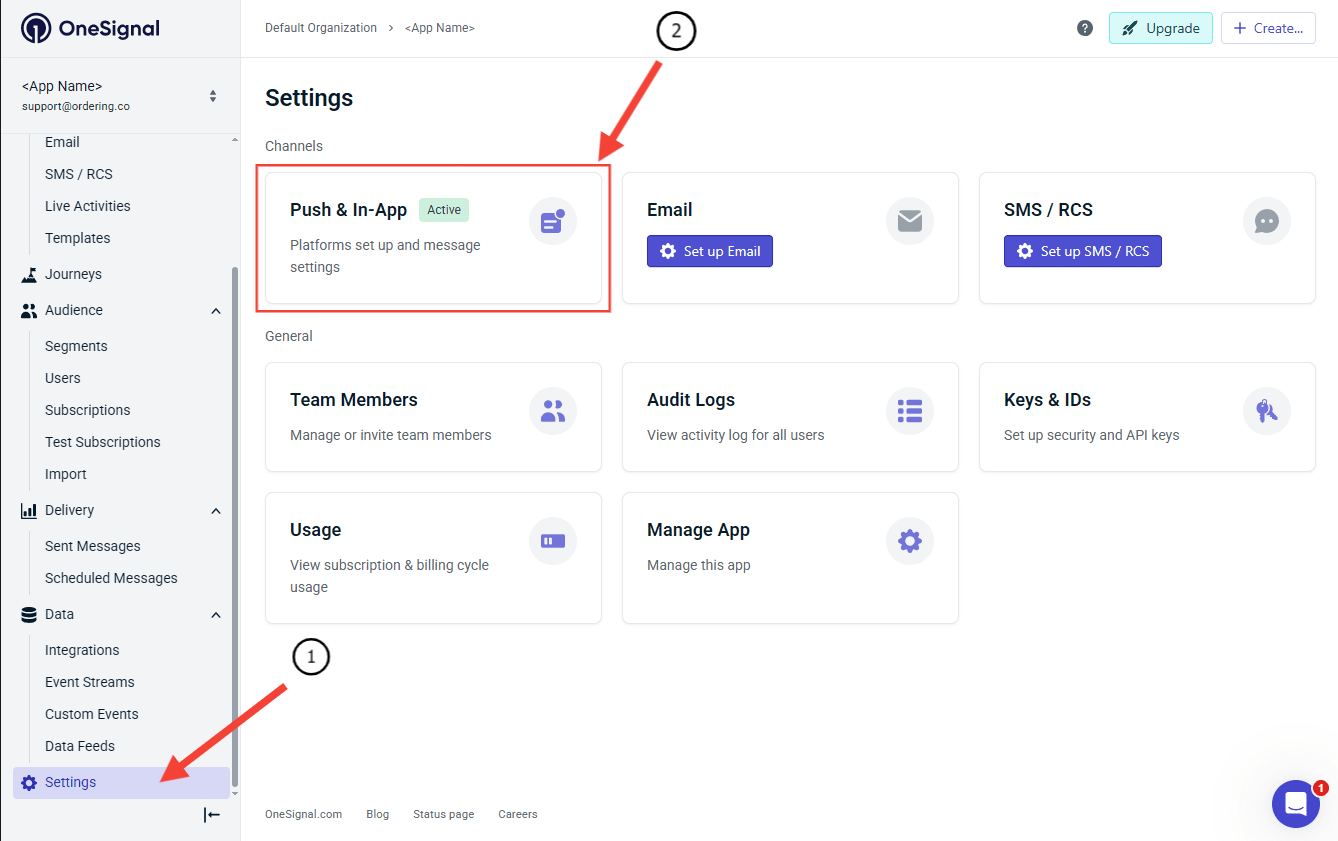
- Sign in to OneSignal, open Settings, and select Push & In-App Settings.
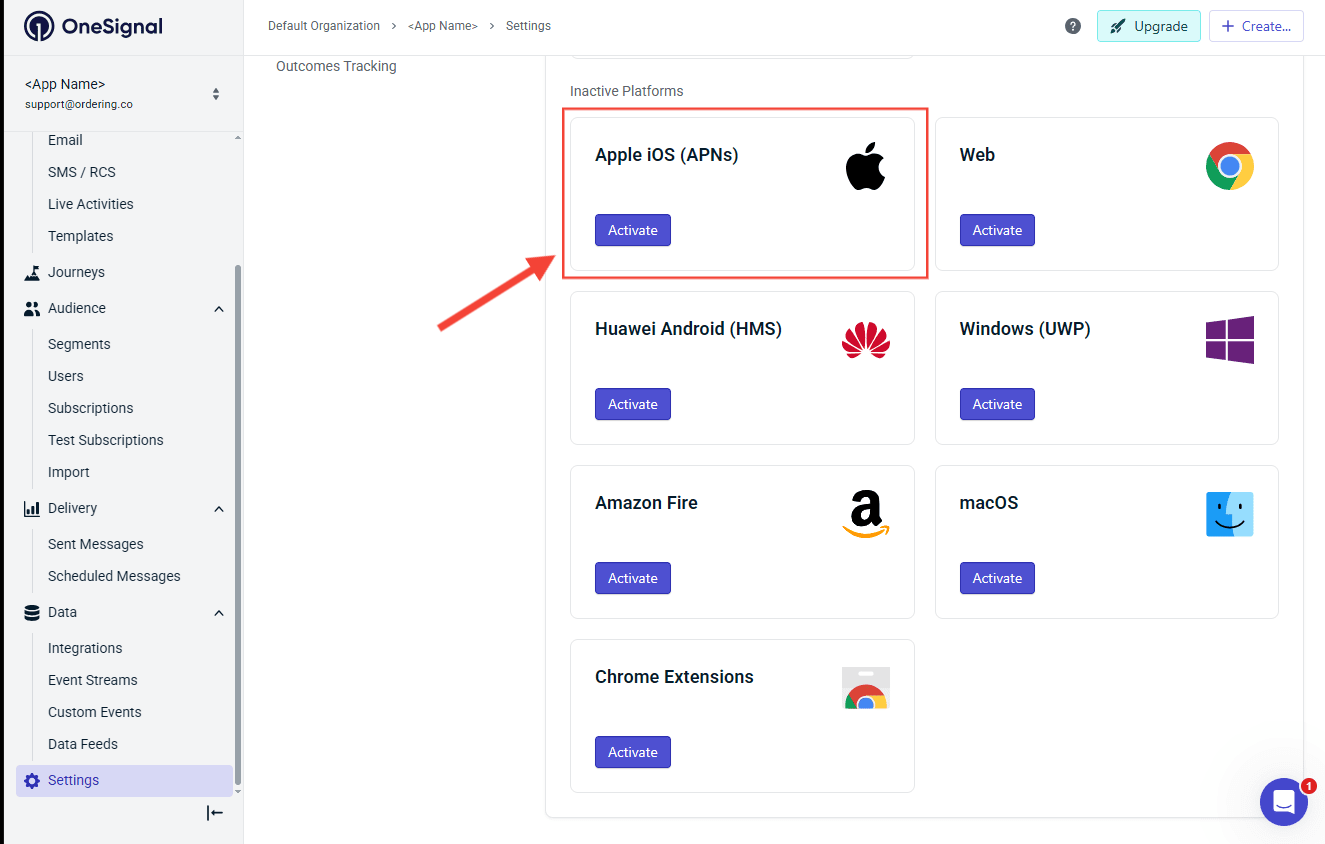
- Select Apple iOS (APNs) and Activate.
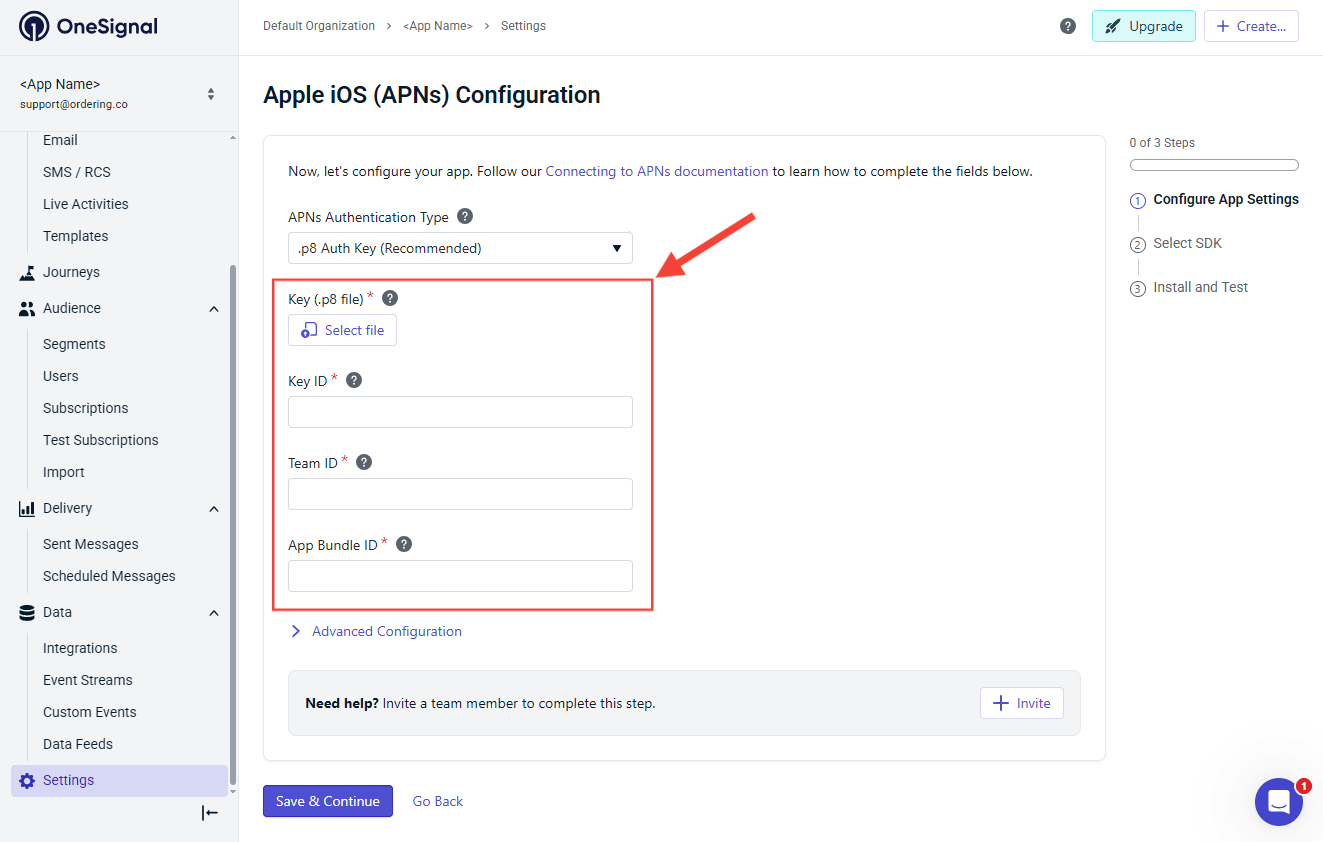
- Enter the .p8 key file, Key ID, Team ID, and App Bundle ID.
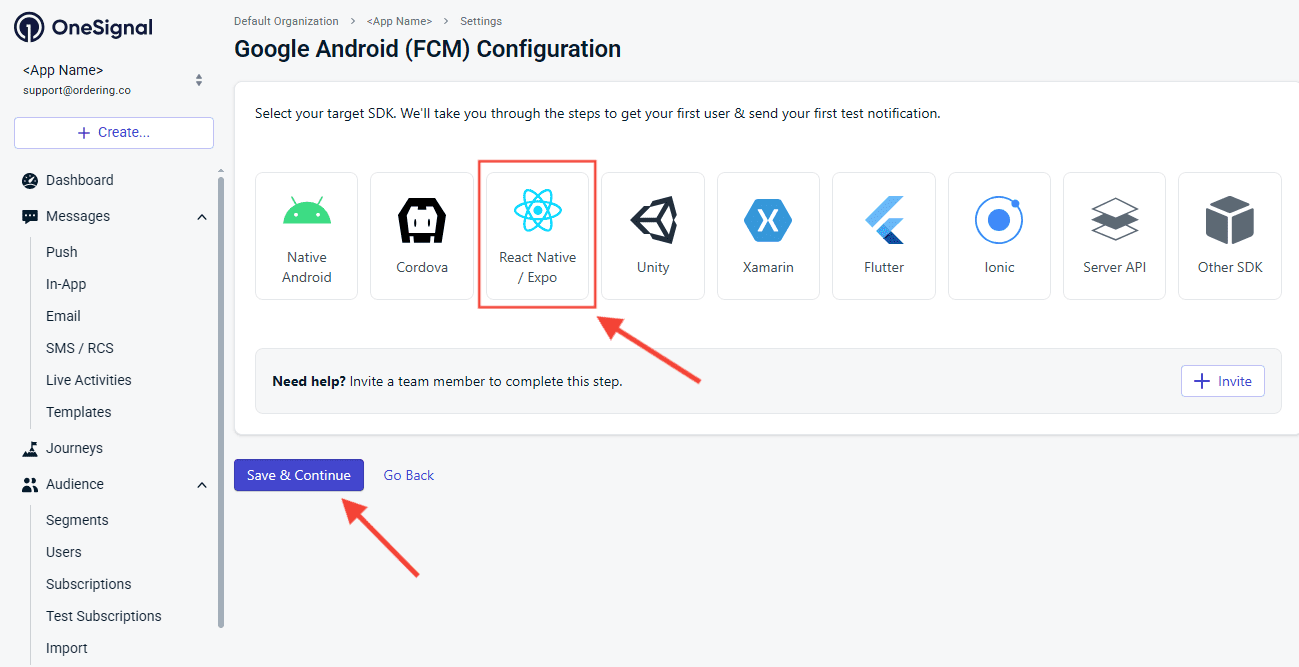
- Select your target SDK as React Native.
- You do not need to copy a new OneSignal App ID. The ID you added for Android is the same for this app.
- iOS (Apple) notifications are now configured for this OneSignal app. Confirm delivery on a test device; the save in OneSignal is not a push to a customer.
OneSignal: Keys and IDs (iOS)
See Keys and IDs.
Repeat the OneSignal registration steps for each of your iOS applications. You can reuse the same .p8 key file to configure notifications in OneSignal for each app.
Testing push notifications
After completing the configuration:
- Install the app on a test device.
- Open the app and allow notifications.
- Perform an action that triggers a notification (for example, place a test order).
If the configuration is correct, the notification should be received on that device. A missed notification is not proof that every later order will alert every user.
Best practices
- Keep messages short and clear.
- Avoid sending too many notifications.
- Send notifications only when they provide useful information.
- Use notifications for important updates and promotions.
Troubleshooting
Notifications are not received
Check the following:
- The OneSignal App ID is correct
- The REST API Key is correct
- The user enabled notifications on their device
- The device has an active internet connection
- The app is properly registered in OneSignal
- One Signal Default Enabled is No if you are using custom credentials
Dashboard configuration
Paste each App ID and REST API key into the matching fields on Push notifications. Repeat Firebase and OneSignal registration for every Customer, Business, and Driver app.
For the product overview, see OneSignal on Ordering.co.