Create developer accounts and grant access
Your business should own its Apple Developer and Google Play Console accounts. Use the accounts to manage app records, store submissions, updates, feedback, and provider analytics. Grant time-bound, role-based access when an authorized release workflow requires help from Ordering.co.
Never share passwords, recovery codes, two-factor authentication codes, private keys, or payment-profile access. Invitations let you grant and remove access without transferring account ownership.
What developer accounts let you do
Use provider tools
Developer accounts provide the consoles, identifiers, testing controls, signing resources, and support channels needed to build and operate app releases.
Distribute apps
Use Apple’s and Google’s stores to submit and distribute approved releases.
Manage updates and feedback
The account owner can manage app metadata, releases, user feedback, and team access through the provider consoles.
Configure store services
Store services can include app distribution, approved payment features, and other provider capabilities. Confirm the requirements for each capability in the provider console before you enable it.
Review analytics
Use the provider consoles to review the analytics and operational information available for your apps.
Enroll in the Apple Developer Program
If you are publishing as an organization, enroll with the legal entity that should appear as the seller. Apple requires a D‑U‑N‑S Number for a company or organization and uses it to verify identity and legal-entity status. An individual enrollment does not require a D‑U‑N‑S Number, but it represents the individual rather than an organization. A D‑U‑N‑S Number is a unique nine-digit business identifier; organizations can look up an existing number or request one from Dun & Bradstreet at no cost.
Before enrolling, prepare:
- An Apple Account with two-factor authentication enabled.
- The organization’s legal entity name and current business details.
- The organization’s D‑U‑N‑S Number, when enrolling as a company or organization.
- The authorized account holder’s contact information and identity-verification materials.
Start from Apple’s enrollment guidance and D‑U‑N‑S guidance. Provider verification and enrollment timing are controlled by Apple, so check the current requirements before planning a launch date.
Apple lists the standard Apple Developer Program membership at 99 USD per membership year, or local currency where available. Eligible nonprofit organizations, accredited educational institutions, and government entities can request a fee waiver. Confirm the current price, local currency, and eligibility during Apple enrollment.
Grant Apple account access
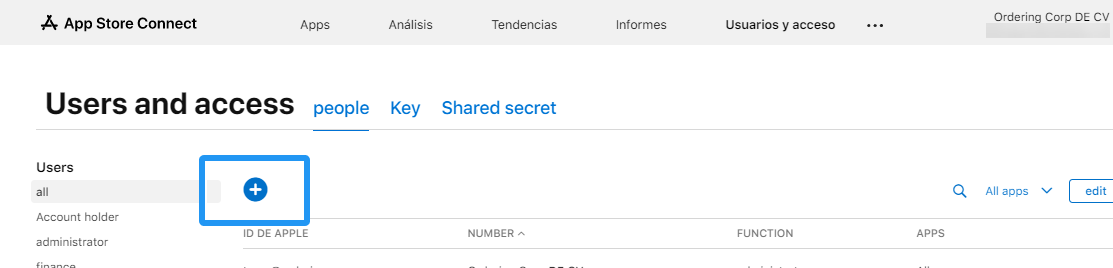
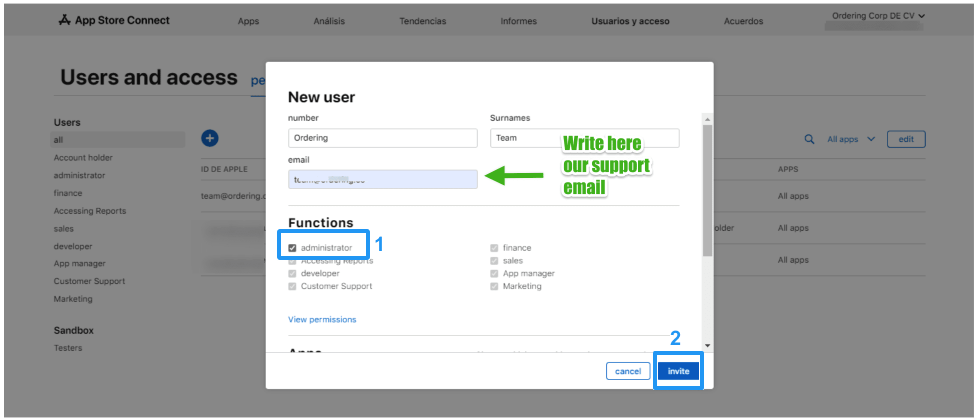
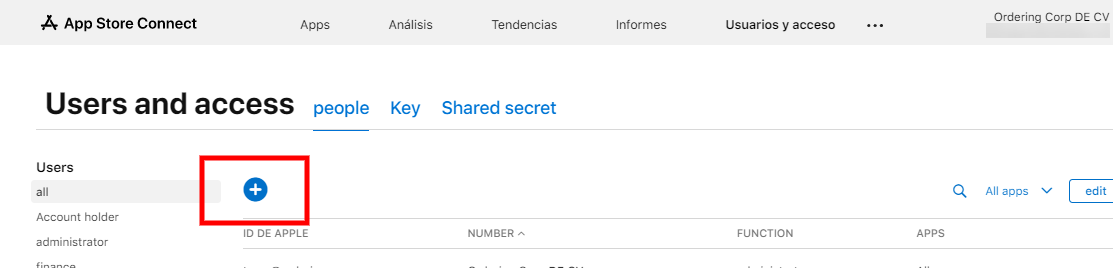
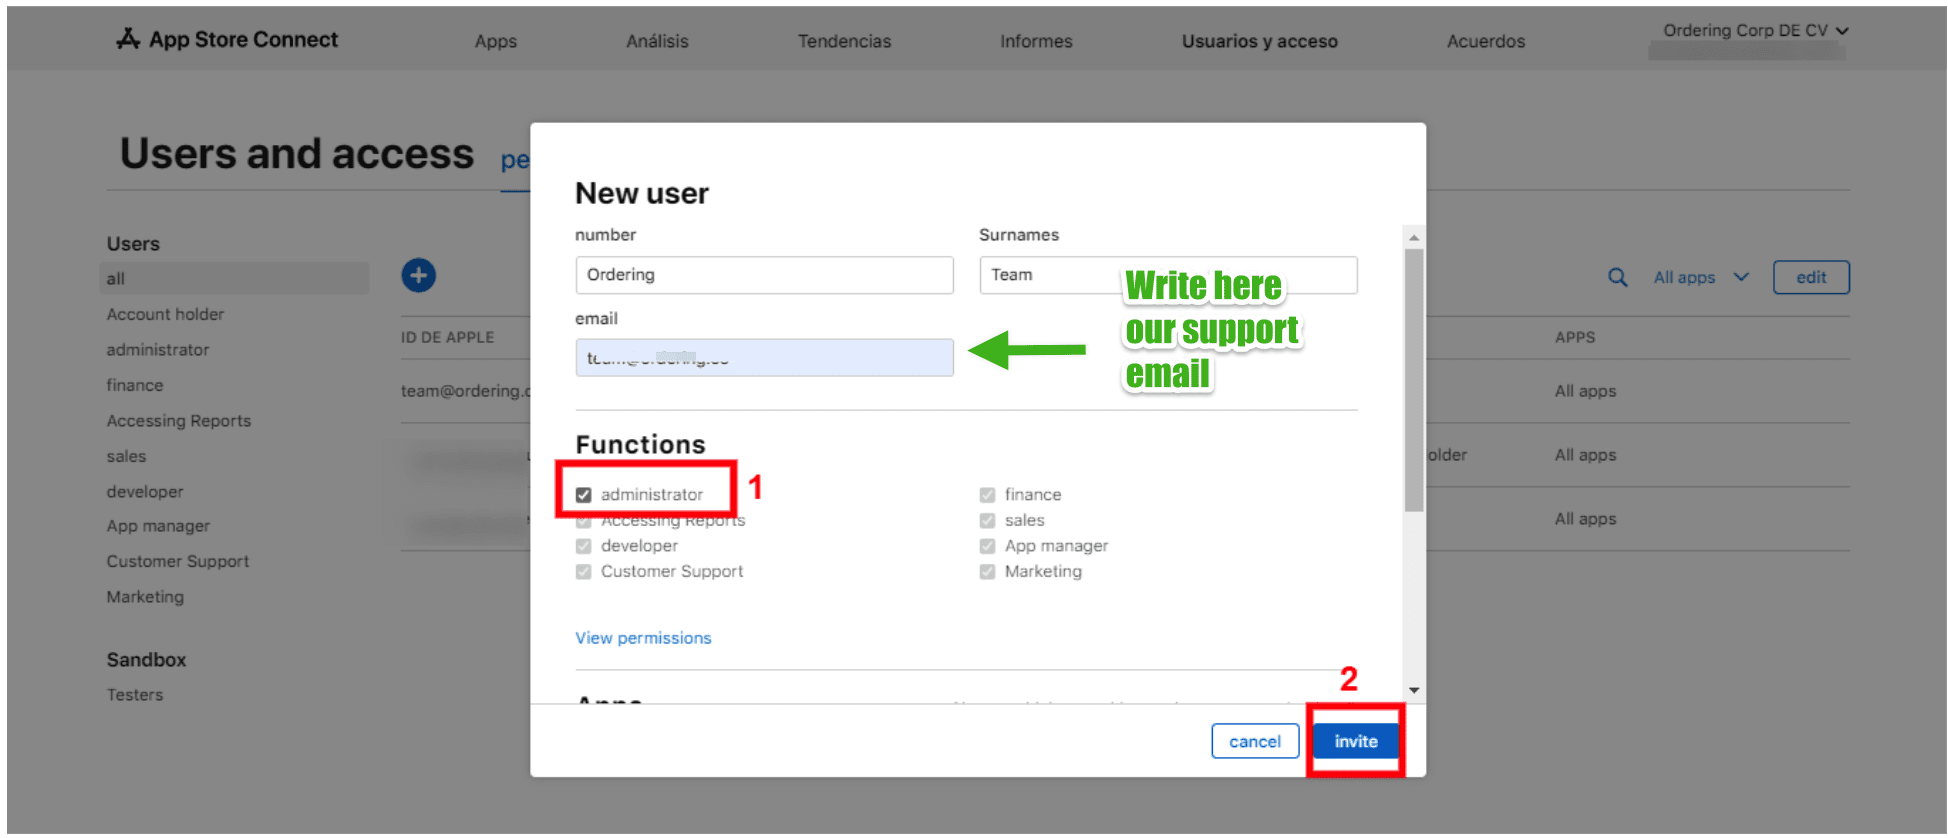
After the account is active, open App Store Connect, go to Users and Access, select Add (+), enter the approved recipient’s name and email address, select the authorized role, and send the invitation.
If an active release workflow requires Ordering.co access, use the recipient address confirmed by your Ordering.co contact. Use support@ordering.co only after confirming it in the active support request.
Account-type boundary
An App Store Connect invitation does not give the same capabilities in every Apple account type. In an individual Apple Developer account, invited users can access App Store Connect, but the Account Holder must manage Certificates, Identifiers & Profiles. Organization accounts can use eligible Apple Developer team roles for those resources. Follow Apple’s account-role guidance before you choose the role.
Grant Admin only when the approved workflow requires account-wide administration. Some full deployment workflows require it; confirm that scope in the active request. For an organization account, also select Additional Resources → Access to Certificates, Identifiers & Profiles when the authorized work needs those resources and Apple makes the option available for the selected role. If a narrower role is sufficient, use it. The account holder keeps ownership and can remove access when the work is complete.
After you send the Apple invitation
Tell the authorized recipient that the invitation is ready and include the project or account name so it can be matched to the request. Keep your own account credentials private. The invited person accepts the invitation through their own provider account; they should not need your password.
Create a Google Play Console account
Google Play offers Personal and Organization developer accounts. Use an Organization account when the developer account represents a business or organization. Google requires the organization’s D‑U‑N‑S Number, legal name and address, organization contact details, and verified developer contact information for that account type.
Start with the Google Account that the business will use to own the Play Console account. Prepare the organization’s legal identity and contact details before creating the account, review the Google Play Developer Distribution Agreement, and complete the required registration payment. Keep the information in the Google Payments profile consistent with the D‑U‑N‑S record. Google displays some organization developer information on Google Play, so use current business contact details that your organization can maintain.
Google lists the Play Console registration at a 25 USD one-time fee. Confirm the current fee, supported payment method, and regional requirements in Google’s Play Console setup guide before you enroll.
Personal-account testing requirement
Some personal Google Play developer accounts must complete closed testing before they can request production access. Confirm the current account-specific requirement in Google’s closed-testing guide before planning a release.
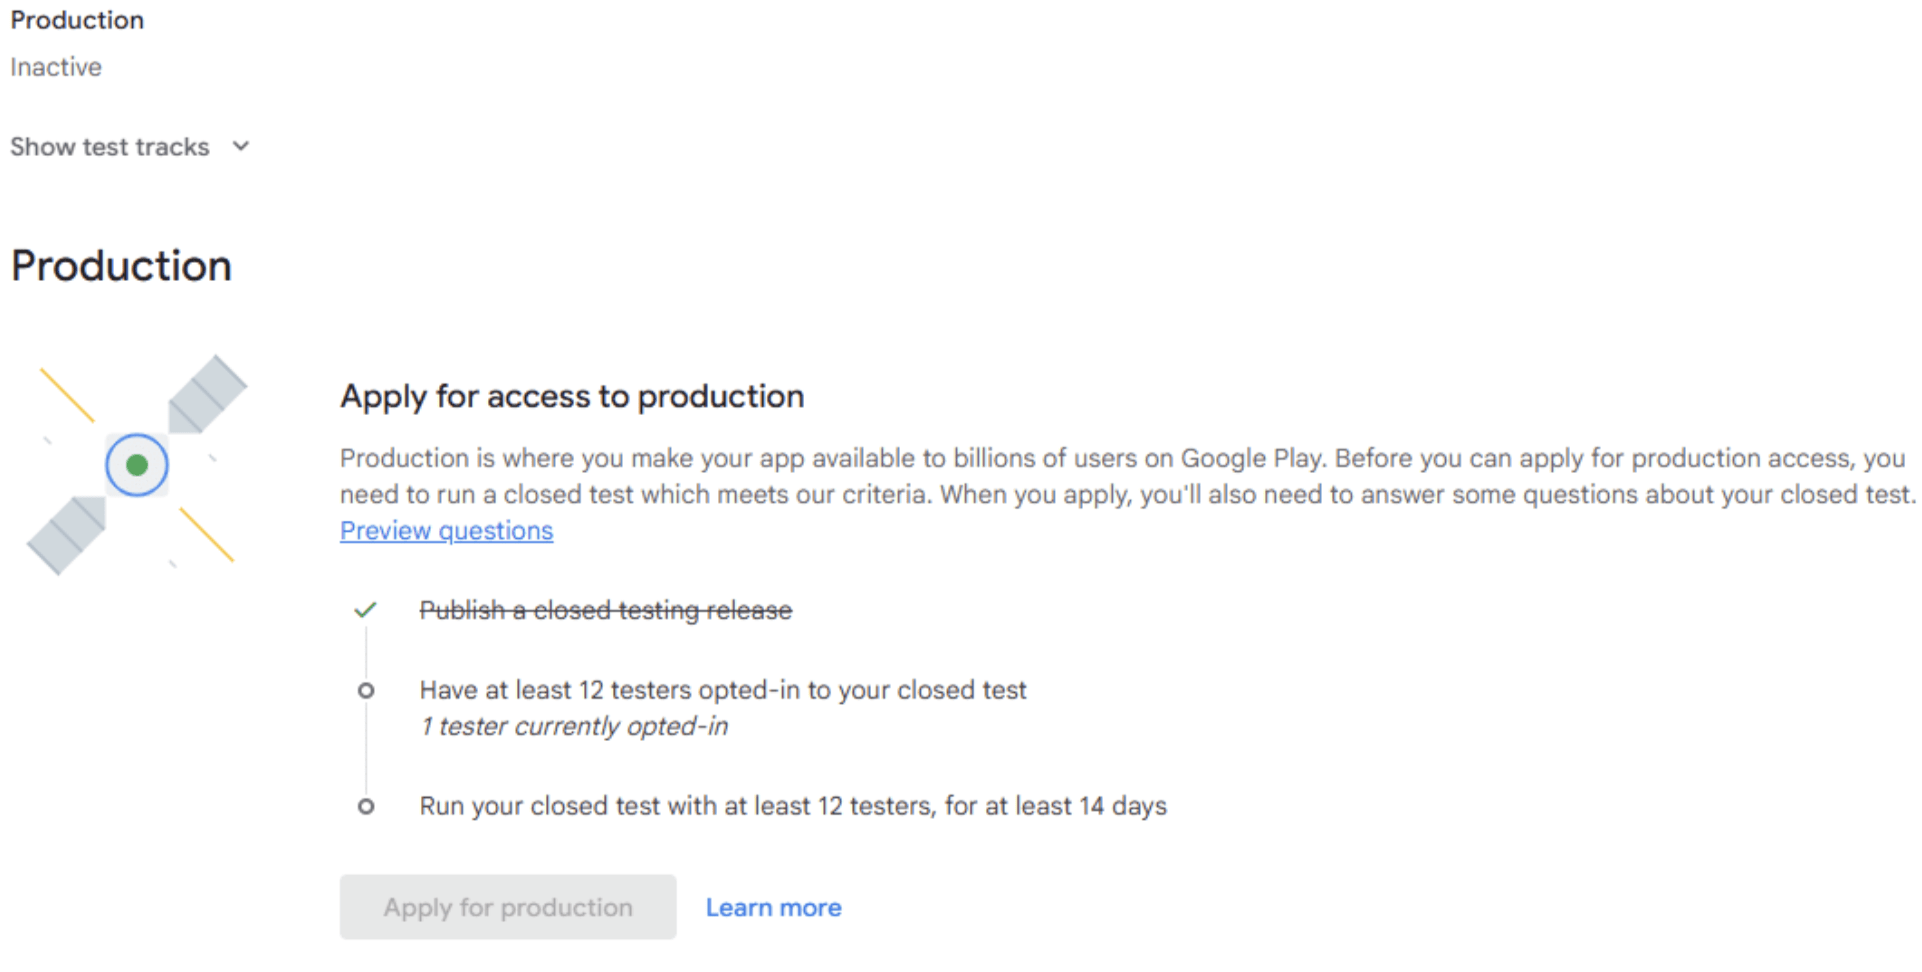
Use Google’s required-account-information guide and account-type guidance to complete the current verification flow. Provider verification, required information, and timing can change.
Grant Google Play Console access
After the account is active:
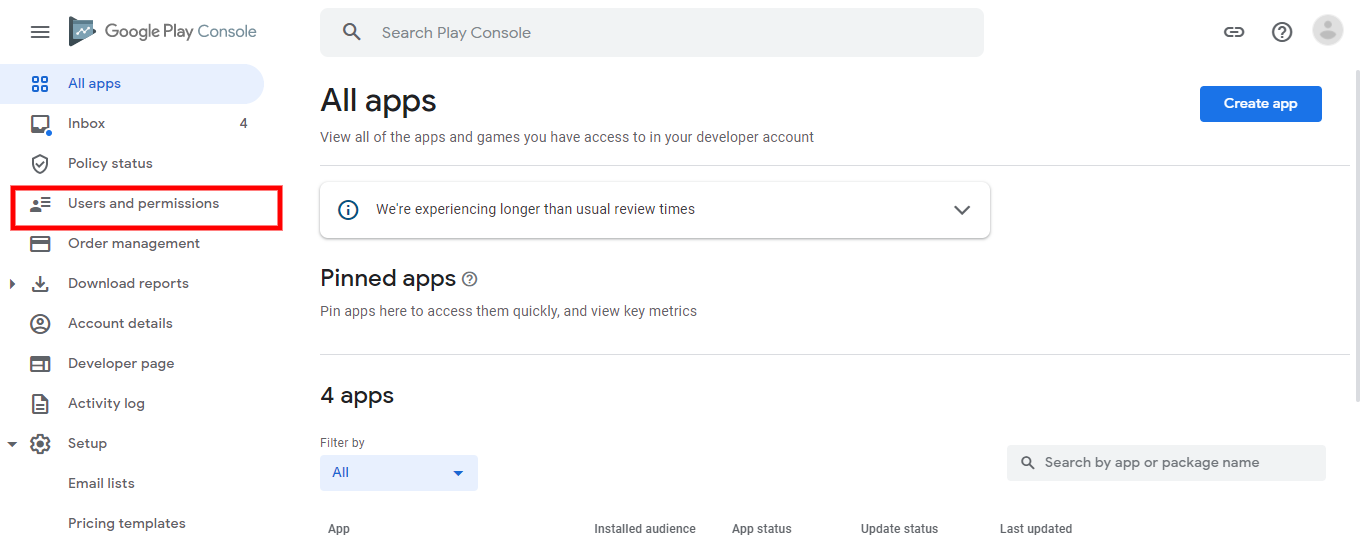
- Sign in to Google Play Console.
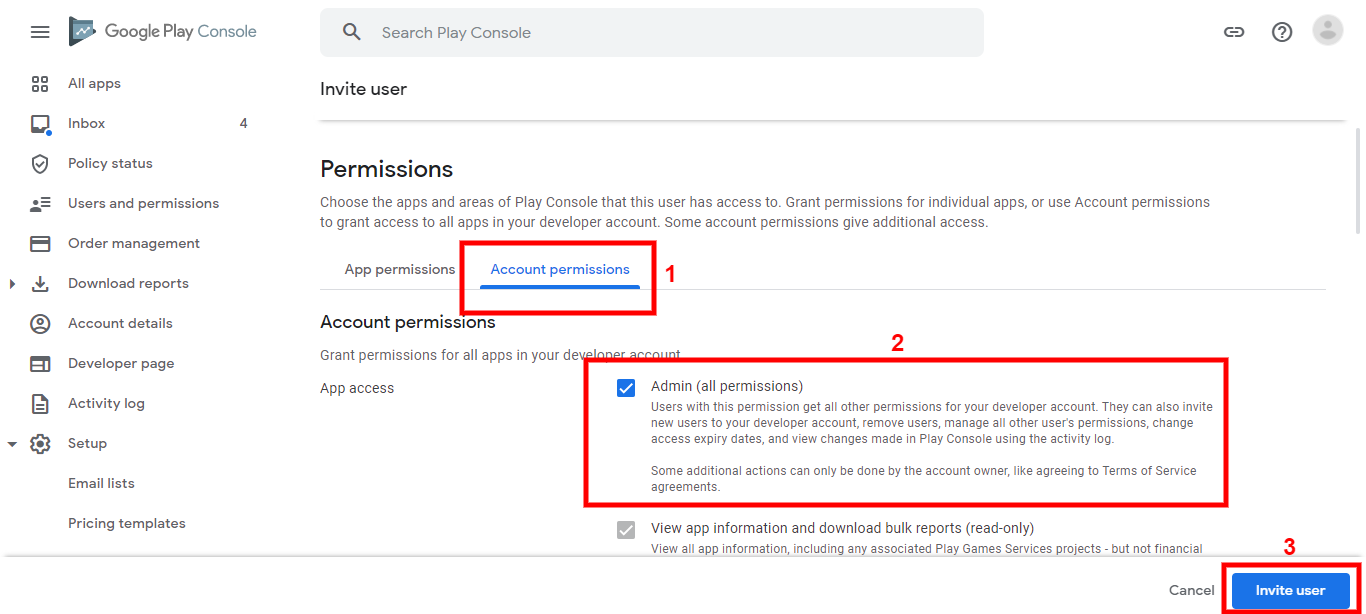
- Open Users and permissions.
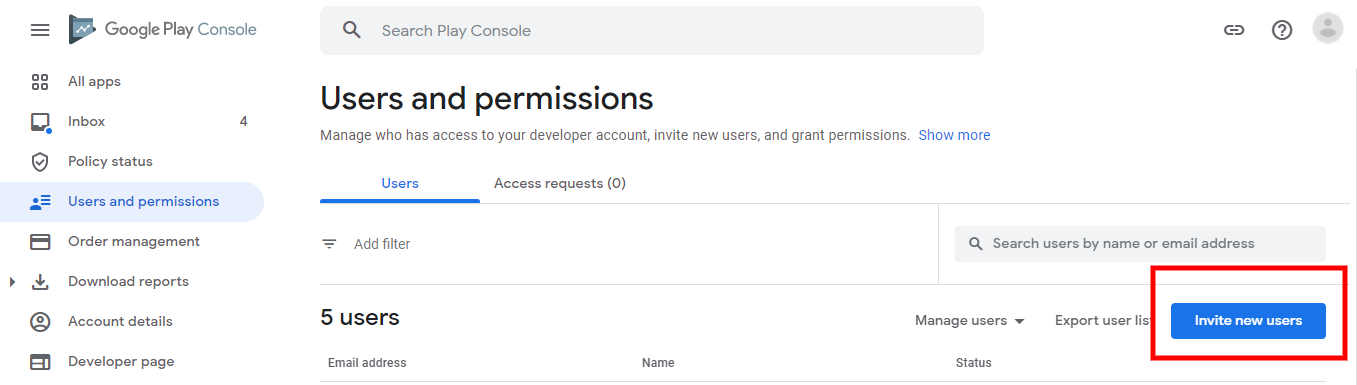
- Select Invite new users.
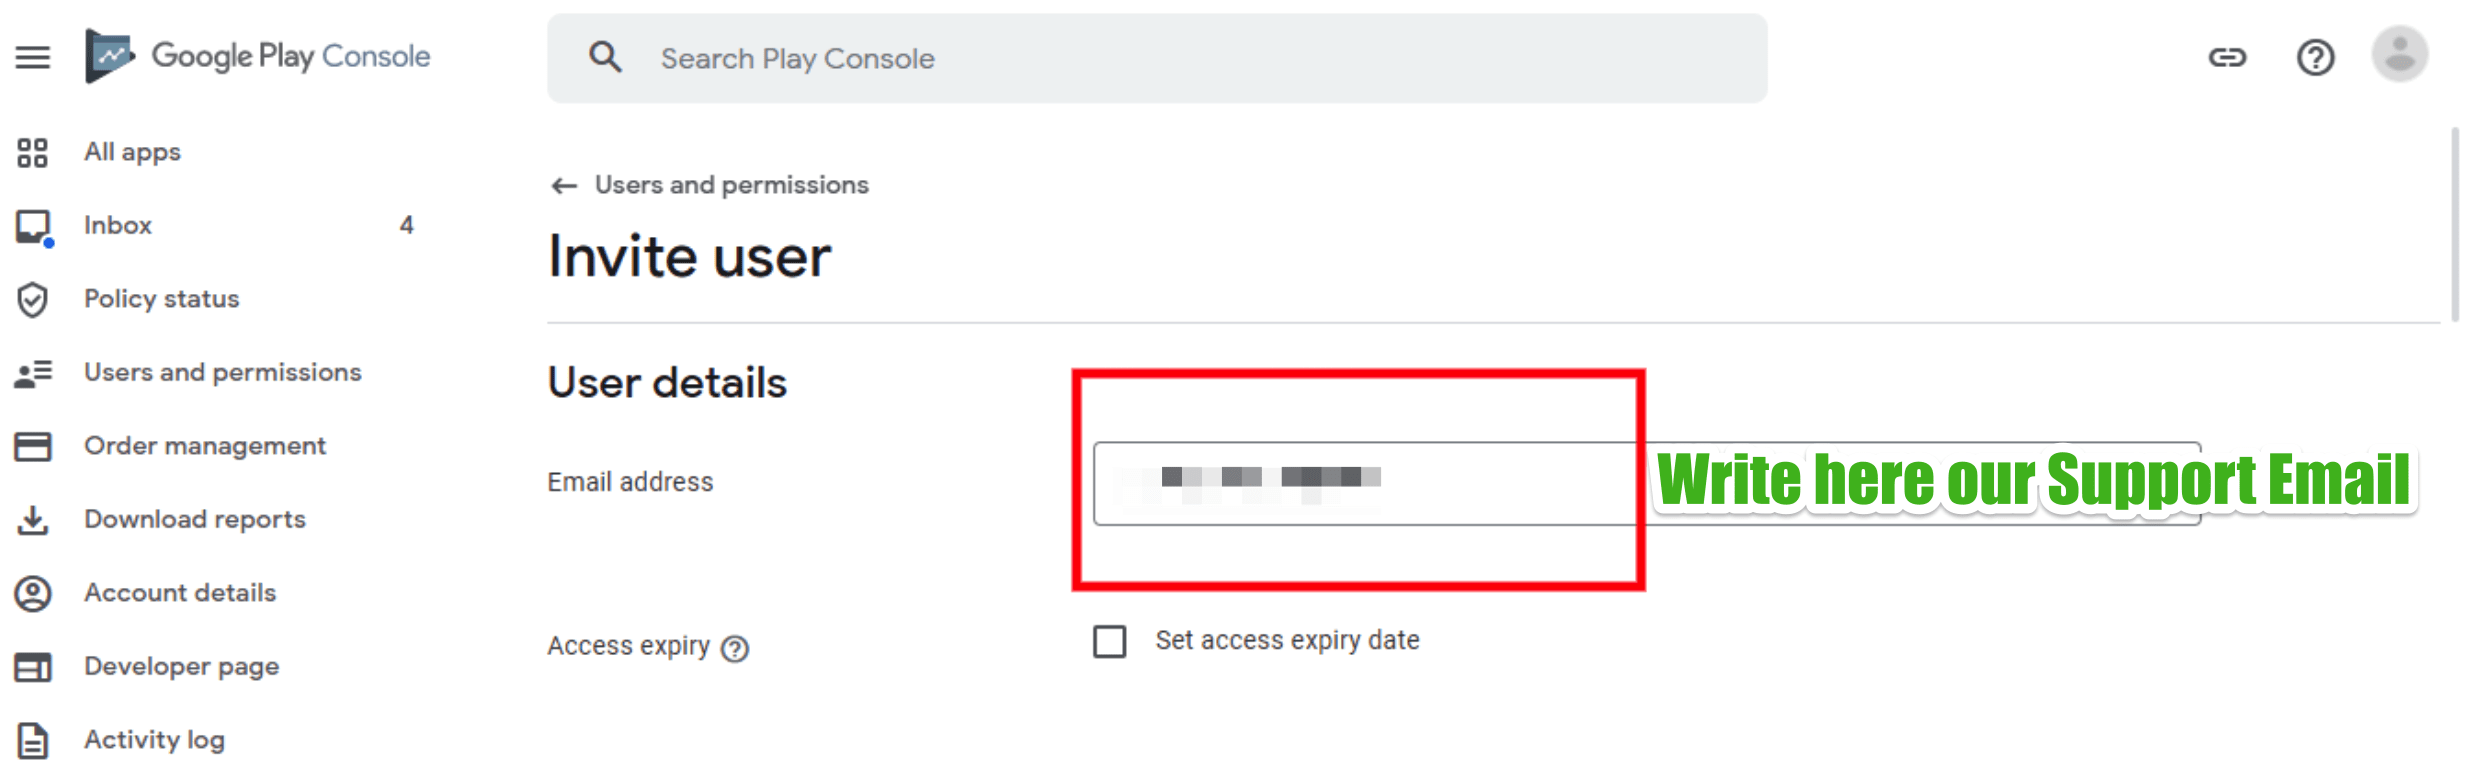
- Enter the approved recipient’s email address. For an Ordering.co release workflow, confirm the recipient in the active support request; use
support@ordering.coonly when that request identifies it. - Set an access-expiry date that covers the active release work, unless the account owner has explicitly approved ongoing access.
- In Account permissions, select Admin (all permissions) only when the approved work requires account-wide administration. Otherwise, grant the narrowest app or account permissions that complete the task.
- Send the invitation.
An account owner or existing admin can invite users. An invited person must sign in using the same Google Account email address that received the invitation. Google’s user-permission guide explains the available access levels and permission scope.
Keep access controlled
- Review active users and permissions before and after a release.
- Keep access-expiry dates aligned with the release work.
- Remove access that is no longer needed.
- Keep account ownership, payment settings, and credentials with the business account owner.
- Include the project or account name when you notify an invited recipient, so the invitation can be identified without exposing credentials.
When support access is needed
Use a role-based invitation when an authorized team needs to help with a new release, store maintenance, or a specific issue. Describe the app, platform, required work, and access end date in the request. Do not promise a provider approval date or share a password to accelerate the process.
Enrollment and access checklist
- Confirm the legal owner of each developer account.
- Choose the provider account type that matches the owner.
- Gather the D‑U‑N‑S Number and verification material when the provider requires them.
- Complete provider enrollment and any identity verification.
- Test the app on applicable real devices before submission.
- Grant only the access needed for the current release work.
- Review and remove access after the work is complete.
Next steps
Once the accounts and access are ready, continue with Build iOS apps, Build apps from Dashboard, and Test and publish app releases.