Build iOS apps
Configure the Apple identifiers, capabilities, app groups, Merchant ID, and App Store Connect key that apply to the app you are building. Then add the resulting values to Dashboard and create an iOS test or distribution build.
Use an Apple Developer account that can manage the required identifiers and signing resources. Keep .p8 keys, API identifiers, and account credentials in an approved secure location; do not place them in tickets, chat, or documentation.
Customer App
Create the main identifier
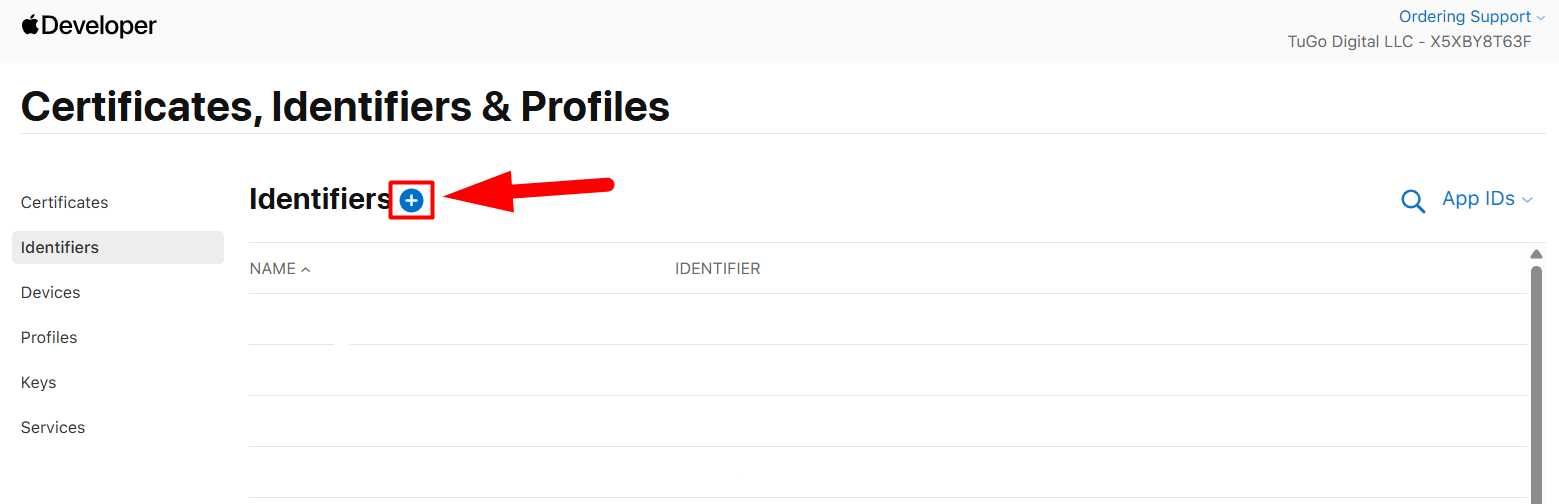
- Open Apple Developer account and go to Identifiers.
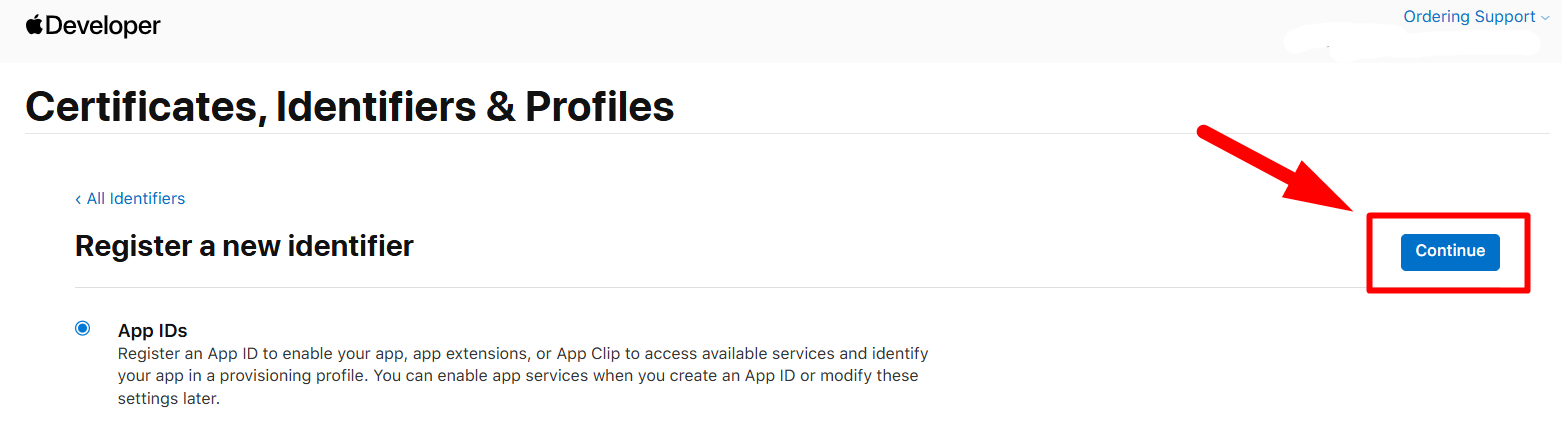
- Select Add (+), choose App IDs, select App, and continue.
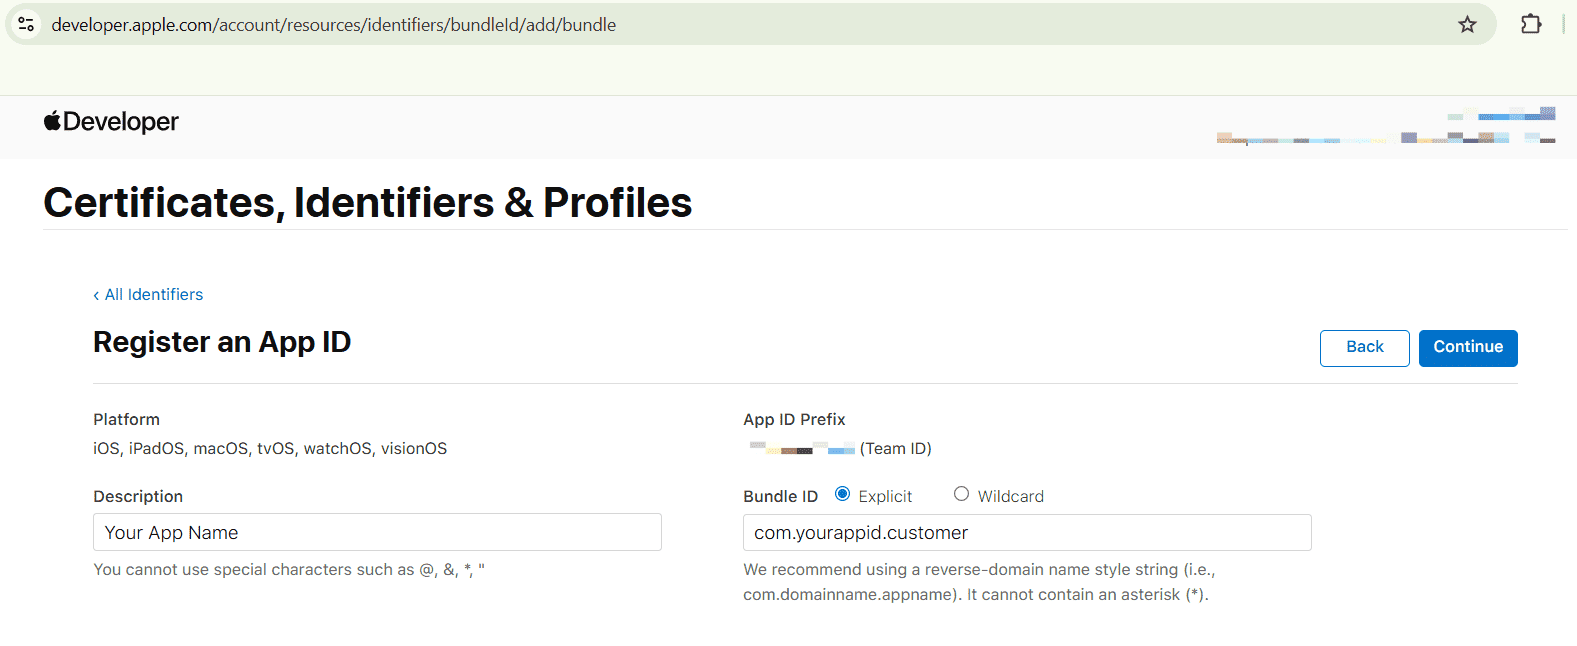
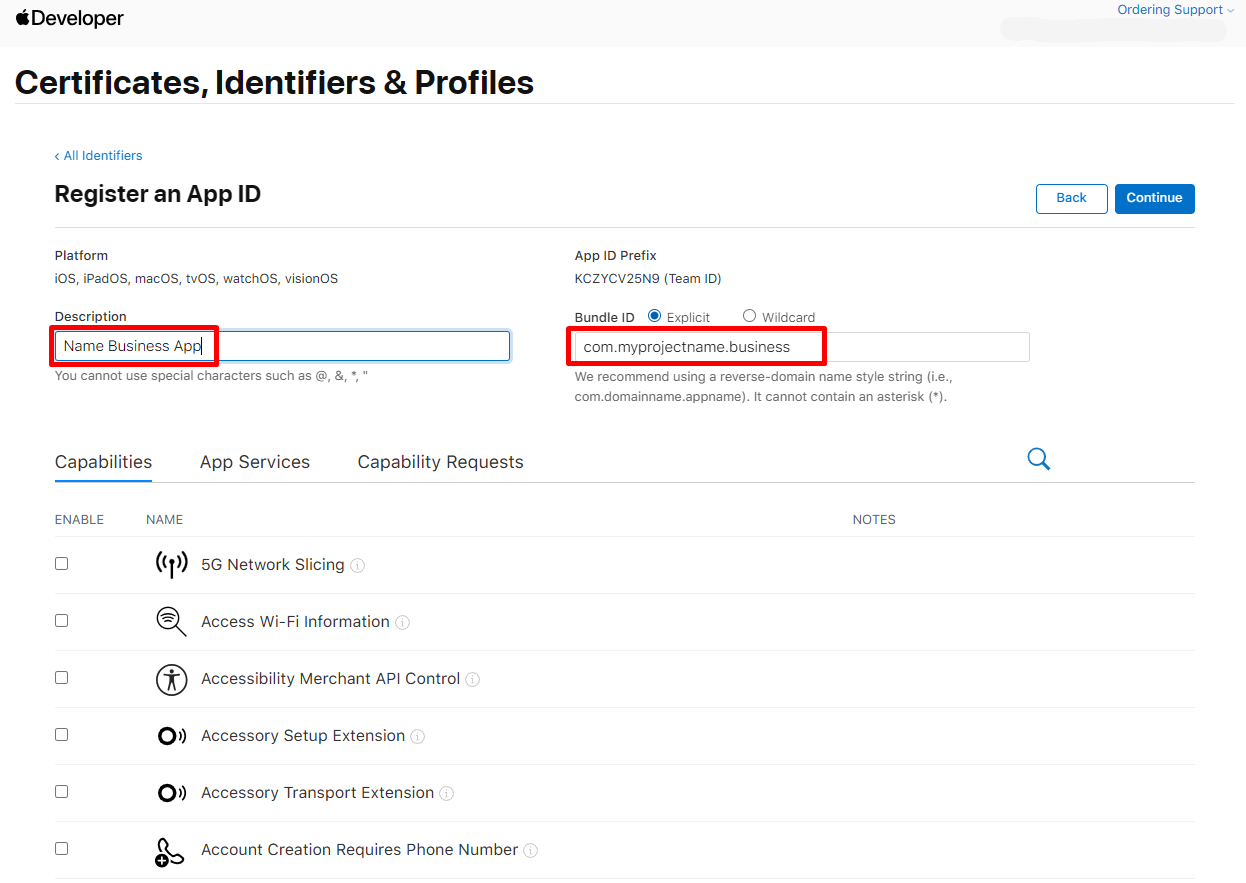
- Enter the app name in Description and the Customer App bundle identifier in Bundle ID. Use the identifier configured for the app; for example,
com.yourprojectname.customer. - Select the required capabilities, continue, and register the identifier.
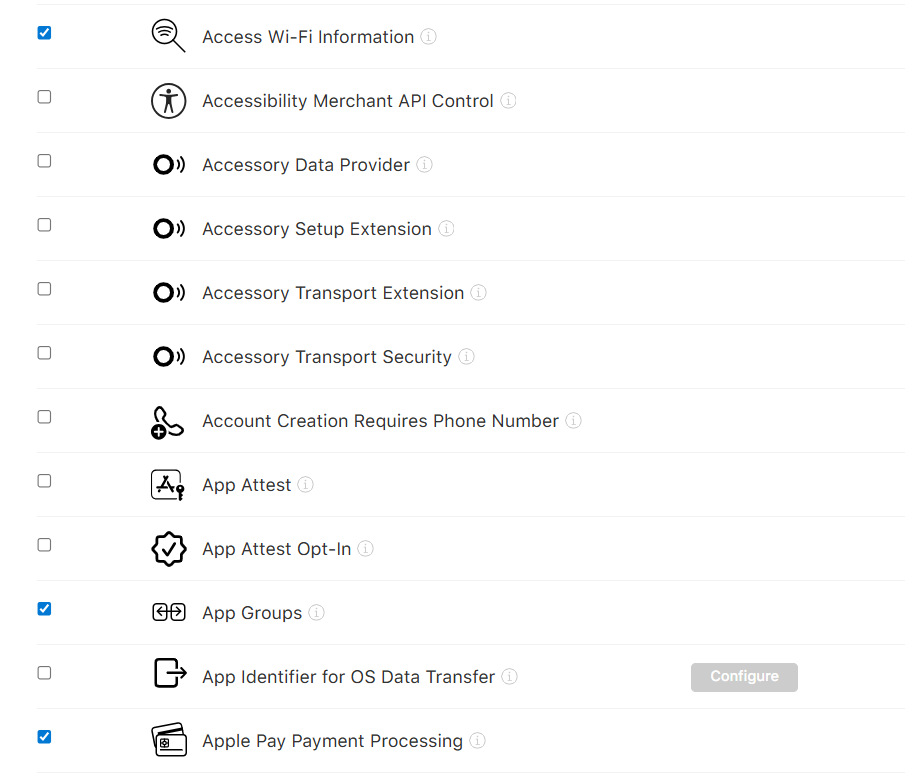
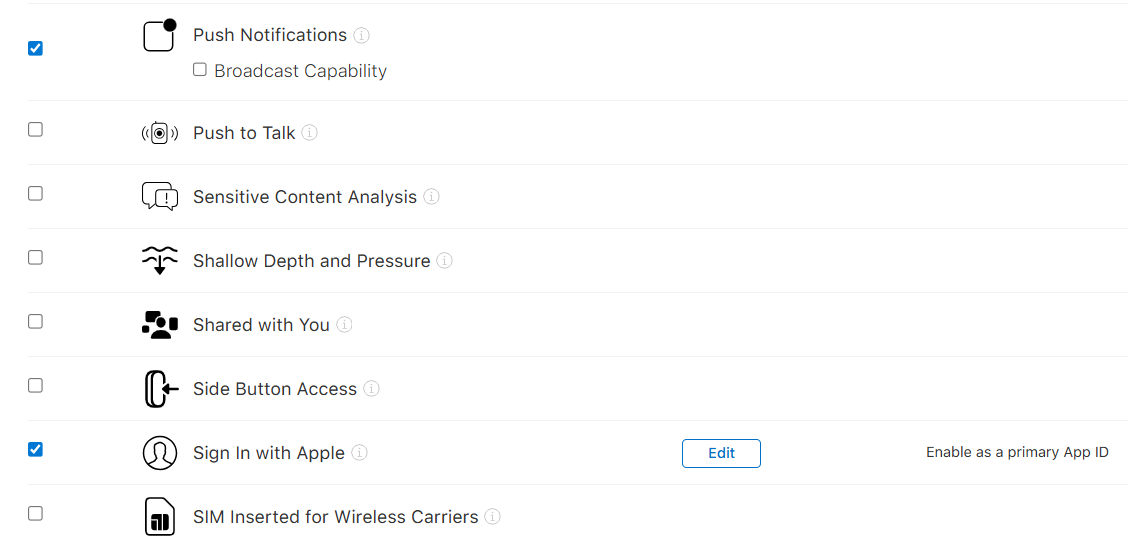
For the Customer App, select these capabilities when they apply to the project:
- Access Wi-Fi Information
- App Groups
- Apple Pay Payment Processing
- Associated Domains
- Maps
- Push Notifications
- Sign in with Apple

Create the notification extension identifier
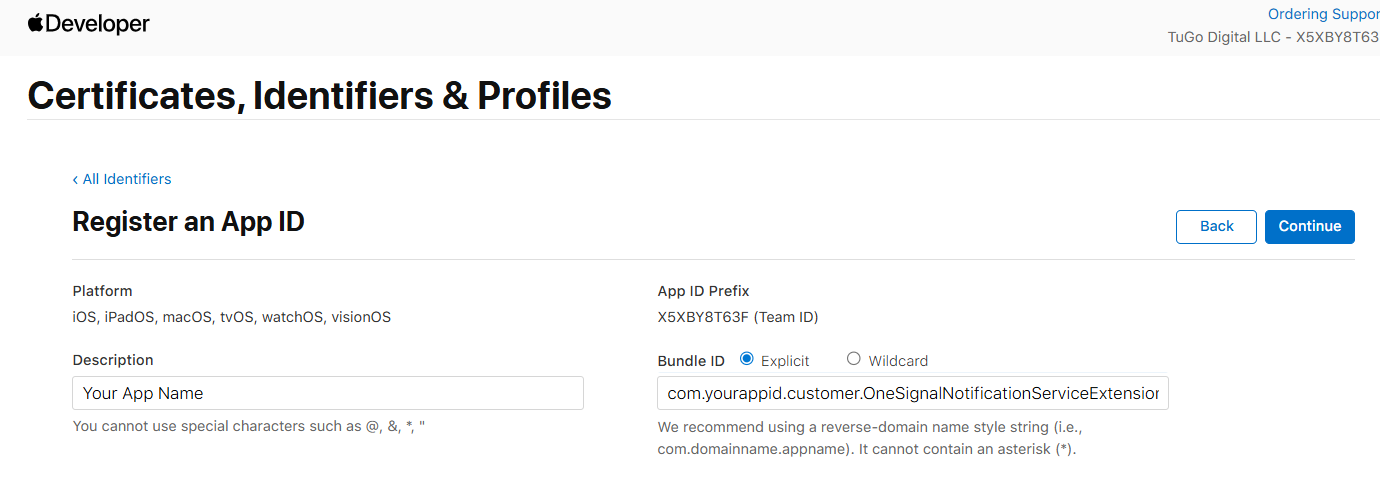
If the Customer App uses OneSignal notifications, create a second App ID using the same process. Append .OneSignalNotificationServiceExtension to the main identifier. For example:
com.yourprojectname.customer.OneSignalNotificationServiceExtension
Select the same applicable capabilities as the main Customer App identifier, then register the extension.
Create the Customer App group
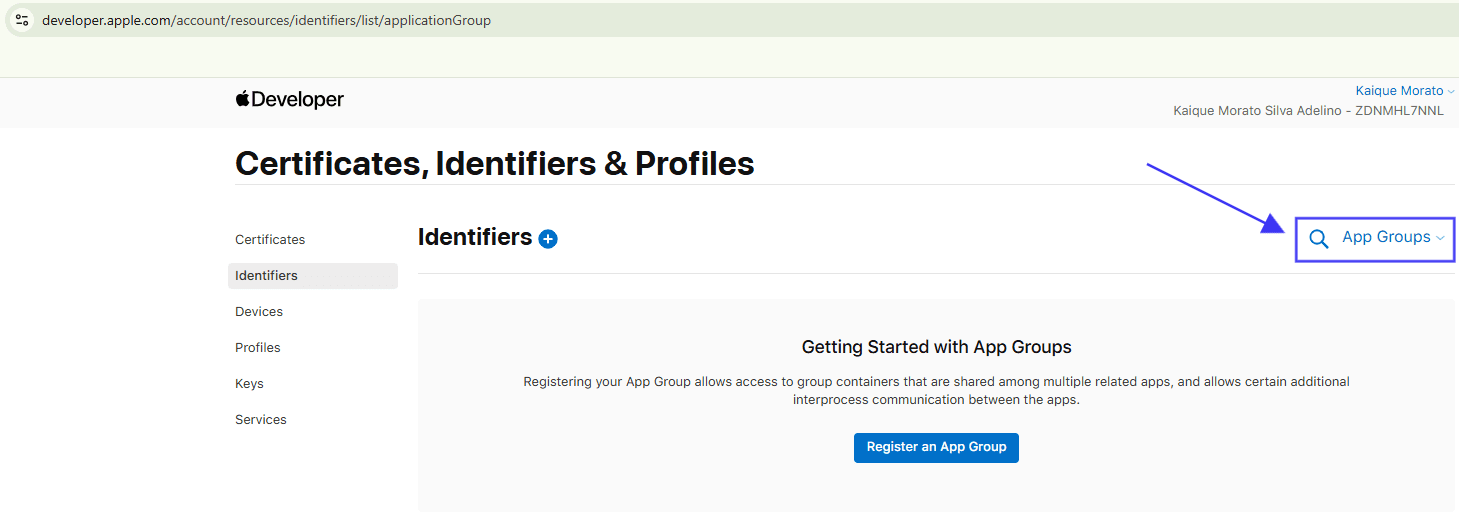
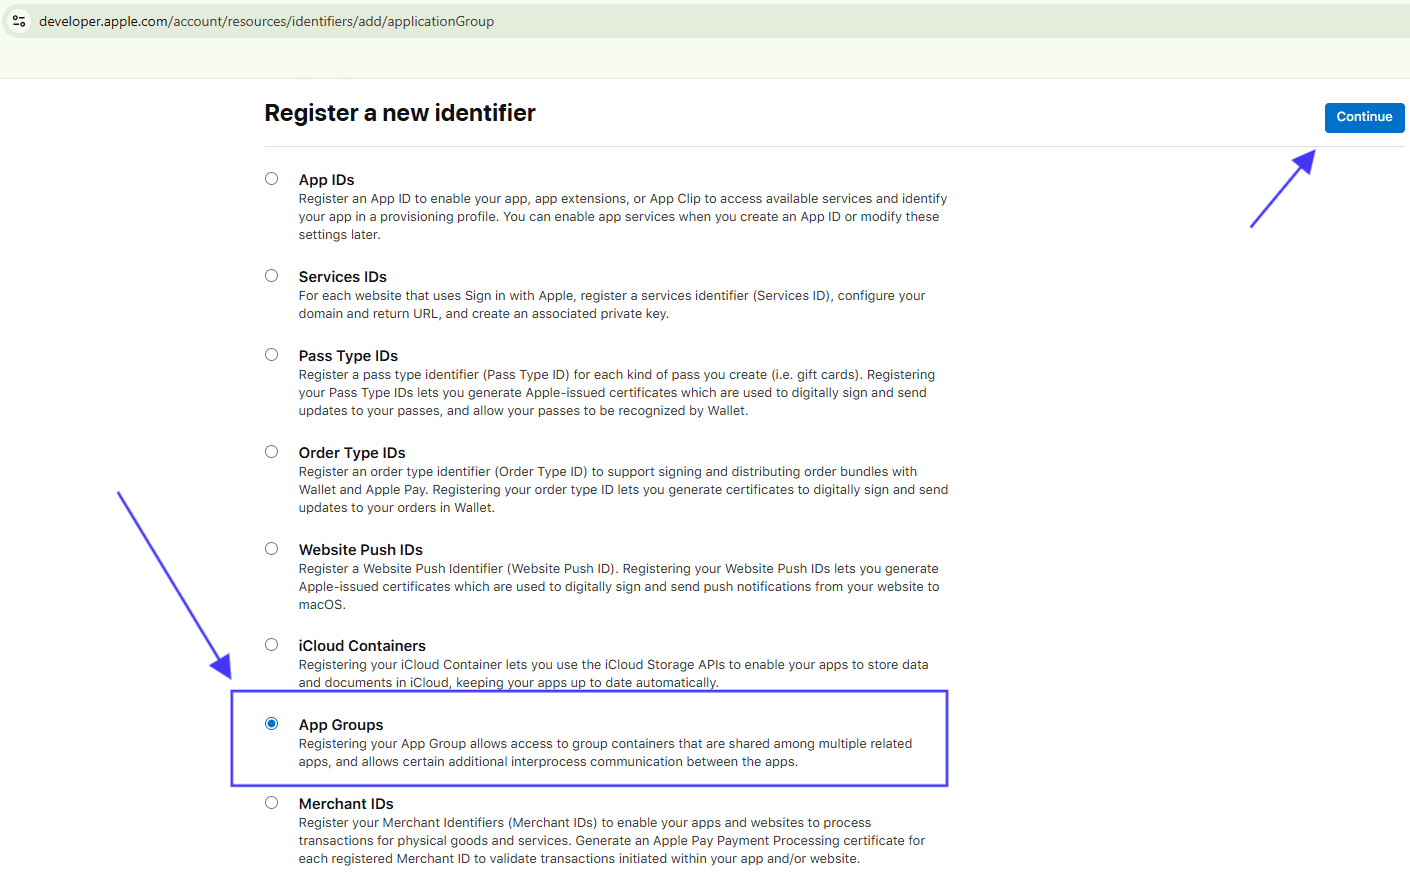
Create one App Group for each app. Open App Groups, select Add (+), enter a group name, and register the group.
Use the Customer App identifier with the group. prefix and .onesignal suffix. For example:
group.com.yourappname.customer.onesignal
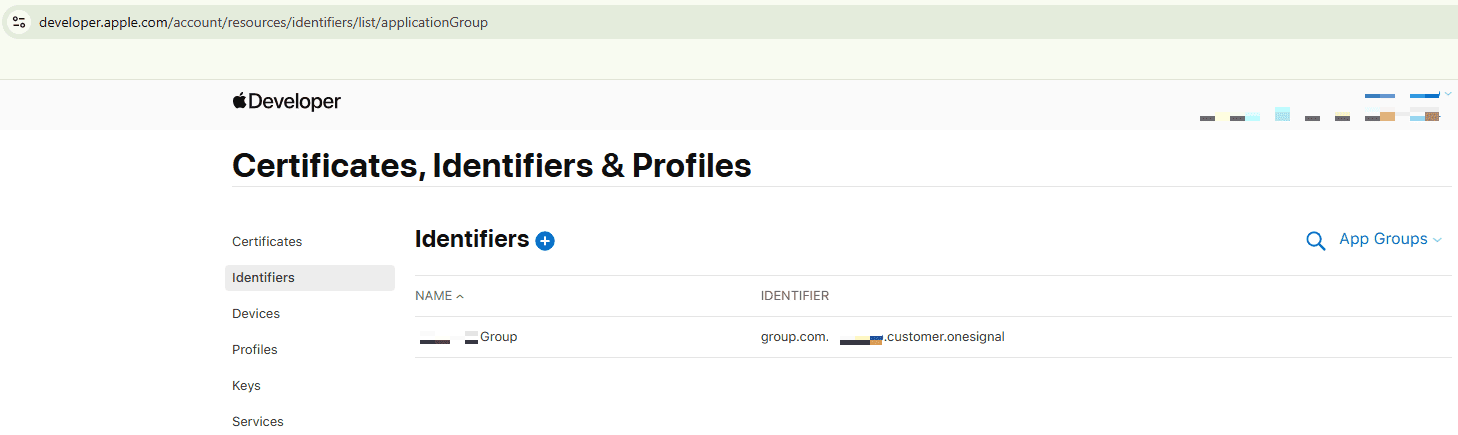
Use a different group identifier for every app. Do not reuse the Customer App group for a Driver App or Business App.
Create the Merchant ID
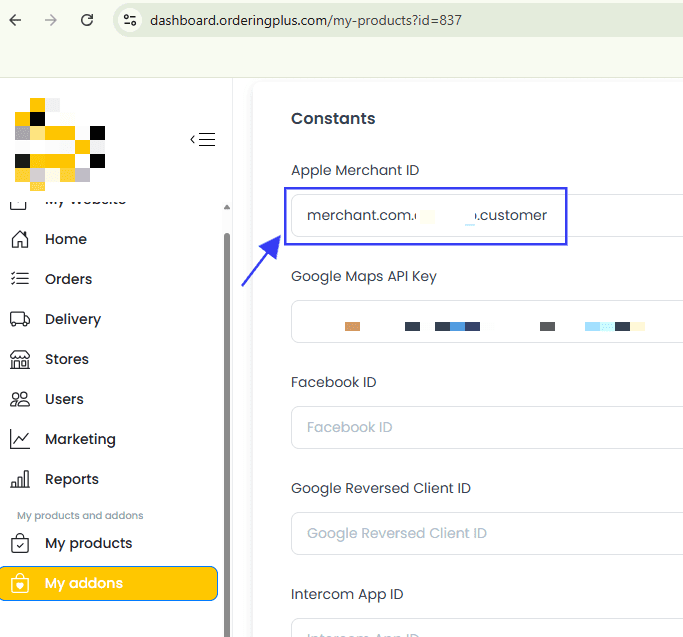
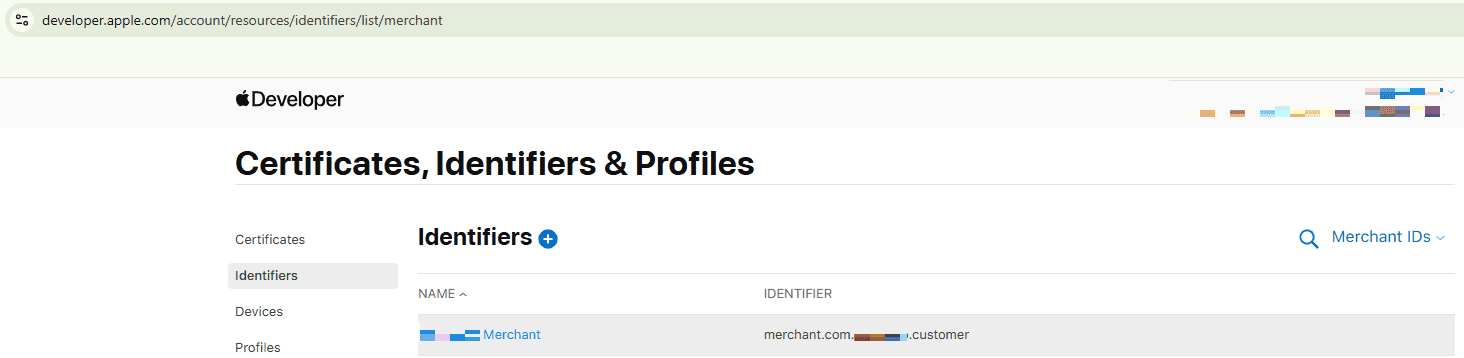
For a Customer App that uses Apple Pay, open Merchant IDs, select Add (+), enter the merchant name, and register an identifier such as:
merchant.com.yourappname.customer
Add the resulting Merchant ID to the app’s Dashboard settings. A Customer App needs one Merchant ID for this workflow.
Associate the group and Merchant ID
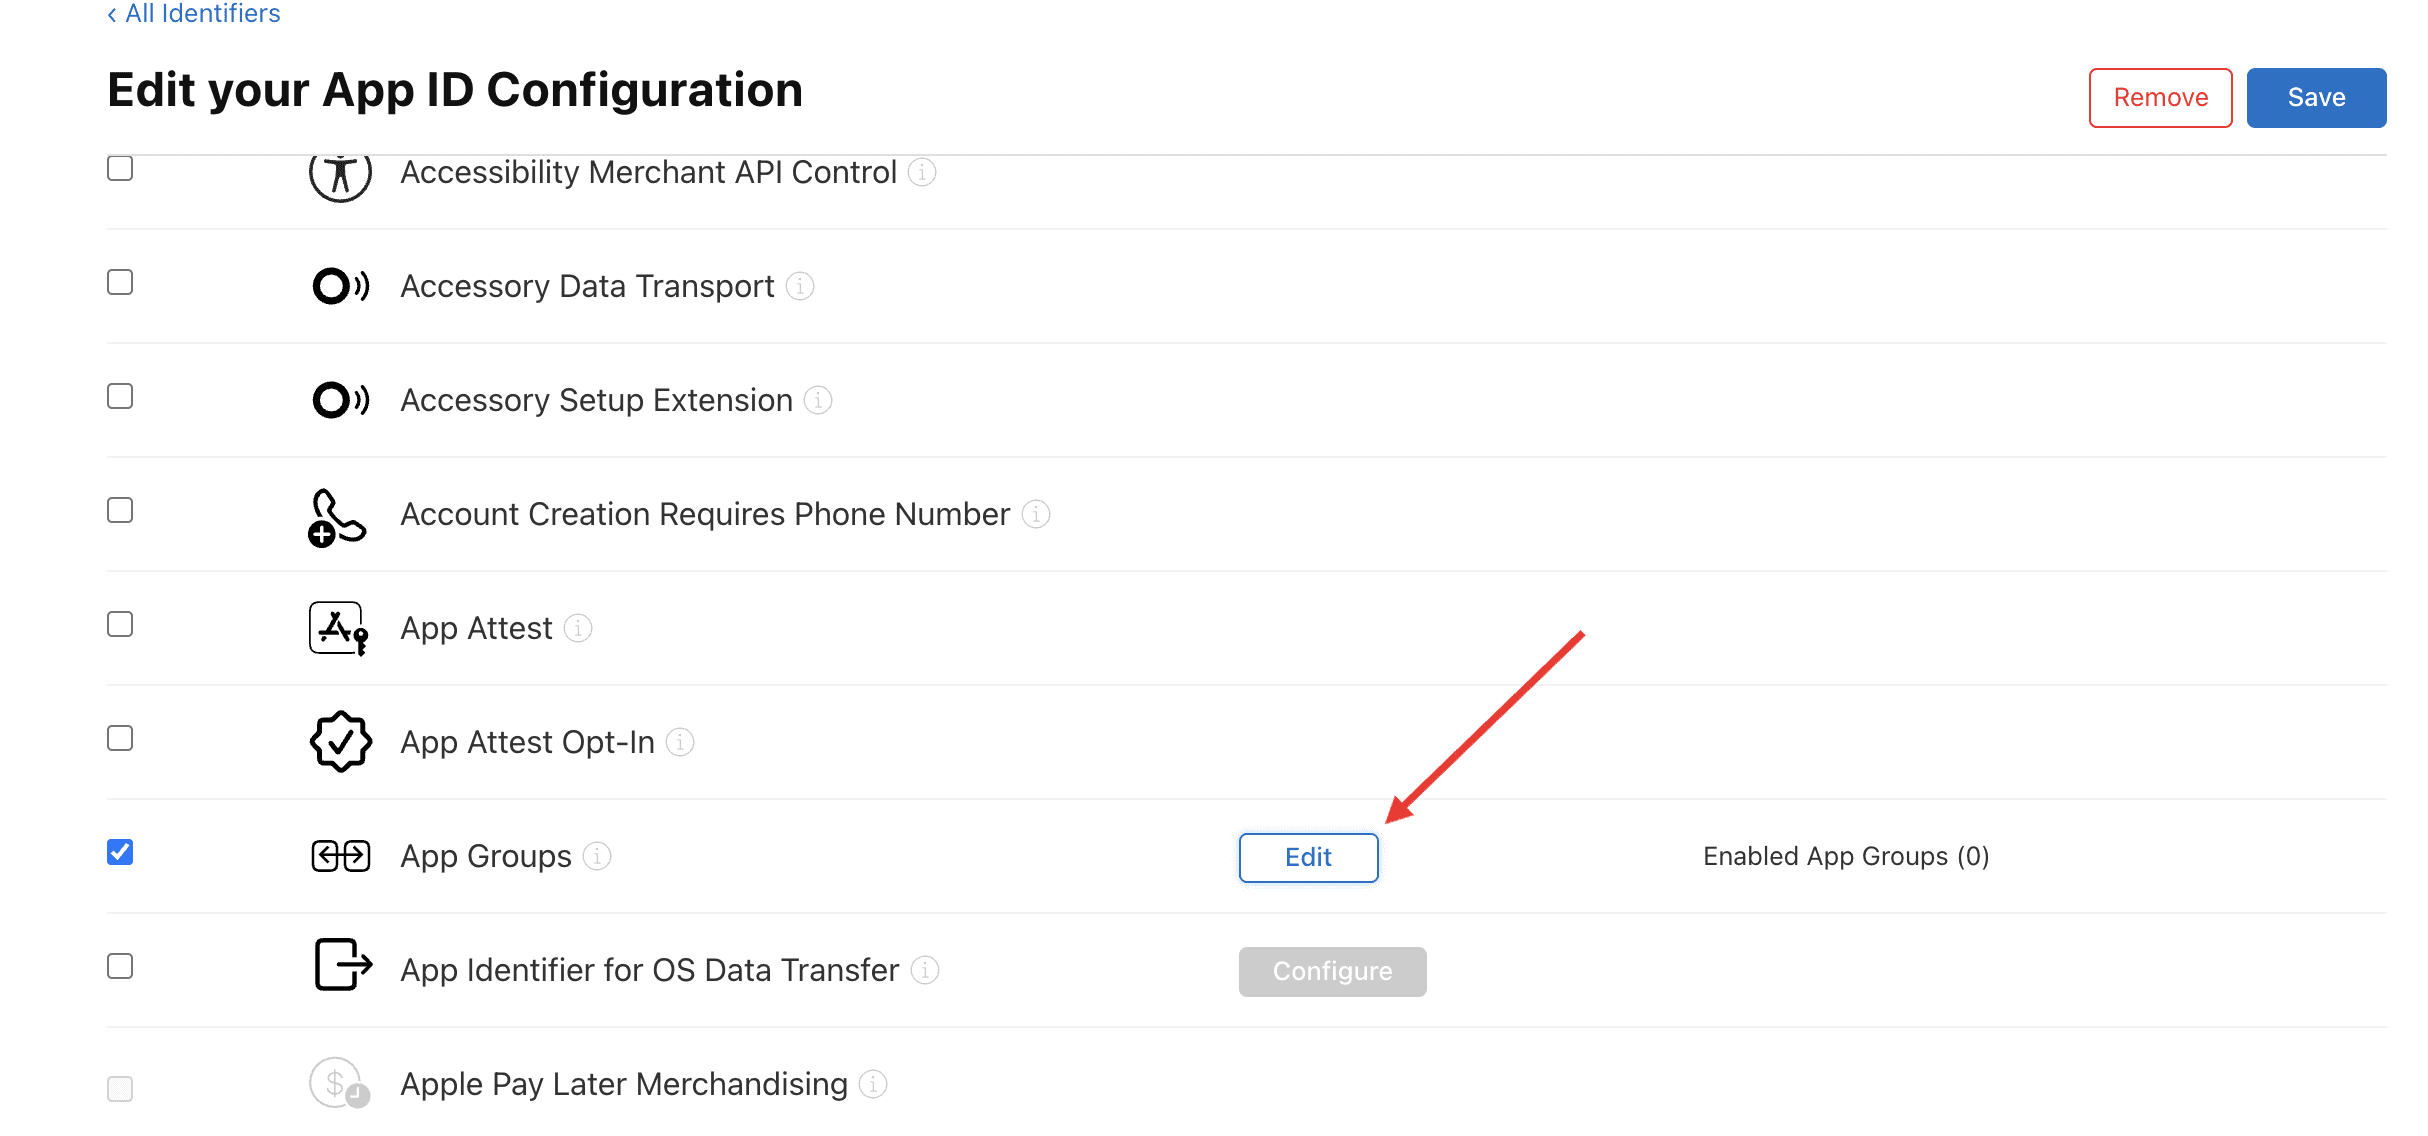
Return to the main Customer App identifier and:
- Open App Groups, select Edit, choose the Customer App group, and save.
- Open Apple Pay Payment Processing, select Edit, choose the Merchant ID, and save.
- Repeat the App Groups setting for the notification extension identifier.
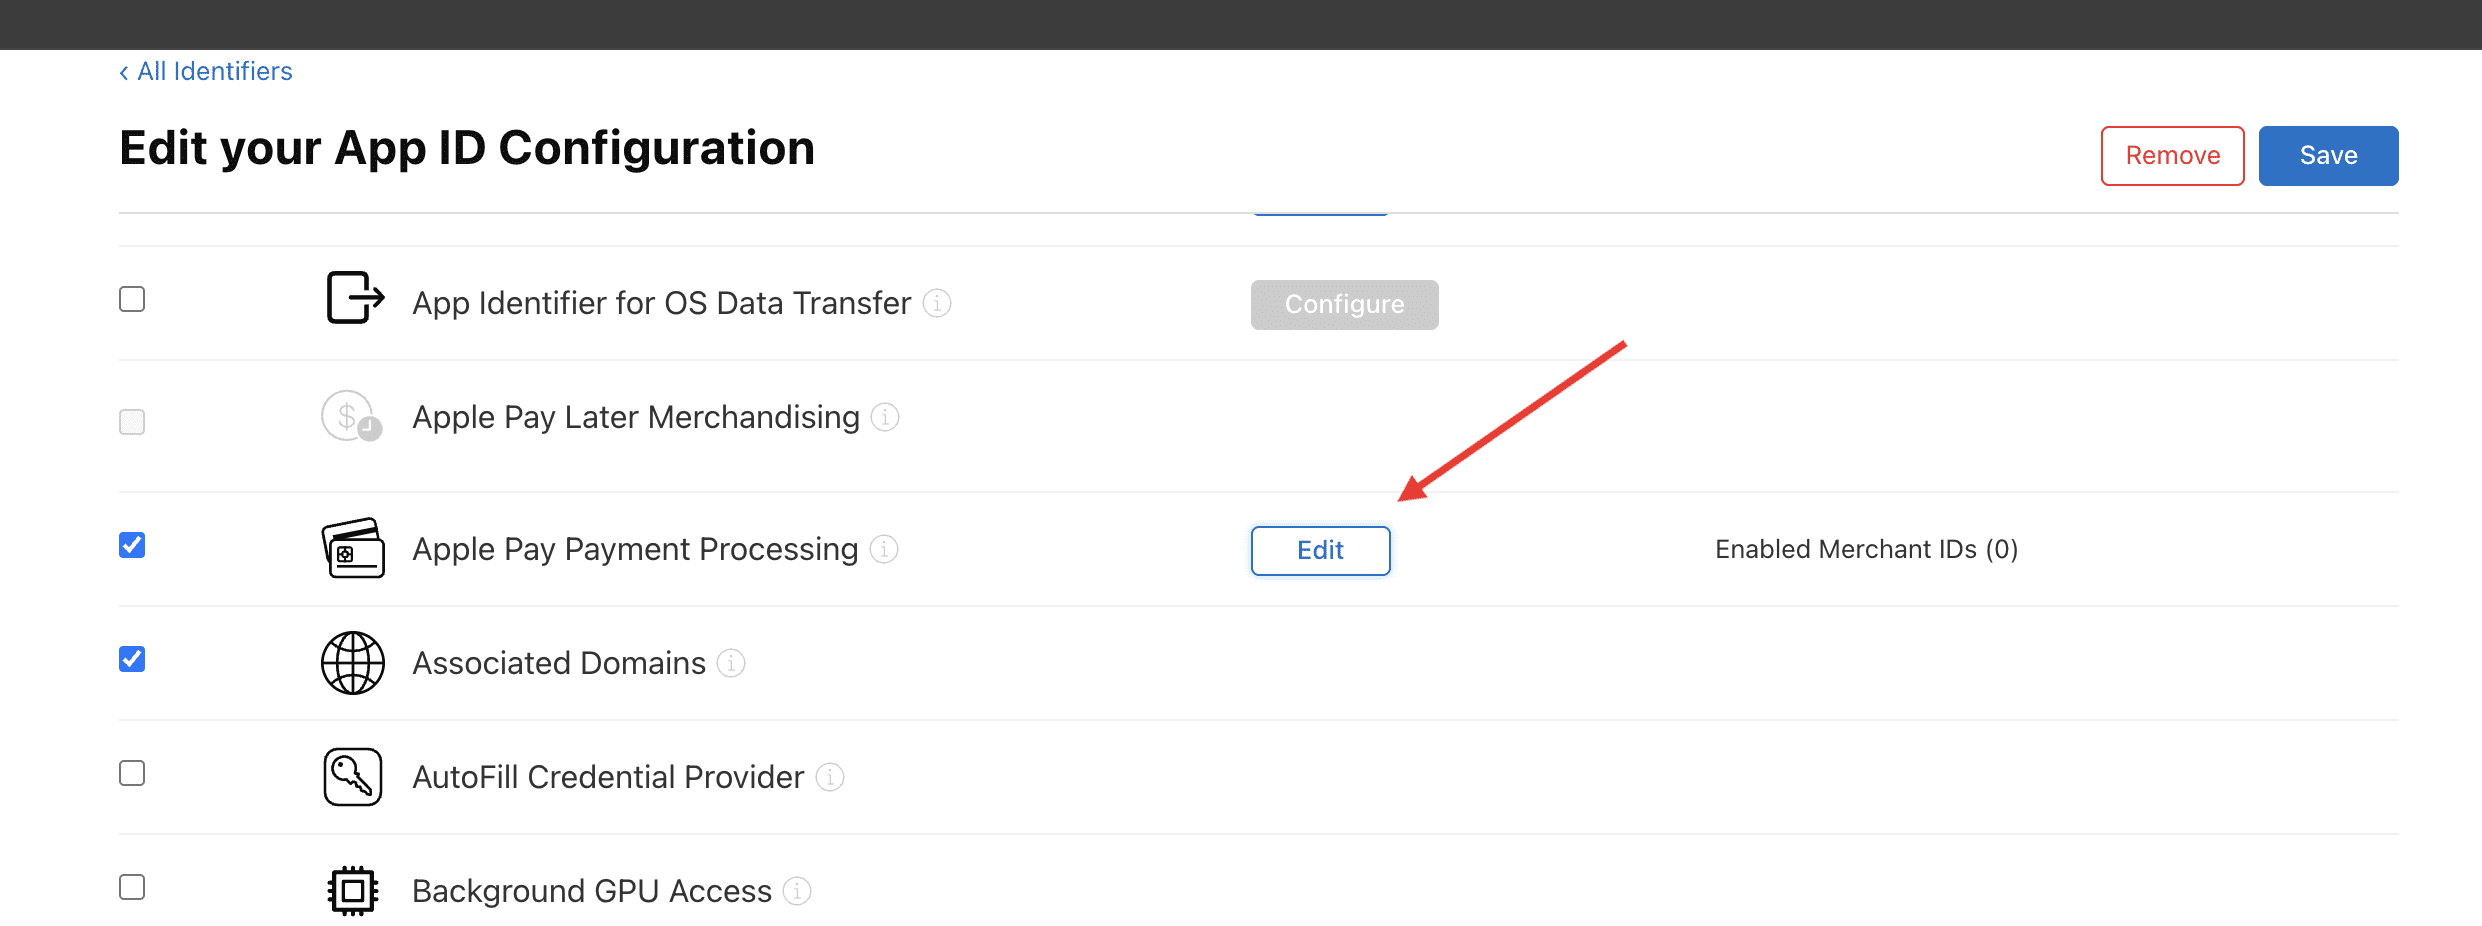
After the Customer App identifier, notification extension, group, and Merchant ID are configured, select the app in Dashboard and use Build PRO when you are ready to generate the iOS distribution build.
Driver App and Business App
Choose a unique bundle identifier
Choose a unique bundle identifier for every Driver App and Business App. Do not reuse an identifier already registered for another app. Examples include:
com.myprojectname.businesscom.myprojectname.partnercom.myprojectname.storecom.myprojectname.drivercom.myprojectname.delivery
Register the identifier and capabilities
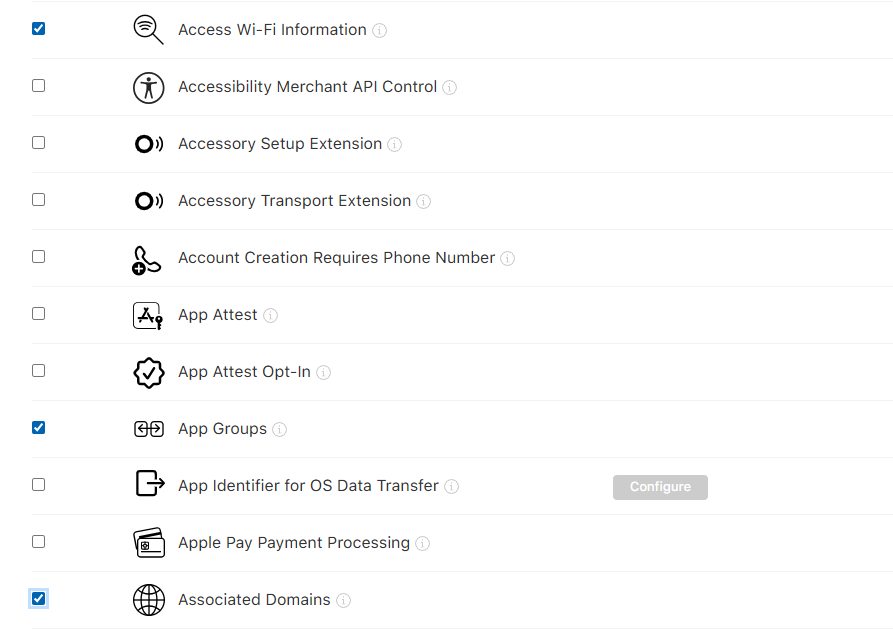
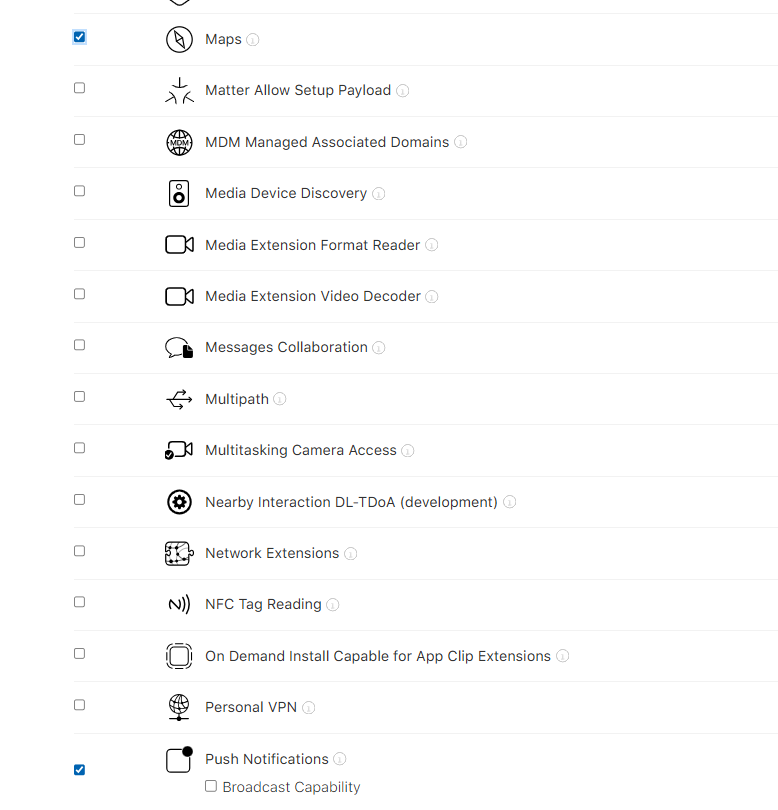
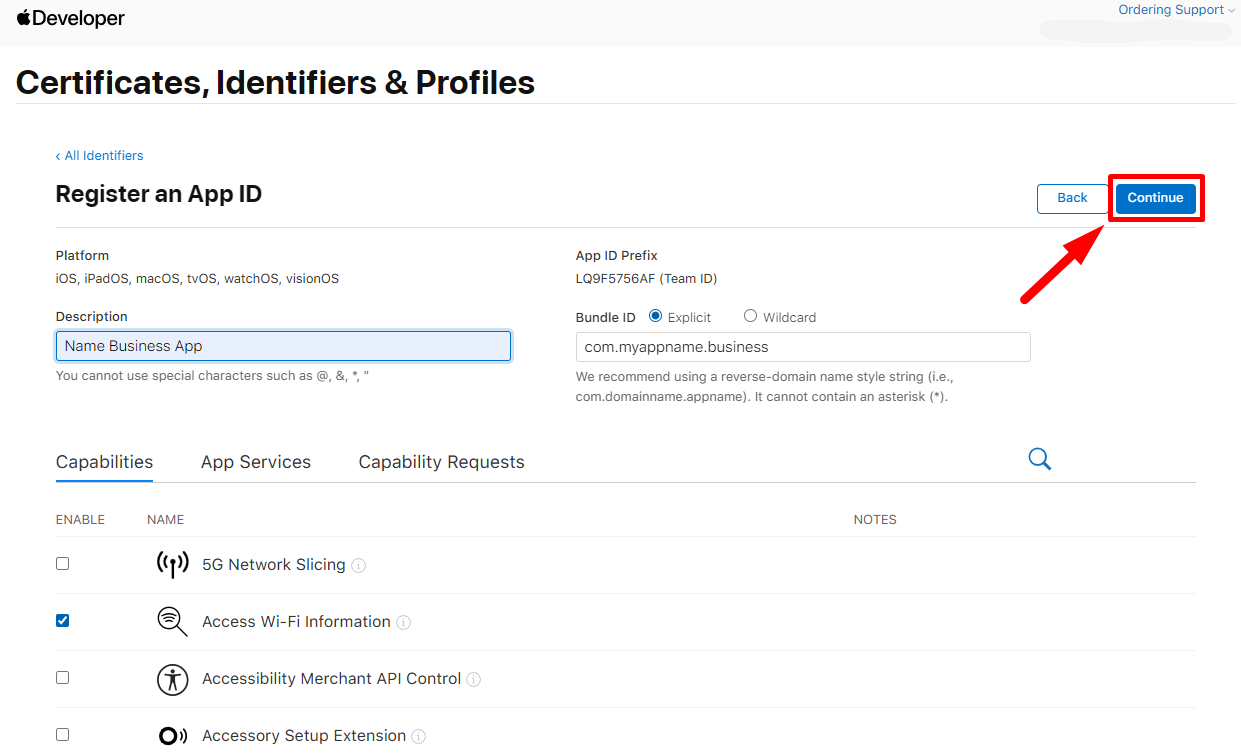
In Apple Developer Identifiers, create an App ID, select App, enter the app name and Bundle ID, and select these capabilities:
- Access Wi-Fi Information
- App Groups
- Associated Domains
- Maps
- Push Notifications
Continue and select Register.
Create the Driver or Business App group
Create a separate App Group for the Driver App or Business App. The group identifier follows the same pattern, using that app’s own identifier:
group.com.yourappname.business.onesignal
Open App Groups, create the group, then select it under App Groups in the app identifier capabilities and save the change.
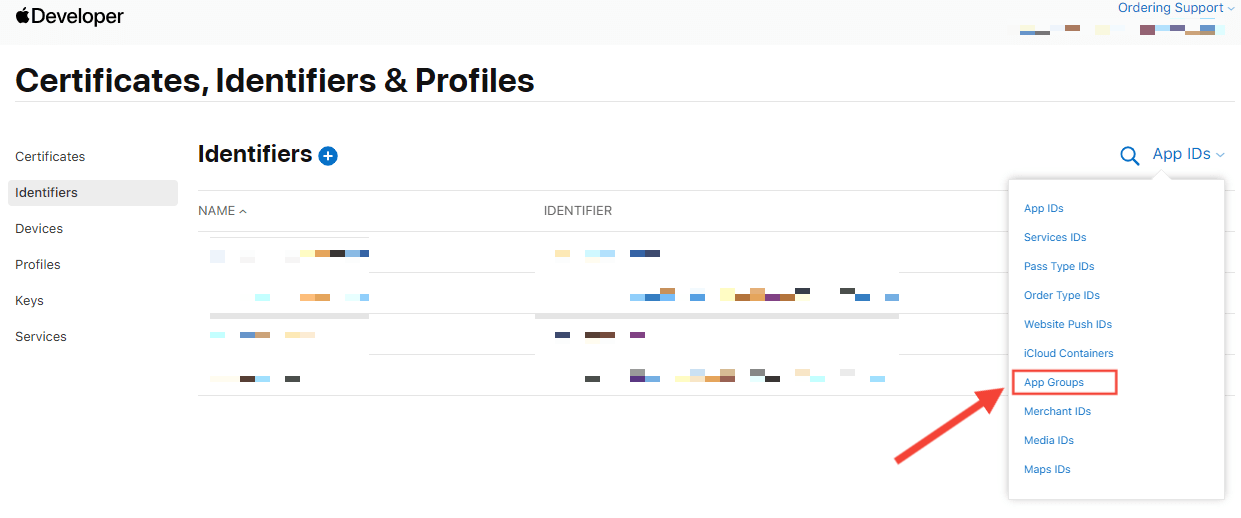
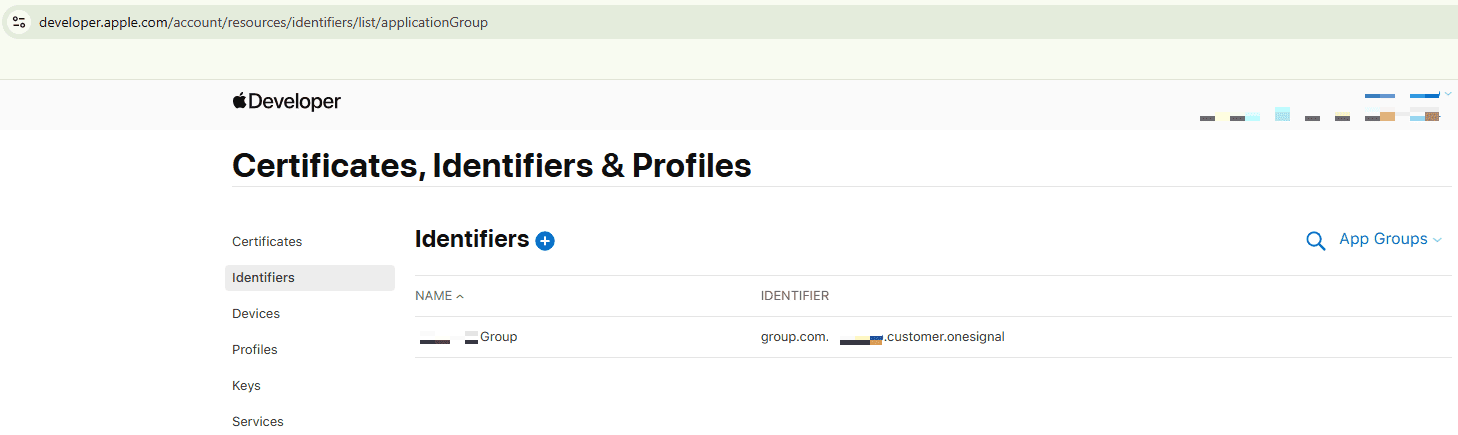
Update the App Groups capability for each Driver App and Business App identifier. These apps do not use the Customer App’s Merchant ID flow unless the app’s own approved configuration requires it.
Create an App Store Connect API key
In App Store Connect API, select Team Keys, create a key, and give it a recognizable name. Download the key when it is generated, then securely record its Key ID and Issuer ID.
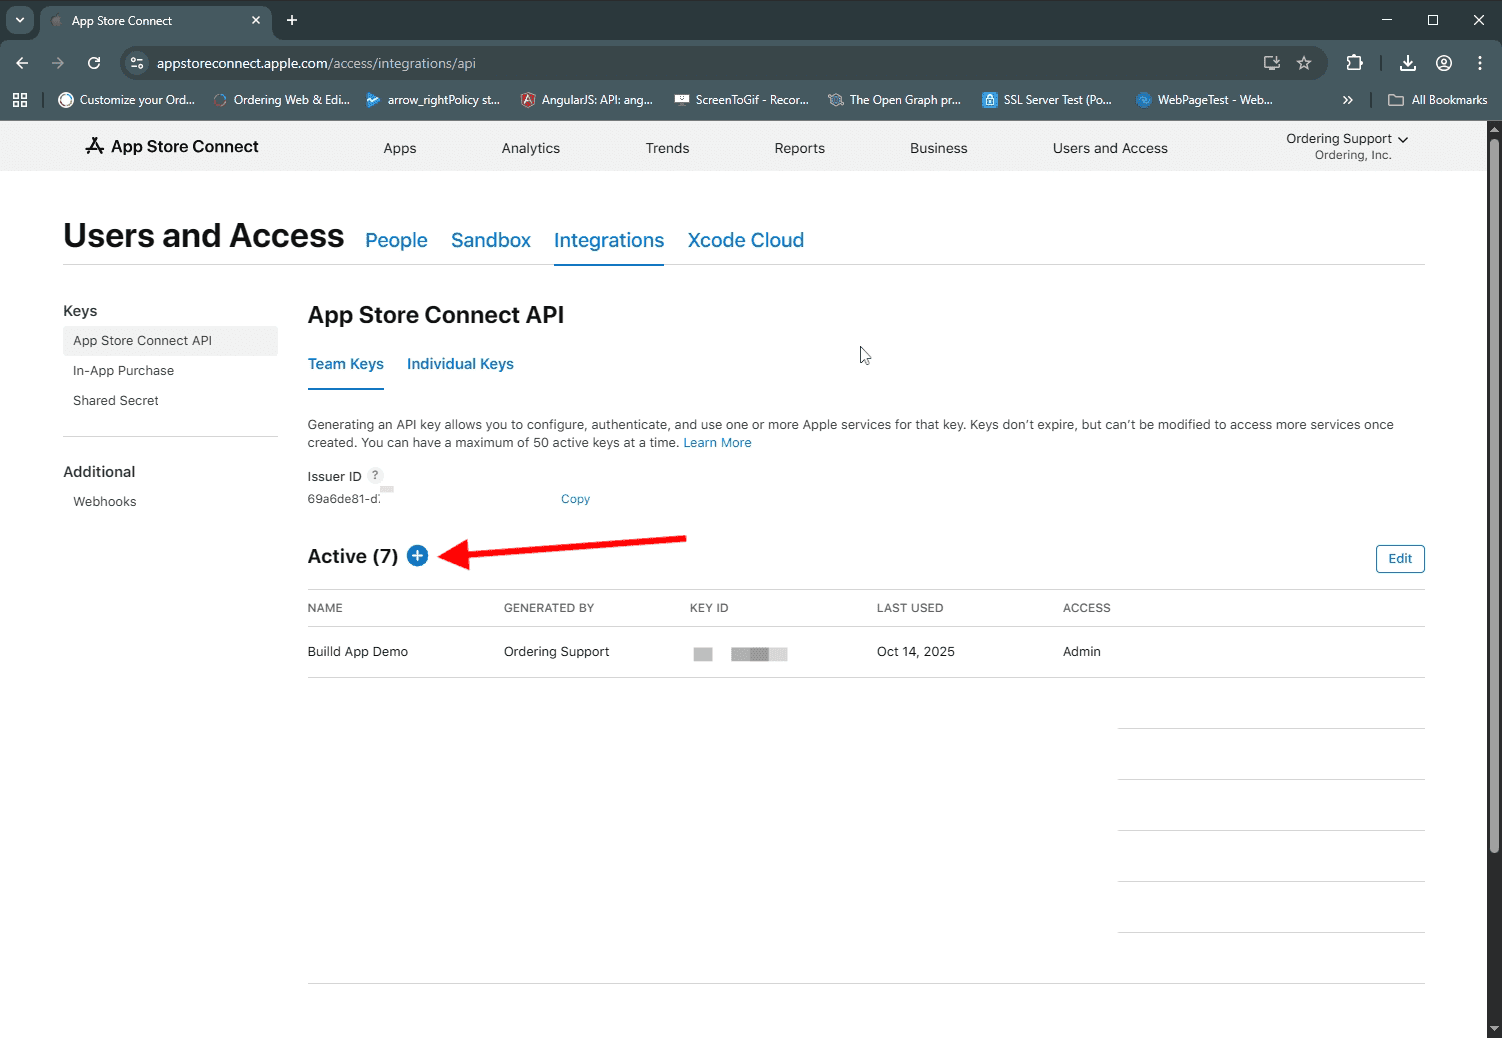
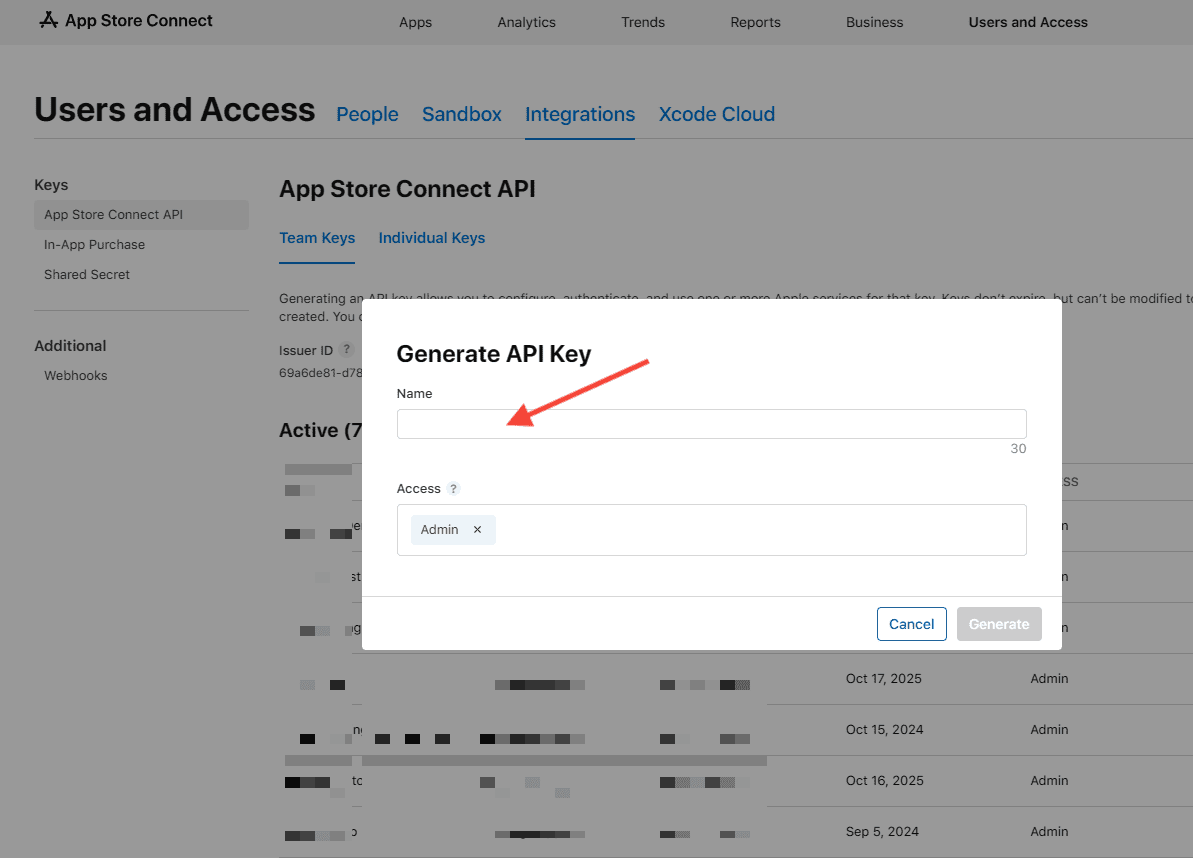
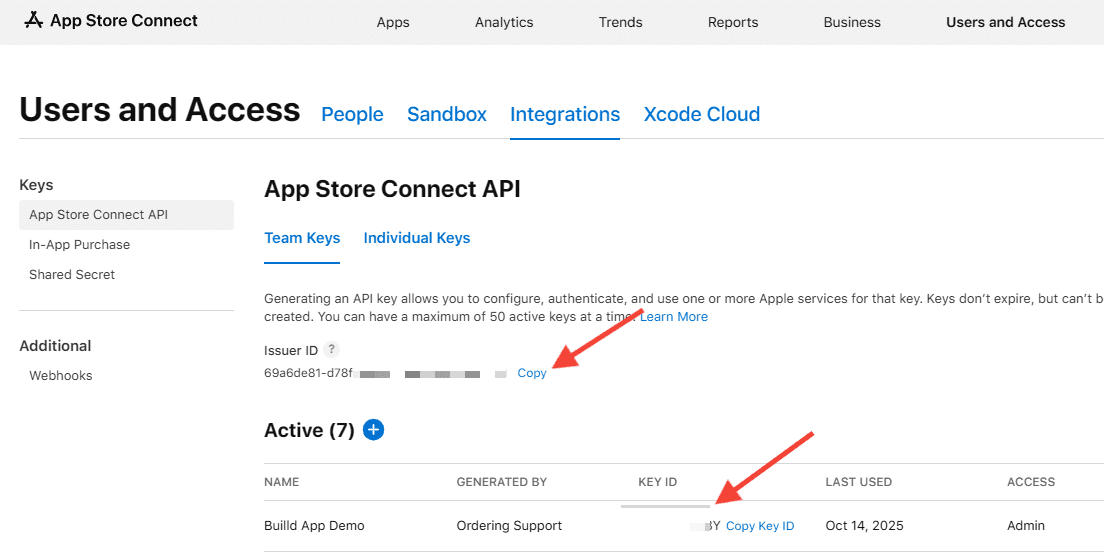
In Dashboard, add the key information to the app’s iOS build configuration. Find the Team ID in the Apple Developer account, then provide the Team ID, Key ID, Issuer ID, and the private key file through the approved secure workflow.
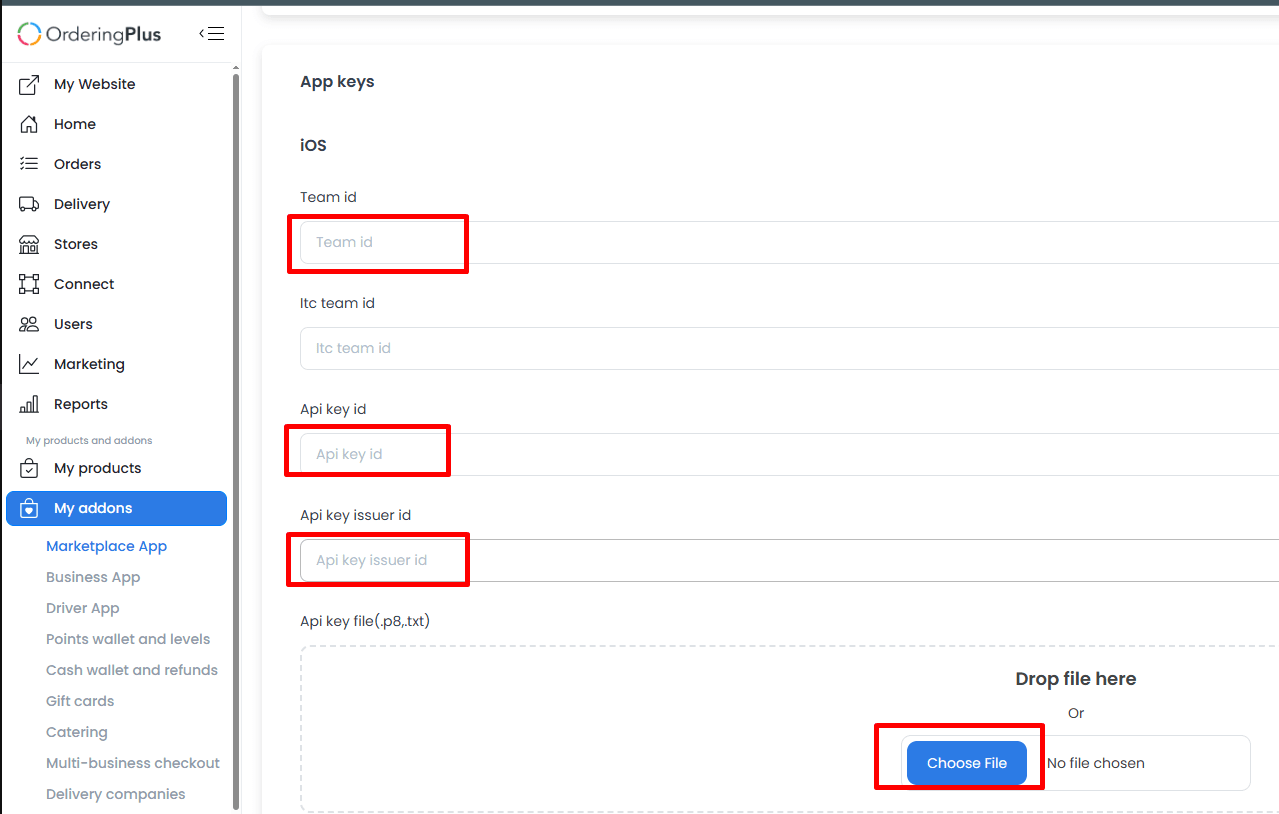
Build and test
After you save the applicable Dashboard settings, generate the iOS build:
- Use Build Test for a testable build on eligible devices.
- Use Build PRO for the App Store distribution build.
Before public submission, test the build and follow Test and publish app releases for the store-listing and review steps.