Build apps from Dashboard
Use the Dashboard to prepare the signing, configuration, visual assets, and build resources for your apps. Complete the settings that apply to the app you are building, then create a test or store-distribution build from the build controls.
Keep signing files, API keys, passwords, and provider credentials in an approved secure location. Do not put them in tickets, chat messages, or documentation.
Configure iOS
An Apple Developer account is required to configure an iOS app. The basic identifier flow applies across app types, with additional capabilities for the Customer App.
Create the main identifier
- In Apple Developer, open Identifiers.
- Select Add (+), then choose App IDs.
- Enter the app name and the bundle identifier configured for the app.
- Use Apple’s identifier rules and confirm the value before building. Changing an identifier can affect signing, store records, and the next build.
Select the required capabilities
Configure capabilities according to the app type. Missing required capabilities can prevent the app from working as intended.
| App type | Capabilities documented for this workflow |
|---|---|
| Customer App | Access WiFi Information, App Groups, Apple Pay Payment Processing, Associated Domains, Maps, Push Notifications, and Sign in with Apple |
| Driver App and Business App | Access WiFi Information, App Groups, Associated Domains, Maps, and Push Notifications |
Create the notification extension and app group
When the app uses OneSignal notifications, create a notification extension identifier in Apple Developer. Use the main identifier followed by .OneSignalNotificationServiceExtension, and enable the same applicable capabilities as the main identifier.
Create a separate app group for each app. Start with the main identifier and add .onesignal; Apple adds the group. prefix automatically. Do not remove that prefix. For example, a main identifier of com.example.app uses an app group such as group.com.example.app.onesignal.
Return to each identifier, edit App Groups, select the matching app group, and save the change. Apply the same app-group setting to the notification extension.
Add a Merchant ID when the Customer App uses Apple Pay
For the Customer App, create a Merchant ID in Apple Developer with the main identifier. Apple adds the merchant. prefix automatically. Add the resulting value to the Dashboard’s Apple Merchant ID setting, then select the merchant under Apple Pay Payment Processing for the app identifier and save it.
Create the App Store Connect API key
In App Store Connect, go to Users and Access → Integrations → App Store Connect API, then create a Team Key with the access required for the build workflow. Save the private .p8 key when you create it, together with its Key ID and Issuer ID, in an approved secure location. The key details can be reused for the apps that use the same App Store Connect team.
Complete the iOS settings in Dashboard
In the app configuration, complete the fields that apply to the release:
- Basic App Settings: Name, Package/Identifier, Version, and Description.
- Constants: Apple Merchant ID when applicable; Google Maps API Key when the app uses maps; optional Facebook ID and Google Reversed Client ID when the corresponding login is enabled; and any optional chat-integration settings confirmed for the project.
- Files: Google service files for the login configuration, when applicable.
- App keys: Team ID, API Key ID, API Key Issuer ID, and the private key file. The ITC team ID can remain blank when it is not required by the project configuration.
Select Save after entering the settings. If a build shows The requested URL returned error: 502 without a certificate or provisioning-profile error, retry the build once. If it happens again, share the error details through the normal support channel without attaching credentials.
Configure Android
Android signing uses a keystore file for Play Store distribution. Prepare the following values through the approved secure process:
- Key alias
- Key password
- Store file in
.jksformat - Store password, which matches the key password in this workflow
- An optional Play Store credential file
Do not copy the passwords or keystore file into a support request. If the team must help with Android signing, use the approved secret-sharing process.
Complete the Dashboard setup
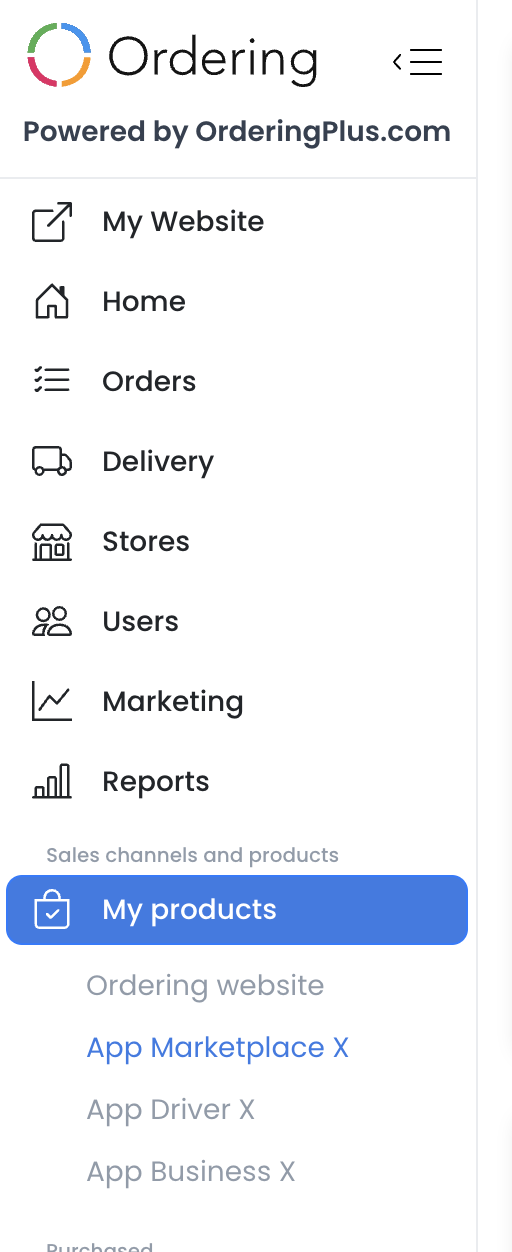
1. Open My Products
Sign in to Dashboard and select My Products in the left sidebar.
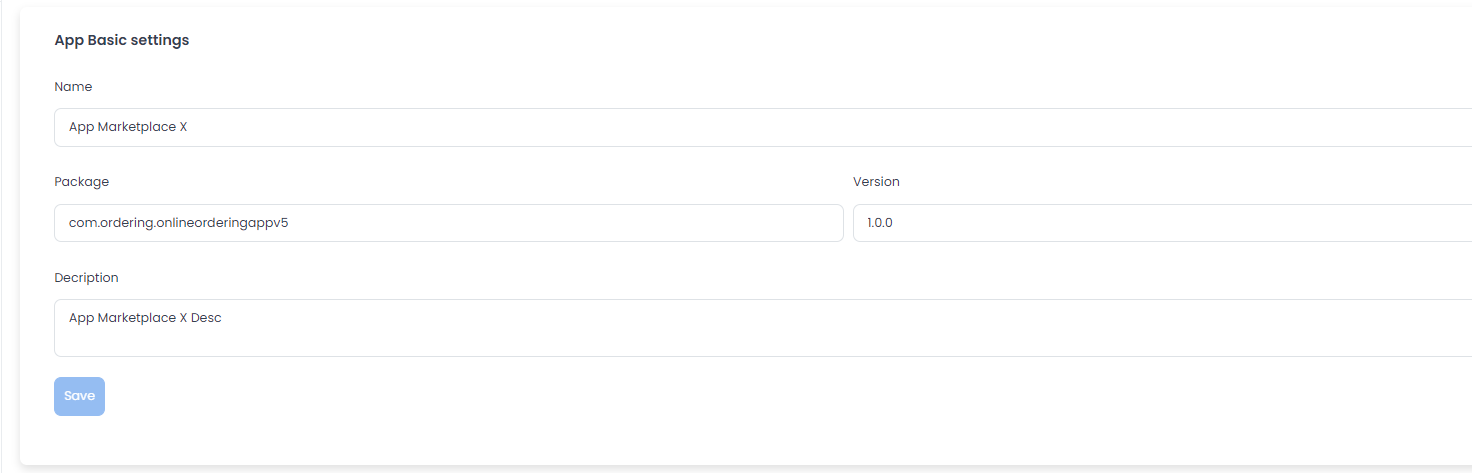
2. Add basic app settings
Configure the app’s Name, Package, Version, and Description.
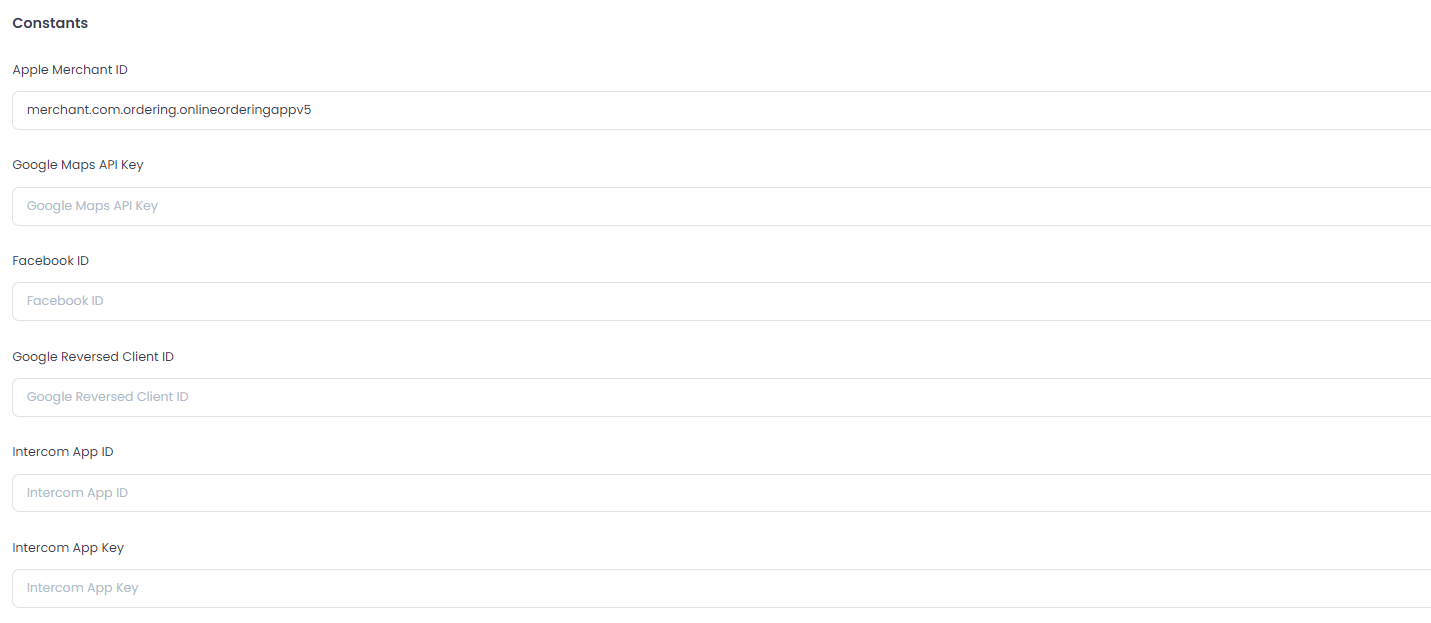
3. Add constants
Add the constants needed by your configuration:
- Merchant ID, when the app uses the associated store payment setup.
- Google Maps API Key, when the app uses maps.
- Facebook ID, when Facebook login is enabled.
- Google Reversed Client ID, when Google login is enabled.
- Optional chat-integration settings only when current integration documentation instructs you to configure them.
The app can be built without optional constants, but configure the Google Maps API Key when the app uses maps and add login identifiers before testing the associated login flow.
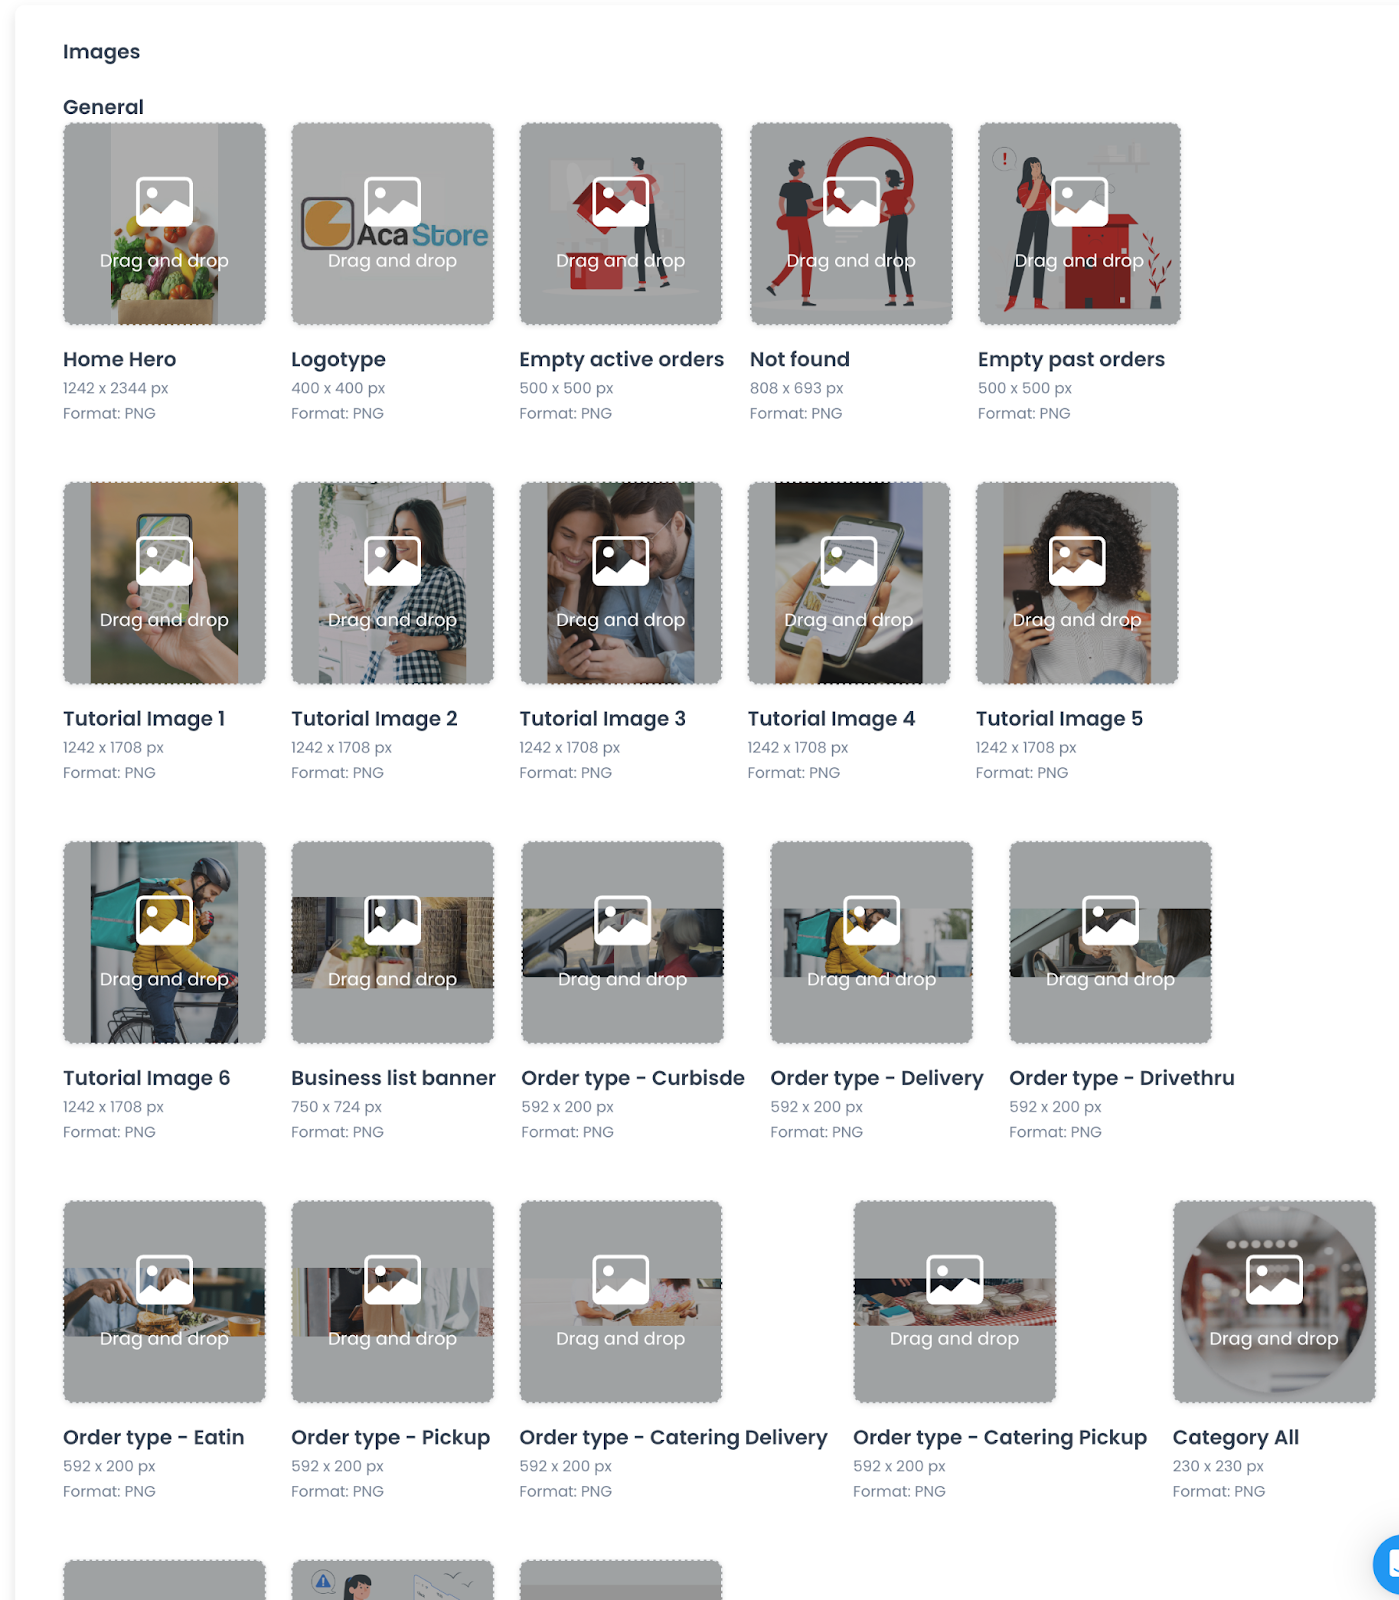
4. Add in-app images
Upload the images used in the app experience:
- Home Hero and Logotype
- Empty Active Orders, Search Not Found, and Empty Past Orders images
- Six tutorial images and a Store List Banner
- Order-type images for Curbside, Delivery, Drive-thru, Eat-in, Pickup, Catering Delivery, and Catering Pickup
- All Categories Result, Long Logo, No Internet, and Dummy Product images
Check the branded and tutorial images shown inside each app. In Customer/Marketplace App, review Tutorial Image 4; if it depicts a device or platform that does not match the iOS experience, replace it with artwork appropriate for that experience. In Driver App, review Tutorial Image 5 and replace the generic “Driver App” label with your app’s name. In Business App, check all in-app branded and tutorial assets for placeholders and replace any that remain with the appropriate project artwork. These are images displayed inside the app. Store listing screenshots are separate: they appear on the App Store or Google Play listing. Prepare those images with Update store listing images.
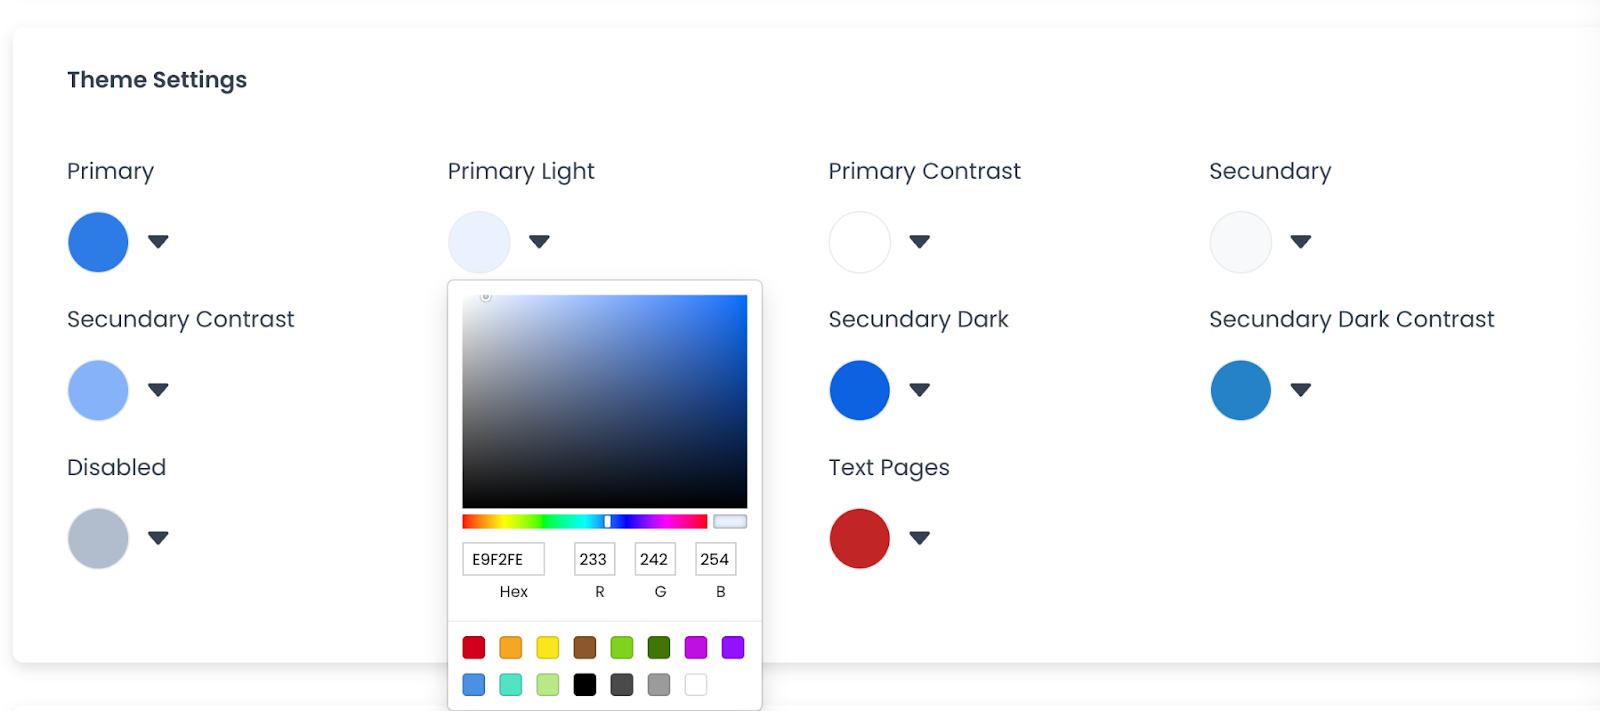
5. Configure theme colors
Enter each color code or select the color from the palette, then save the settings.
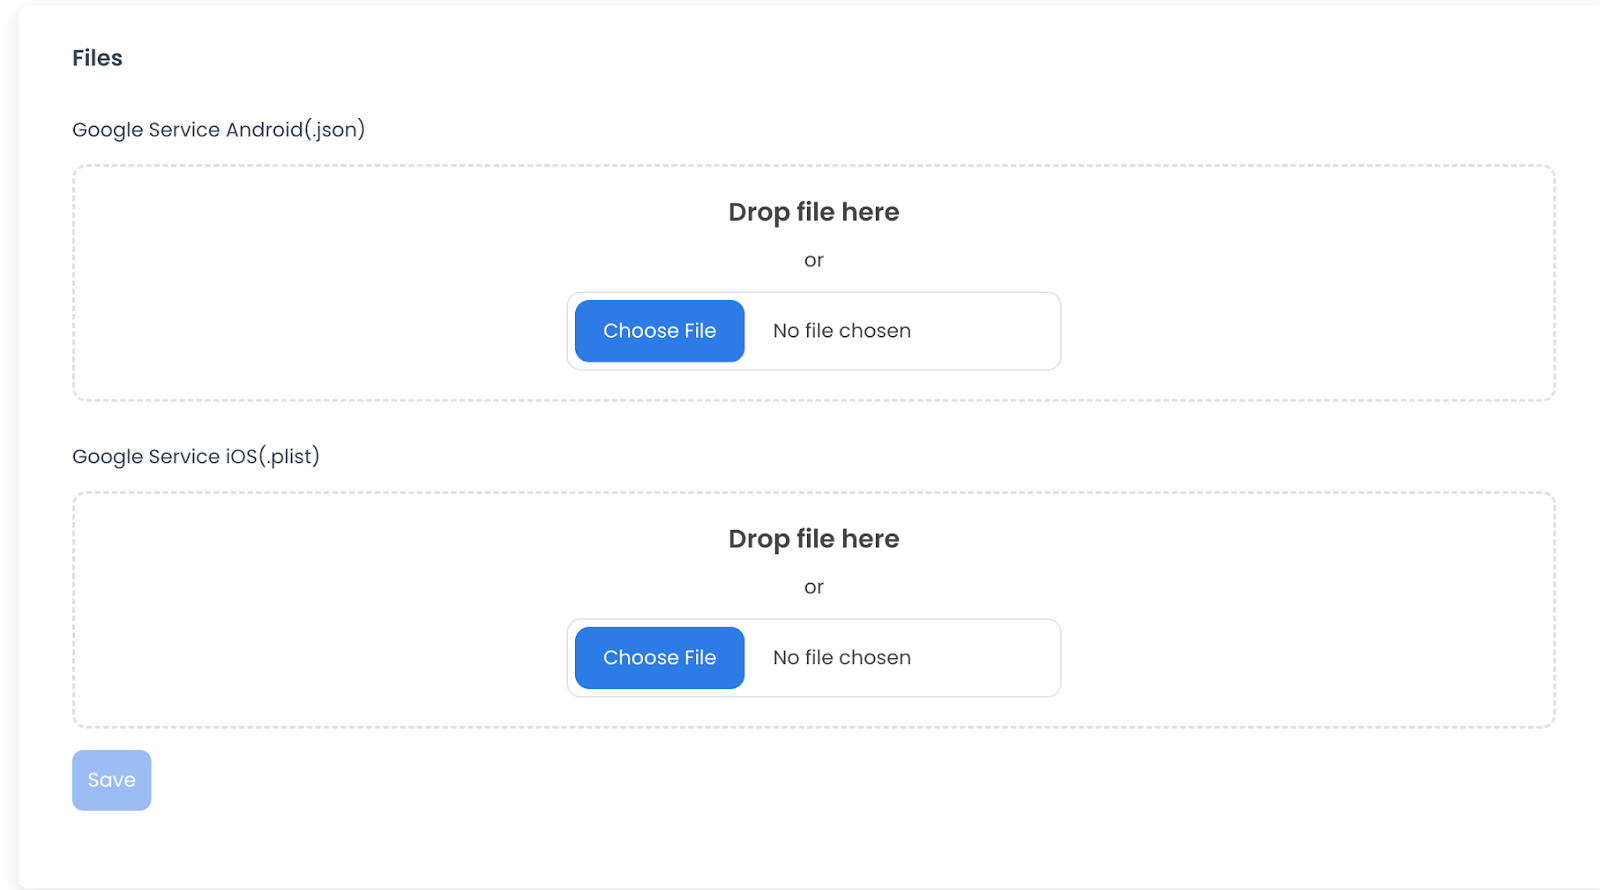
6. Add Google service files when needed
If the app uses Google login, upload the required Google service files in Files: the Android .json file and the iOS .plist file. This setting is optional when Google login is not enabled.
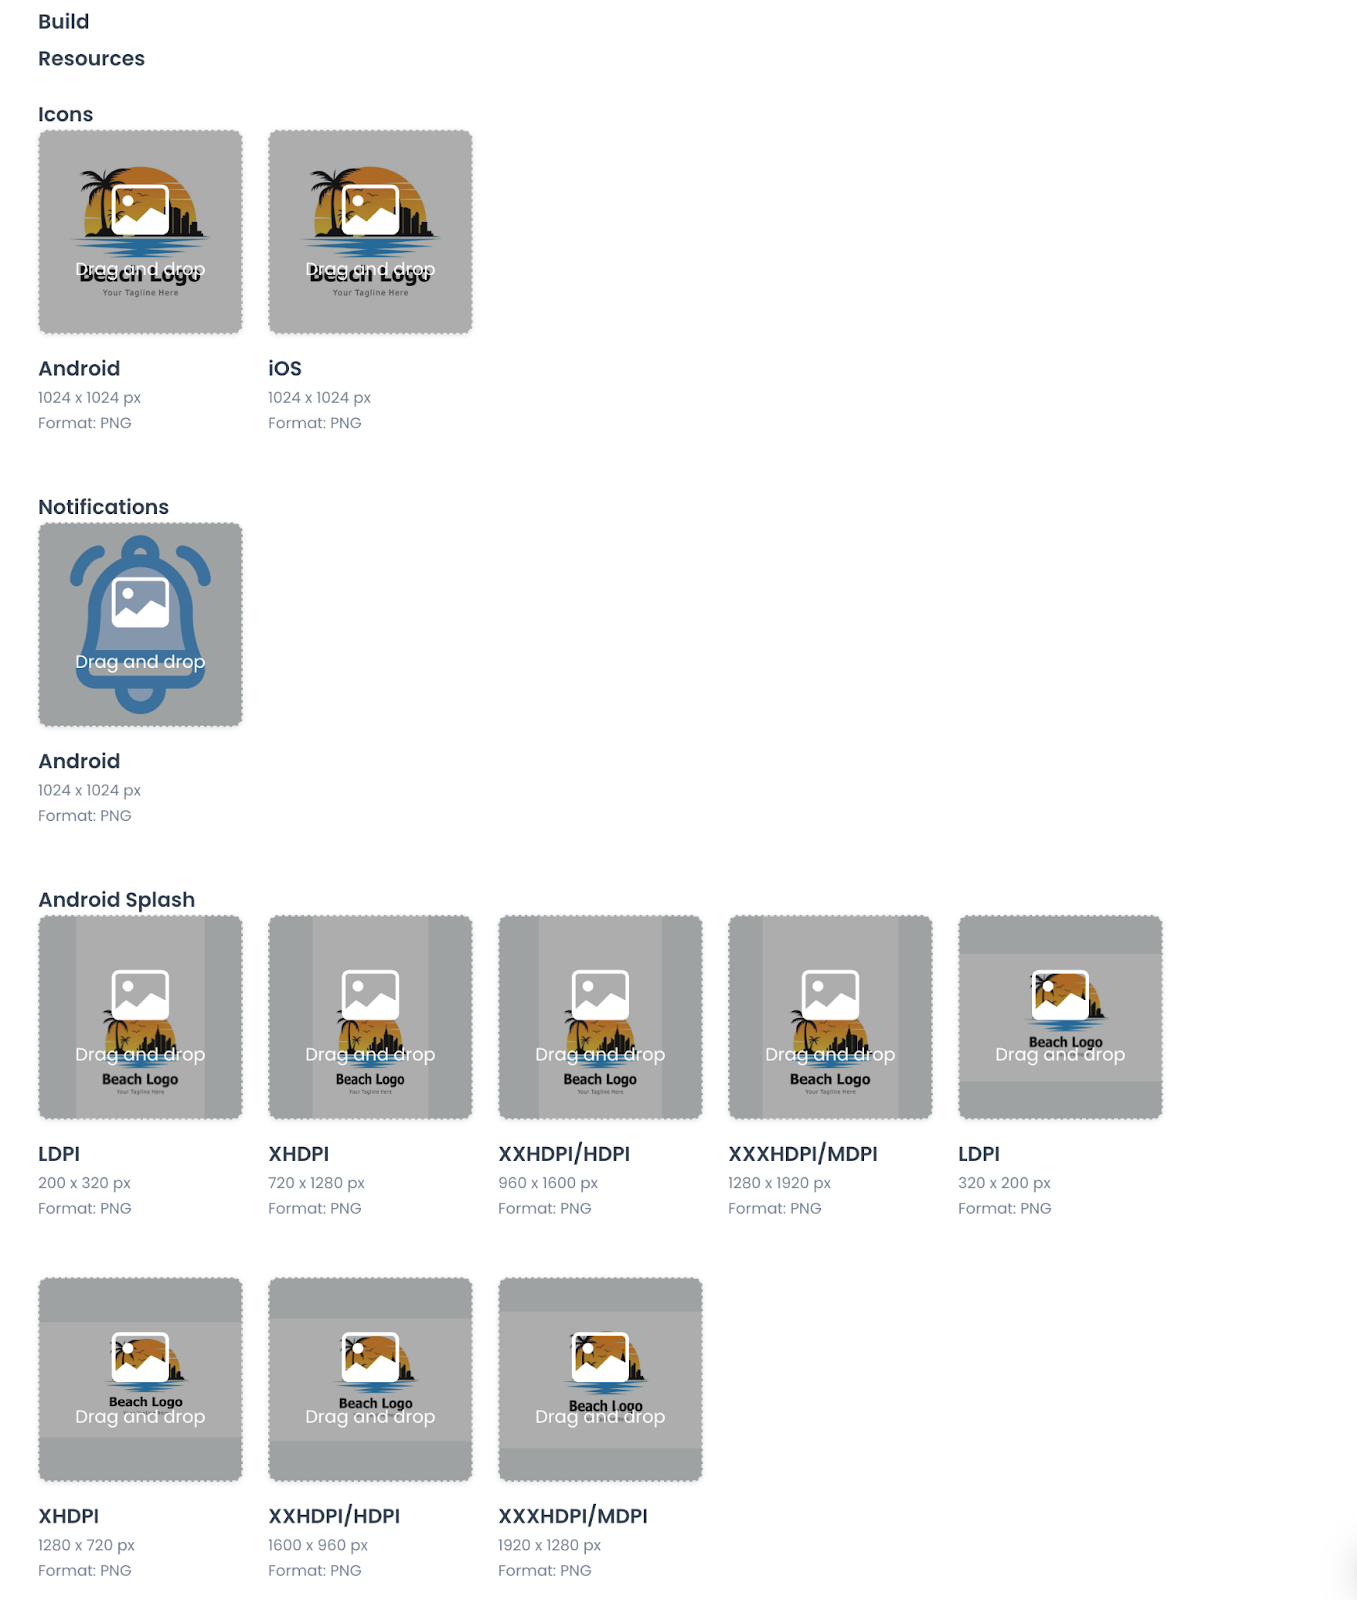
7. Add store build resources
Upload the store assets required for the Android and iOS builds, including app icons, Android notification icons, and splash screens.
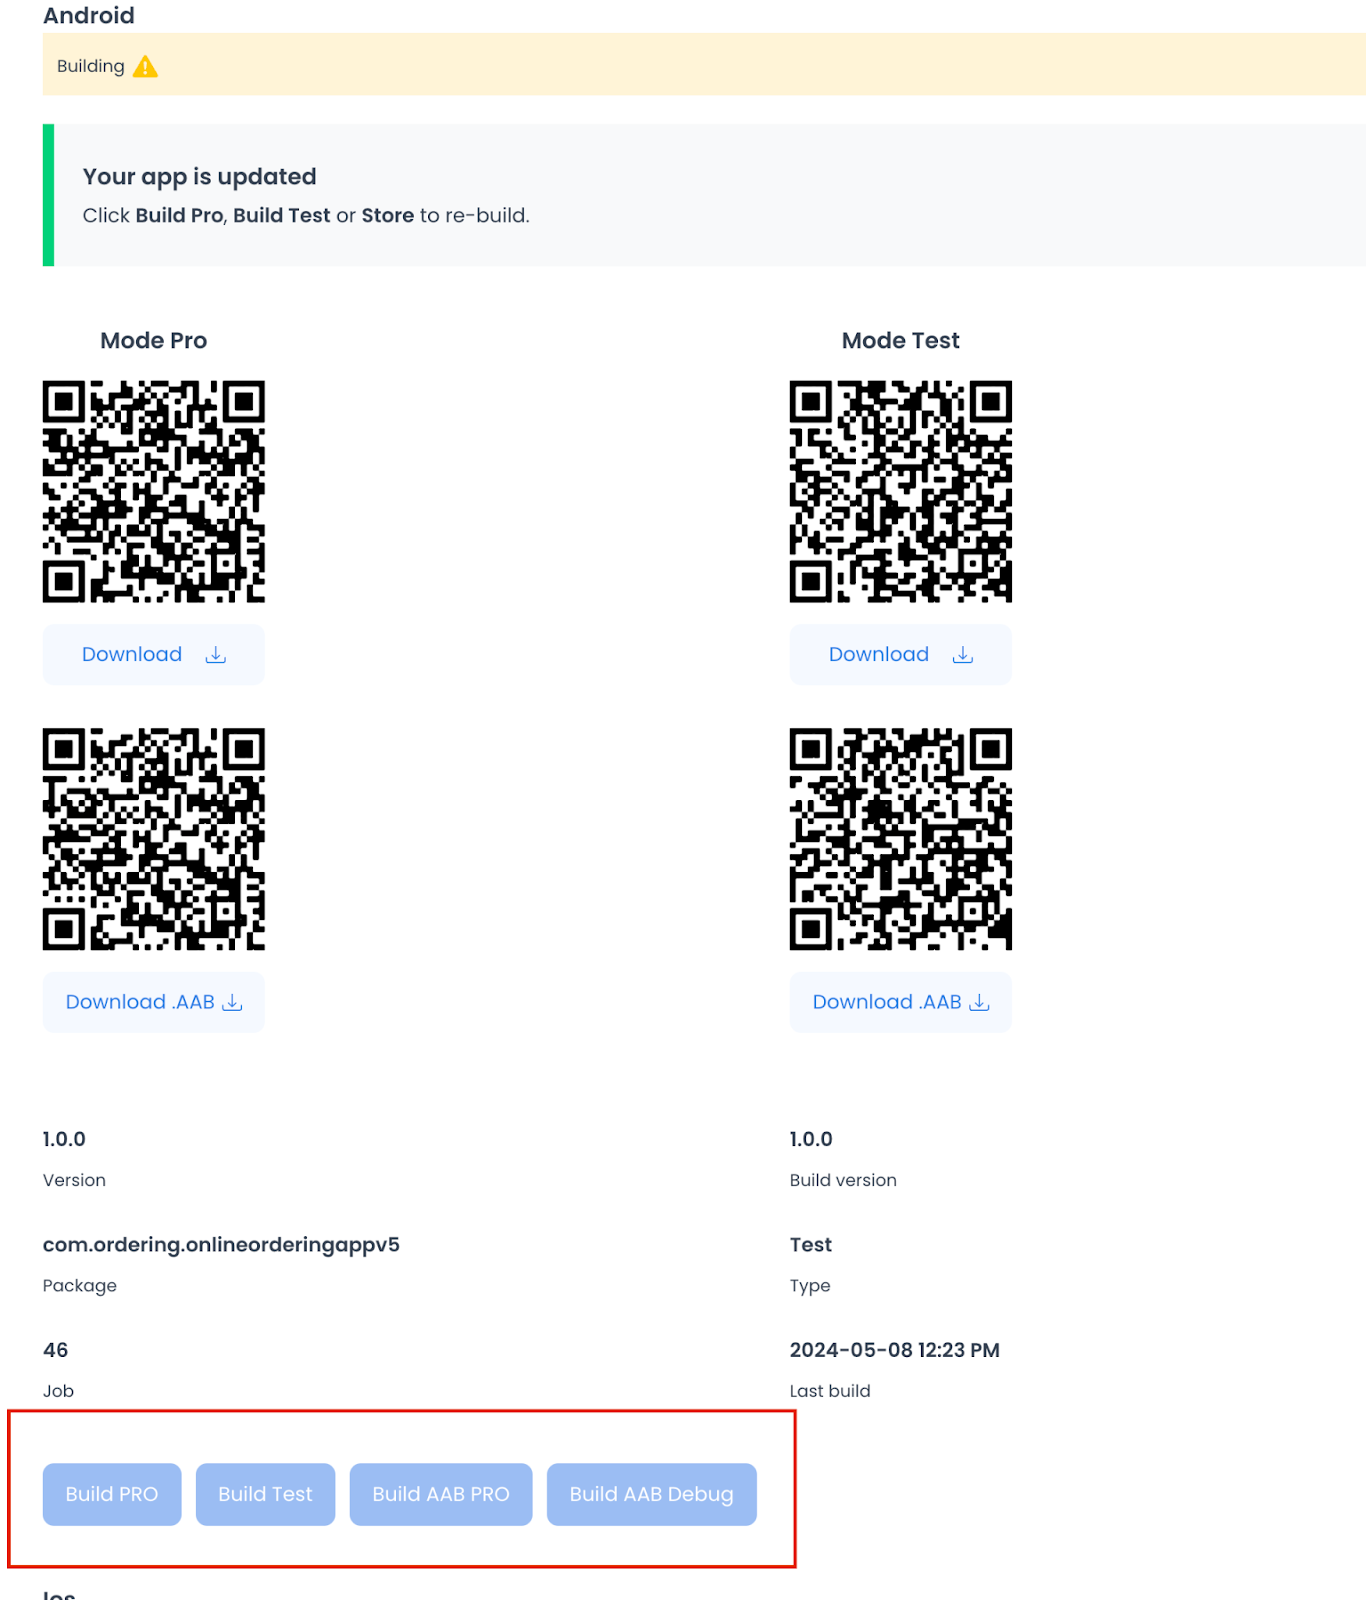
Build the app
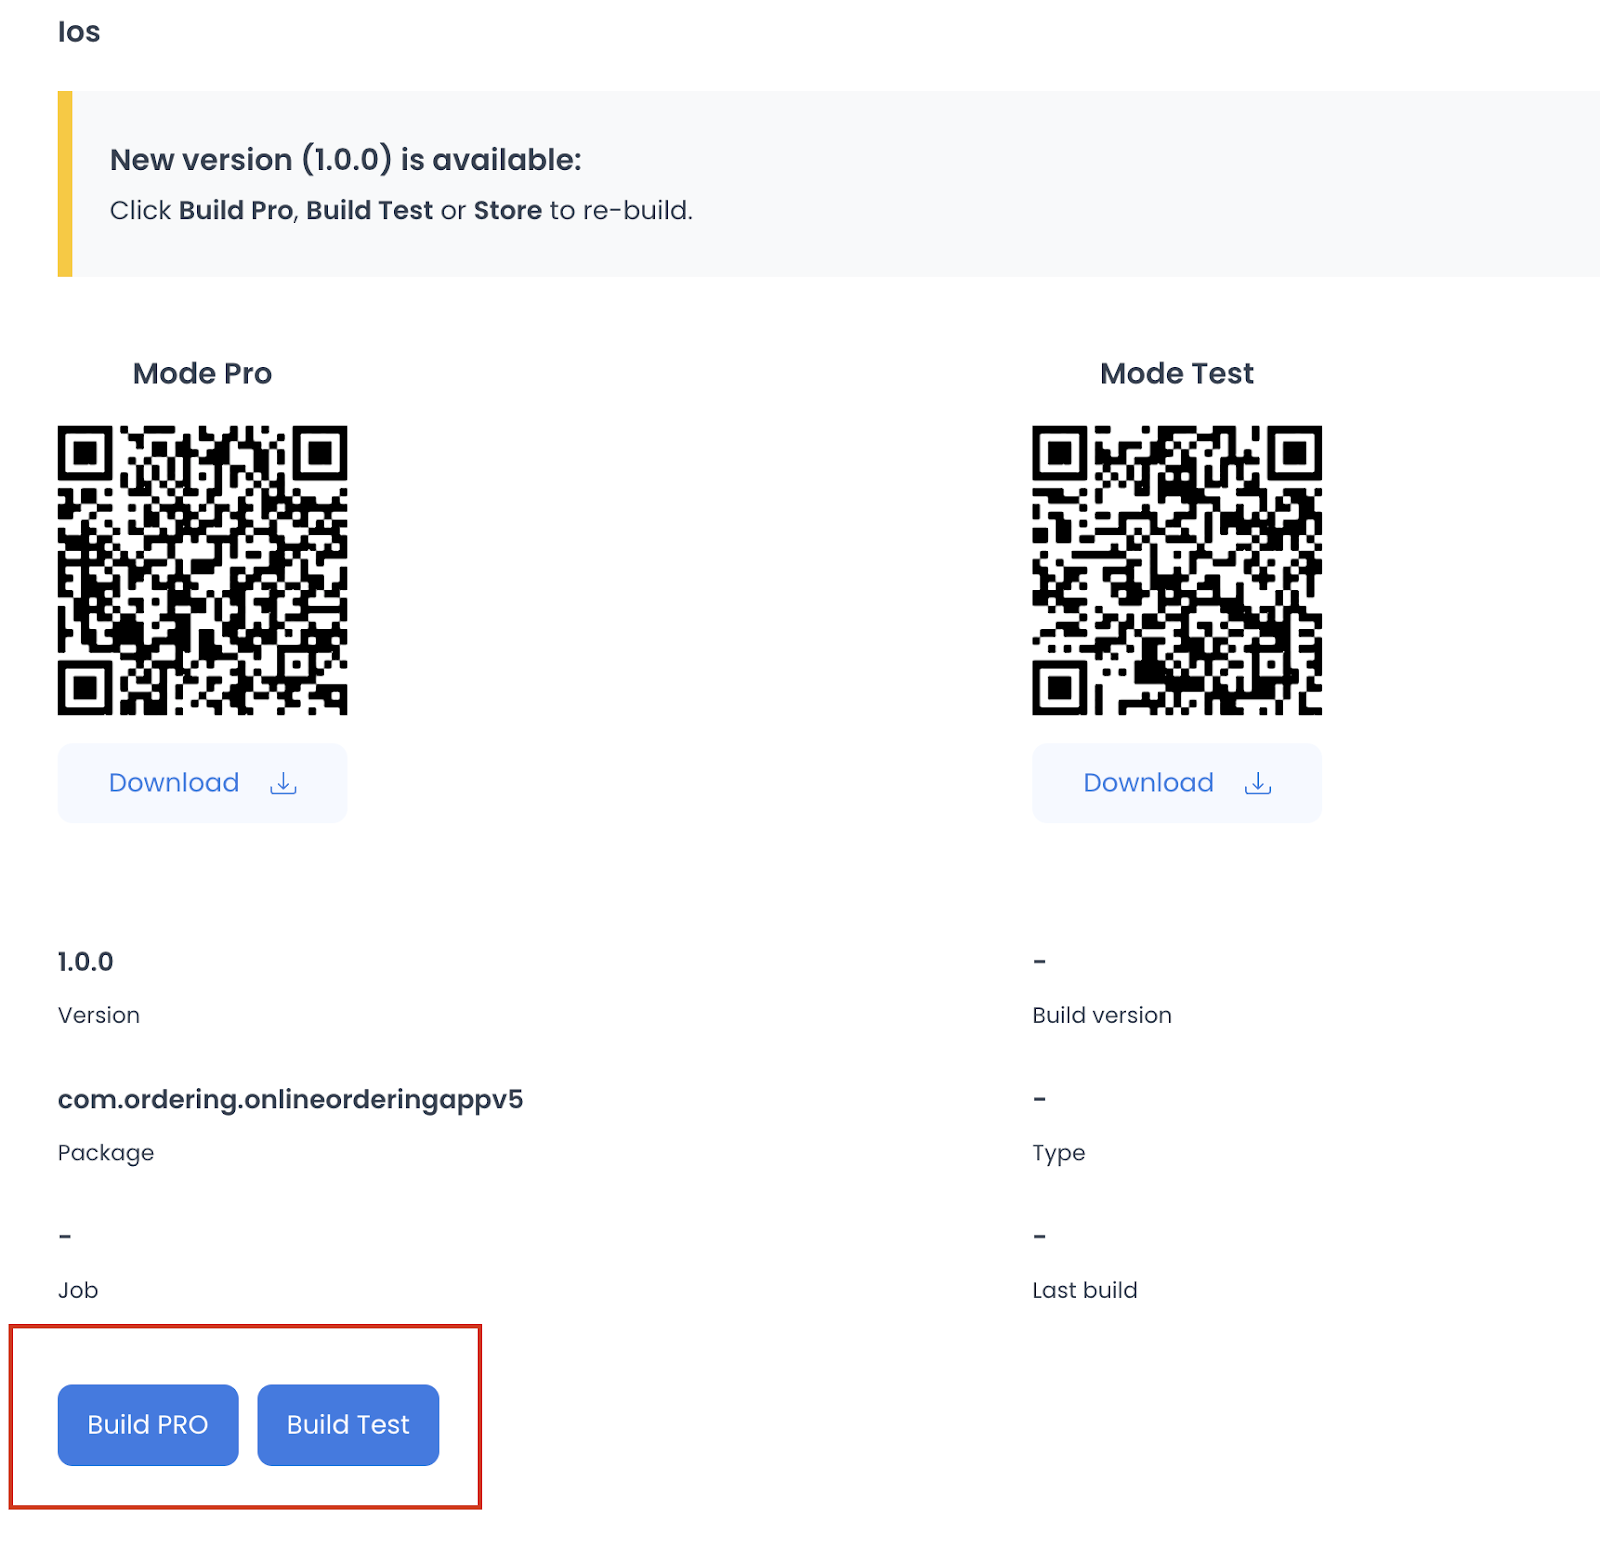
Scroll to the build controls. Dashboard separates the build actions for Android and iOS. A build produces the app file and a QR code after the generation process finishes.
Choose the build action that matches the platform and purpose: use a test build to install and validate the app, and use the applicable distribution build when preparing a store submission. Build controls and available formats can vary by platform and project configuration; follow the labels shown in Dashboard and the platform-specific steps below. A successful build creates an installable or uploadable artifact, but does not by itself publish the app or guarantee store approval.
Android build modes
| Build control | Use |
|---|---|
| Build Test | Creates a test format for installation on a device. |
| Build AAB PRO | Creates the Android App Bundle format used for Google Play distribution. |
| Build PRO | A legacy distribution format for specific cases; use it only when the release workflow requires it. |
| Build AAB Debug | An advanced developer option. |
iOS build modes
- Build Test creates a test format for installation on an eligible device. Register the device UDID in Apple Developer Devices, enable the device’s required developer settings, then create a new test build.
- Build PRO creates the format used for App Store submission.
Next steps
After Dashboard generates the test or distribution build, use the QR code or the generated file for the applicable testing or store-upload workflow. Test the app before public submission, then follow Test and publish app releases for the release lifecycle.