Set up Stripe Connect for your platform
Historical platform OAuth configuration
This procedure preserves a historical OAuth-style setup and its captured screens. It is not a new Connect implementation guide. Before changing an existing configuration, identify the account model, onboarding owner, charge pattern, merchant-of-record responsibility, fee collection, and negative-balance liability, then compare the current setup with Stripe’s onboarding guidance.
Historical account topology
The preserved procedure describes one primary Stripe account for the Dashboard and a separate Stripe account for each business. It says that a different business account could be linked per business while the primary account remained the same.
This is a record of the captured legacy topology, not a current configuration model. It does not establish an available authorization or OAuth path, account onboarding, payment settlement, payout behavior, or a successful connection.
Prepare the platform account
- Use the intended Stripe platform account and complete the provider requirements that apply to it. A Stripe account or Dashboard session does not by itself establish live-payment capability.
- In Stripe Dashboard, open Settings and then Connect.
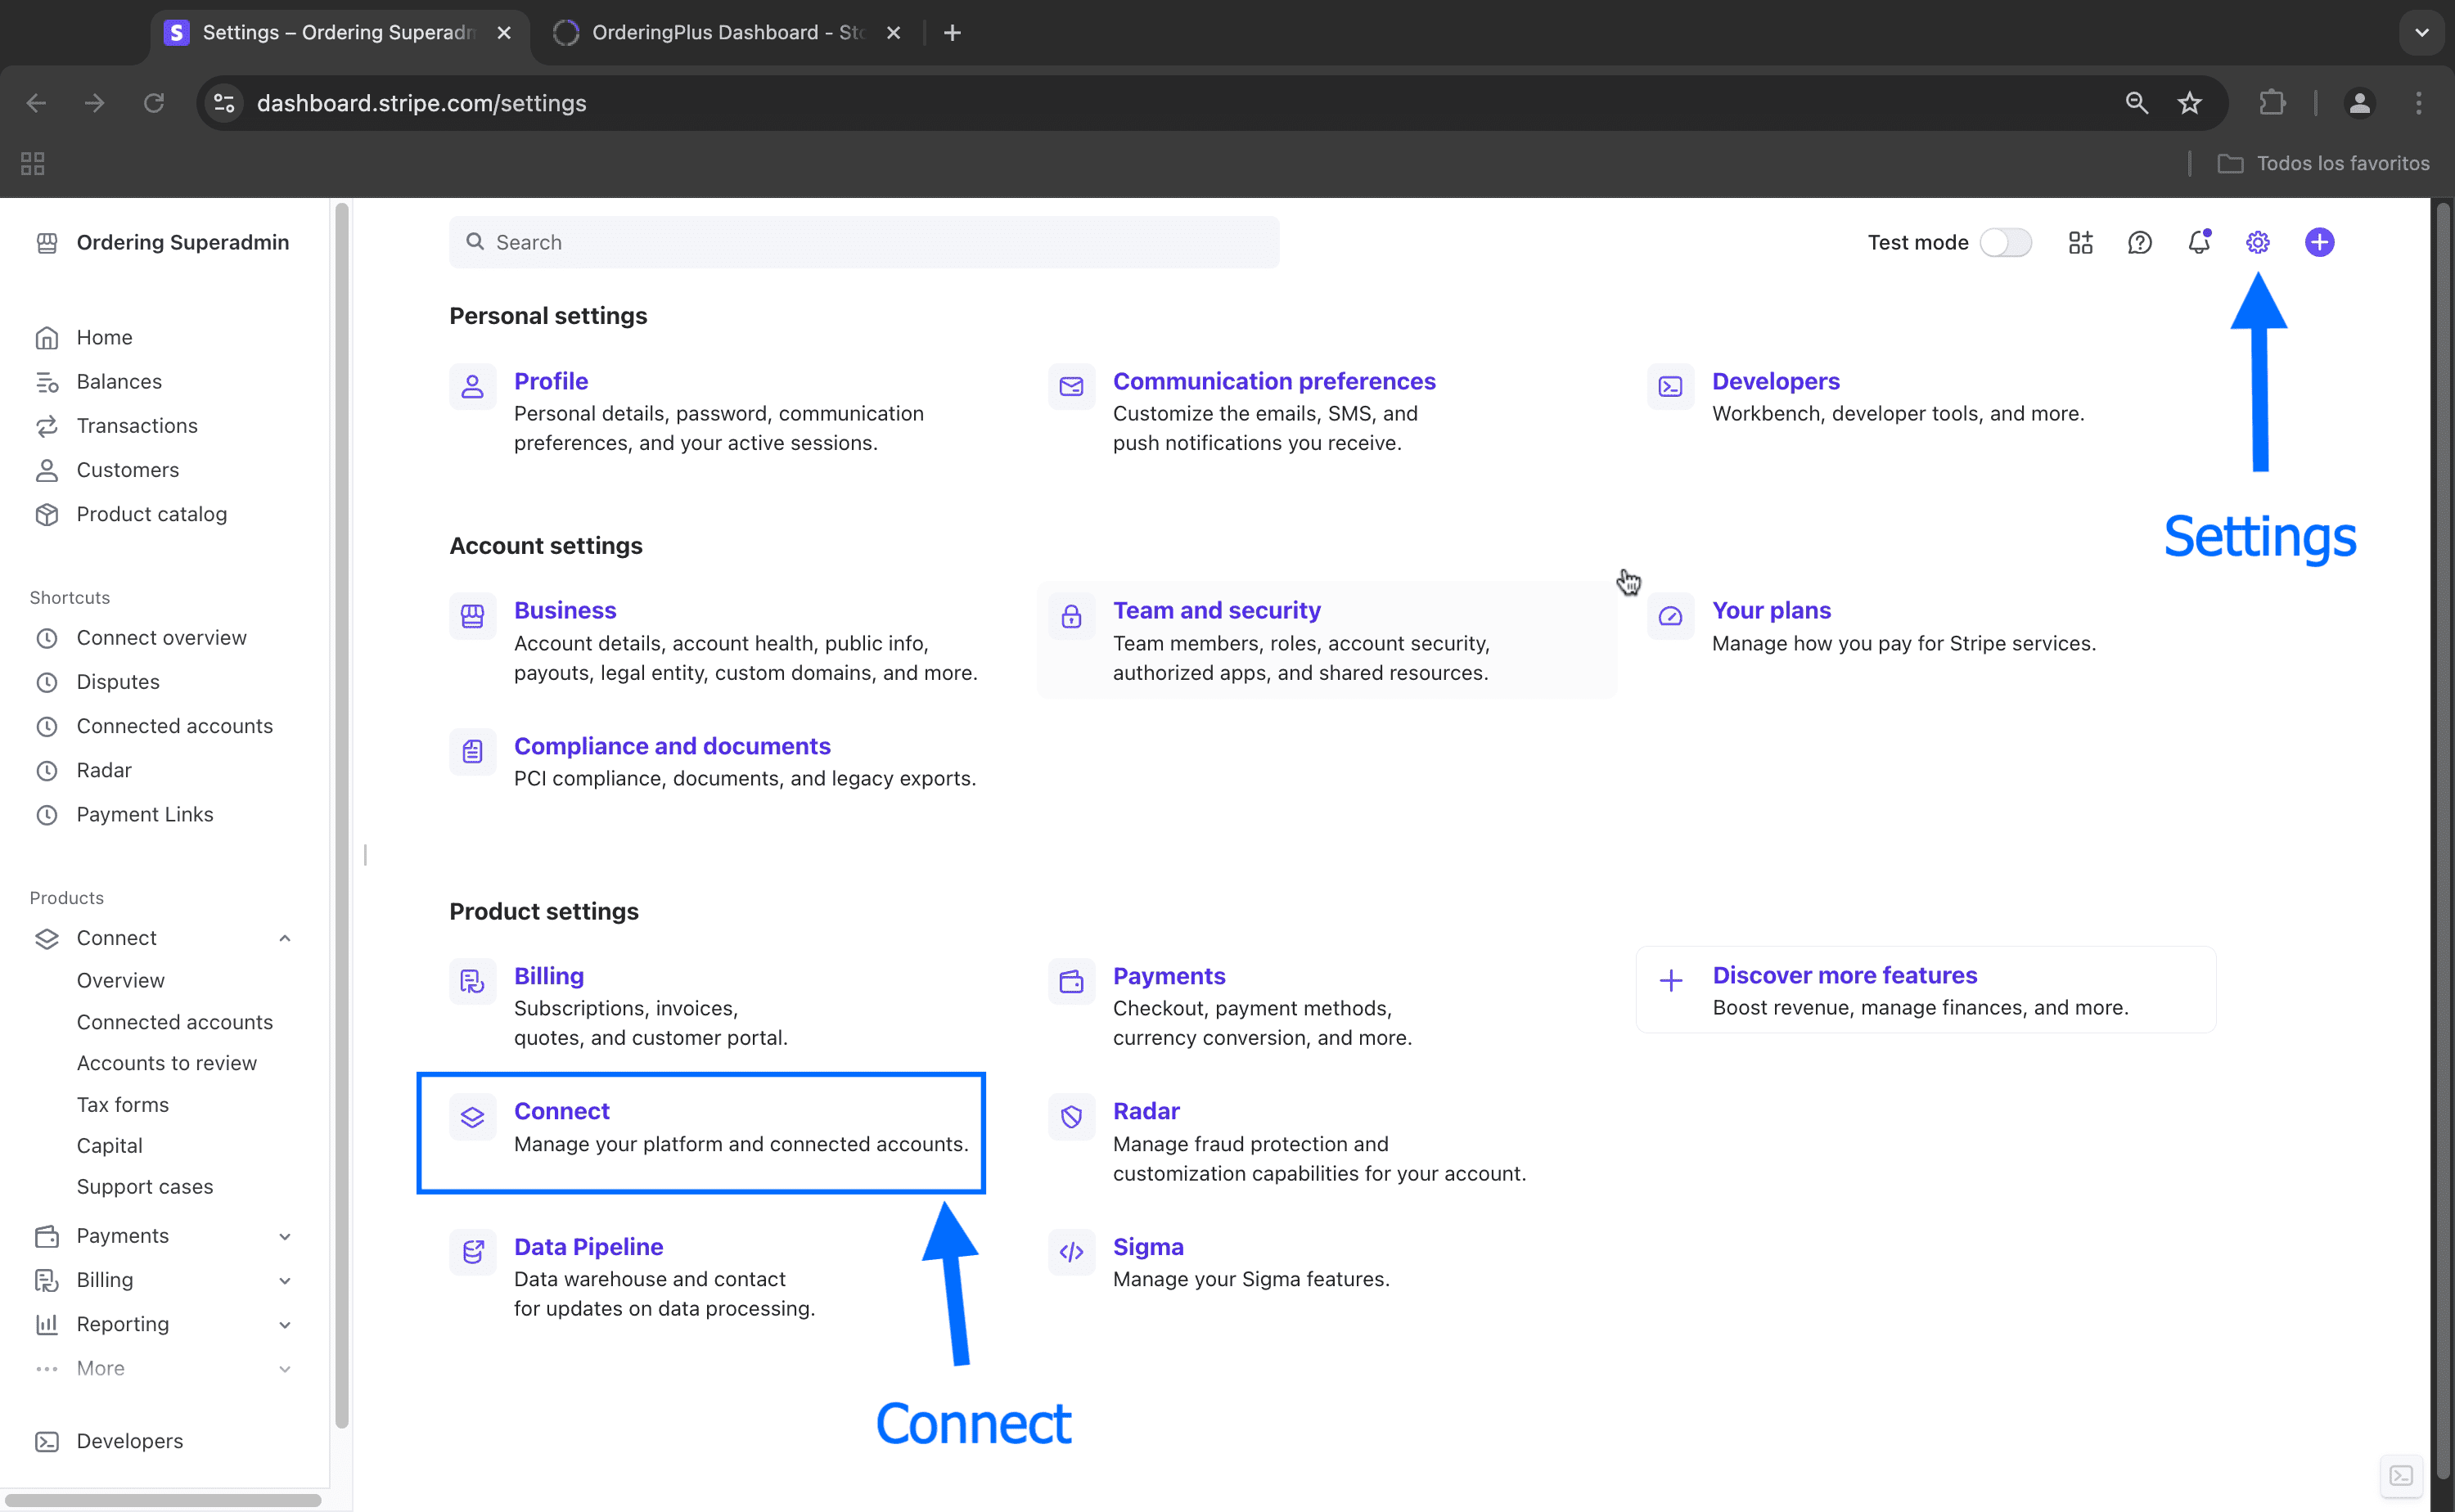
Open the historical full-size reference
- Review Onboarding Options and the country scope for the accounts that will connect. Current Stripe onboarding requirements vary by account and country.
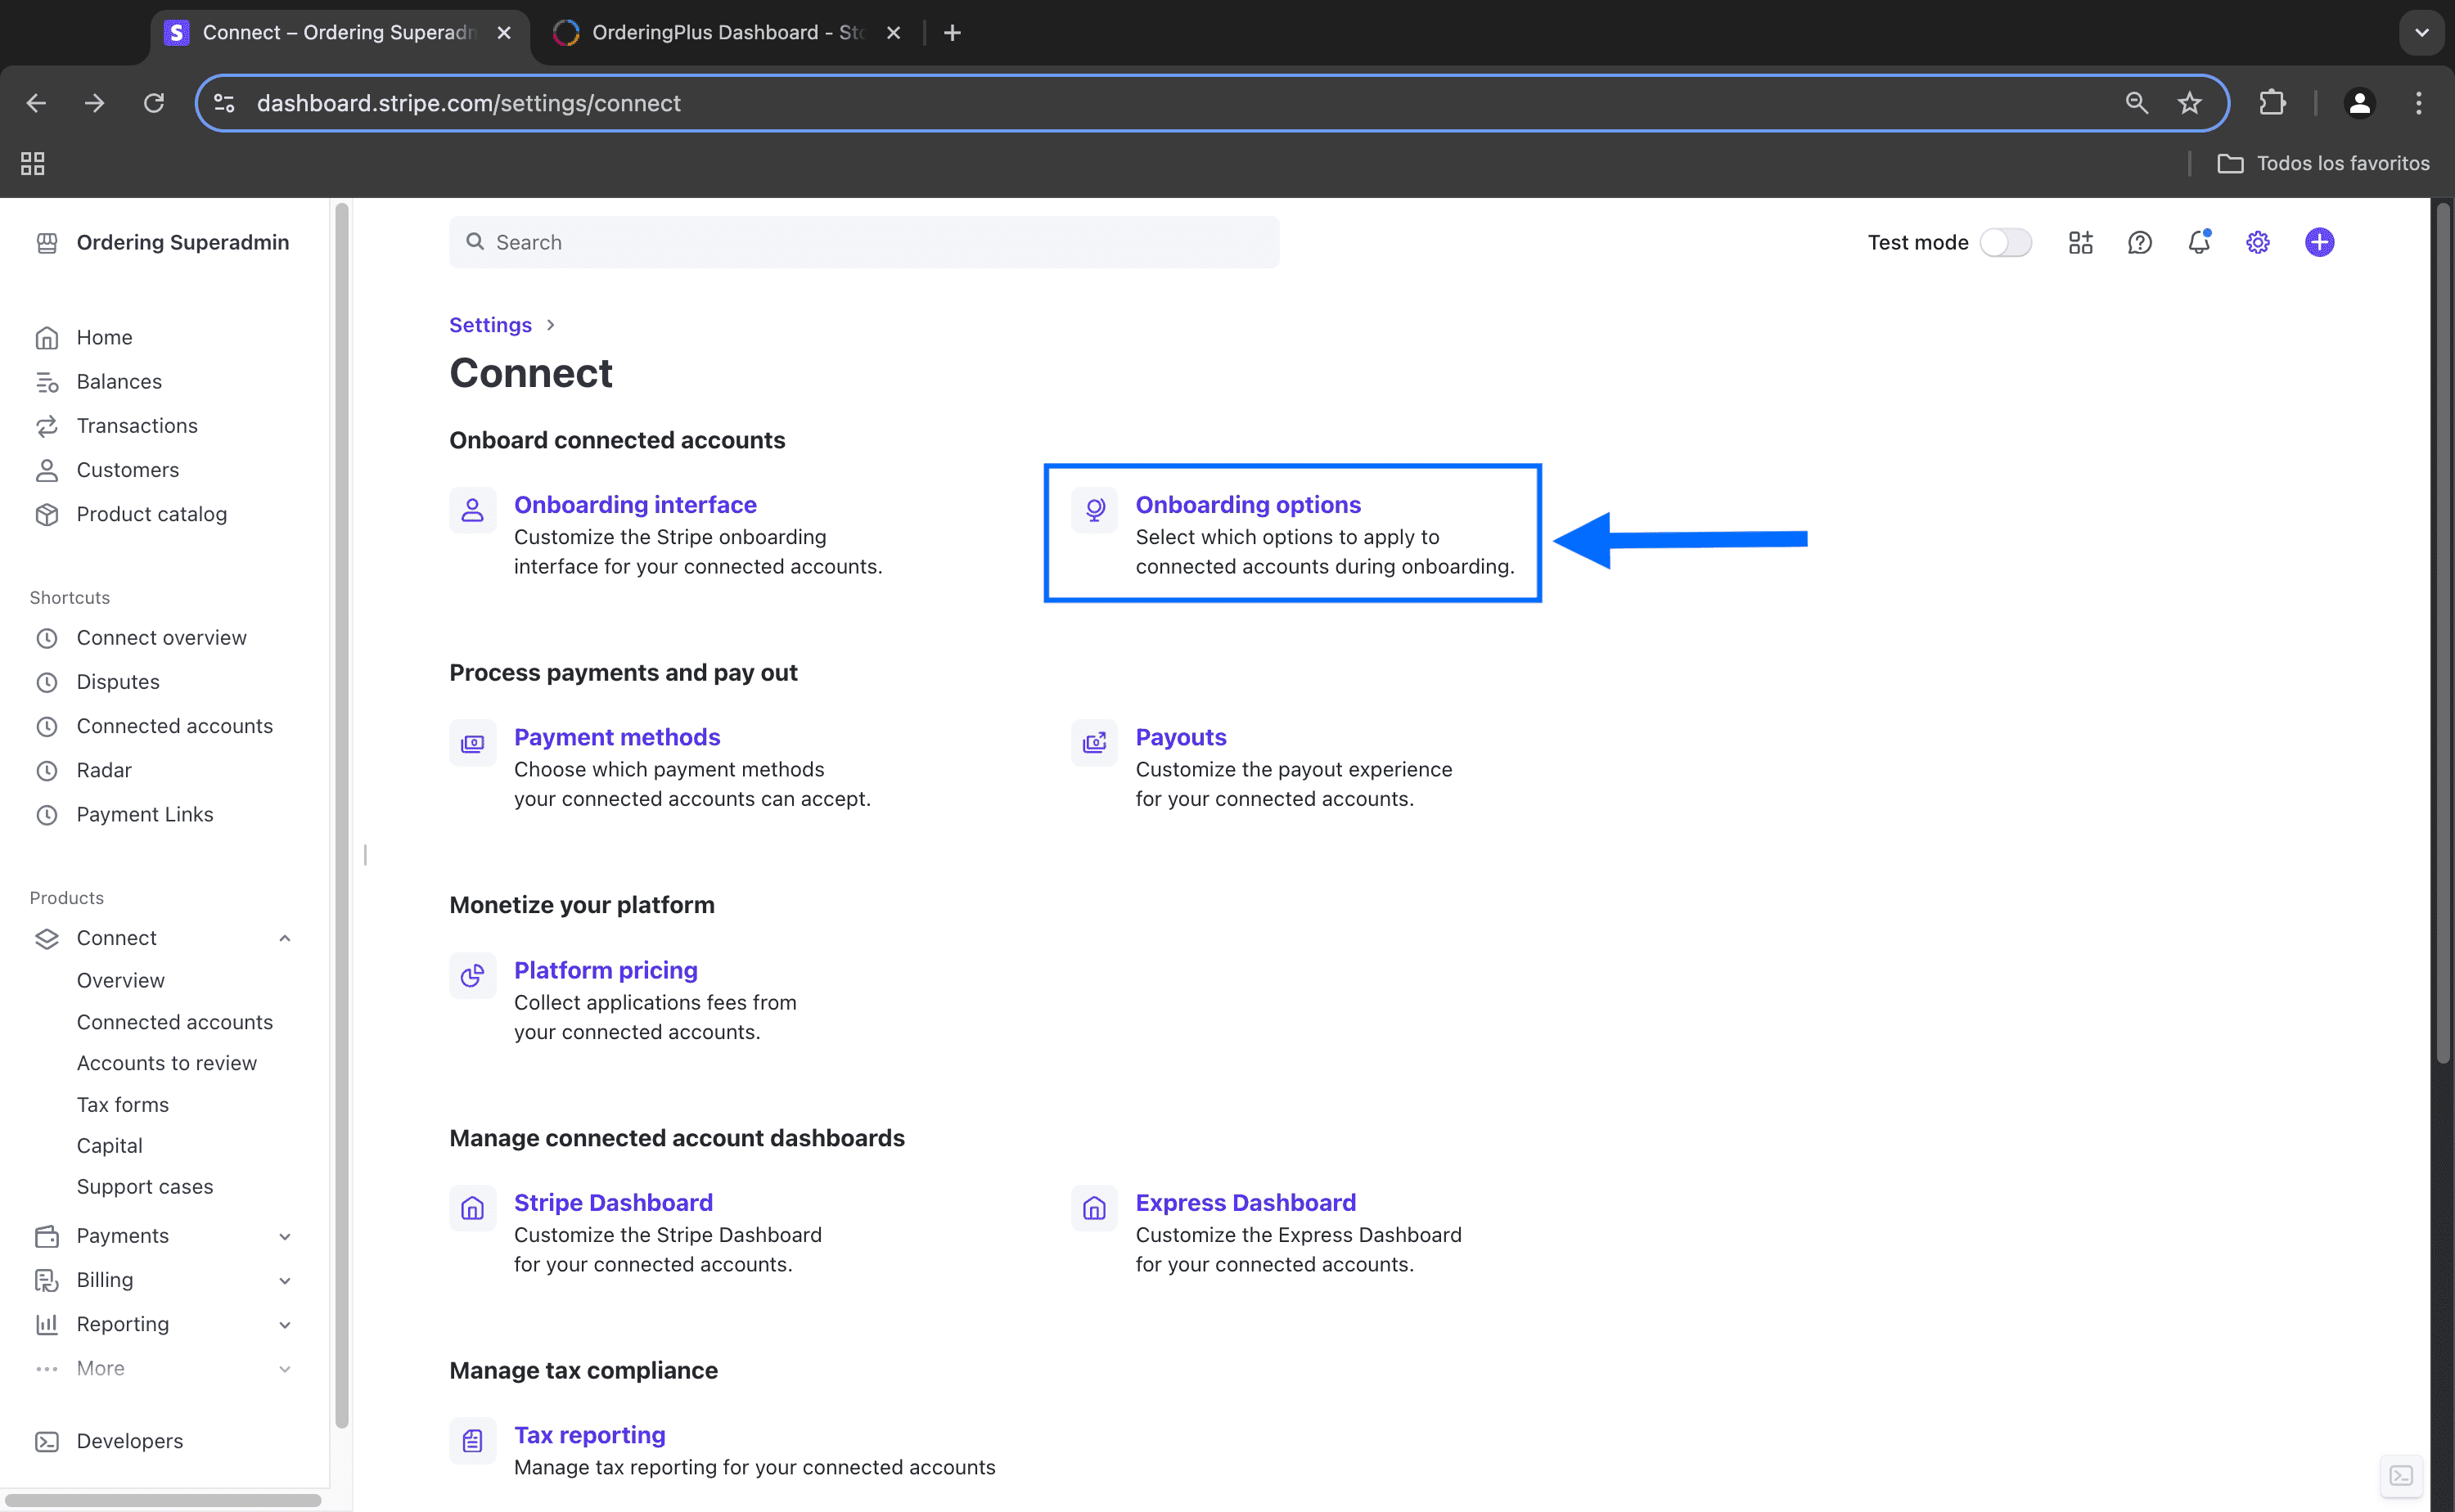
Open the historical full-size reference
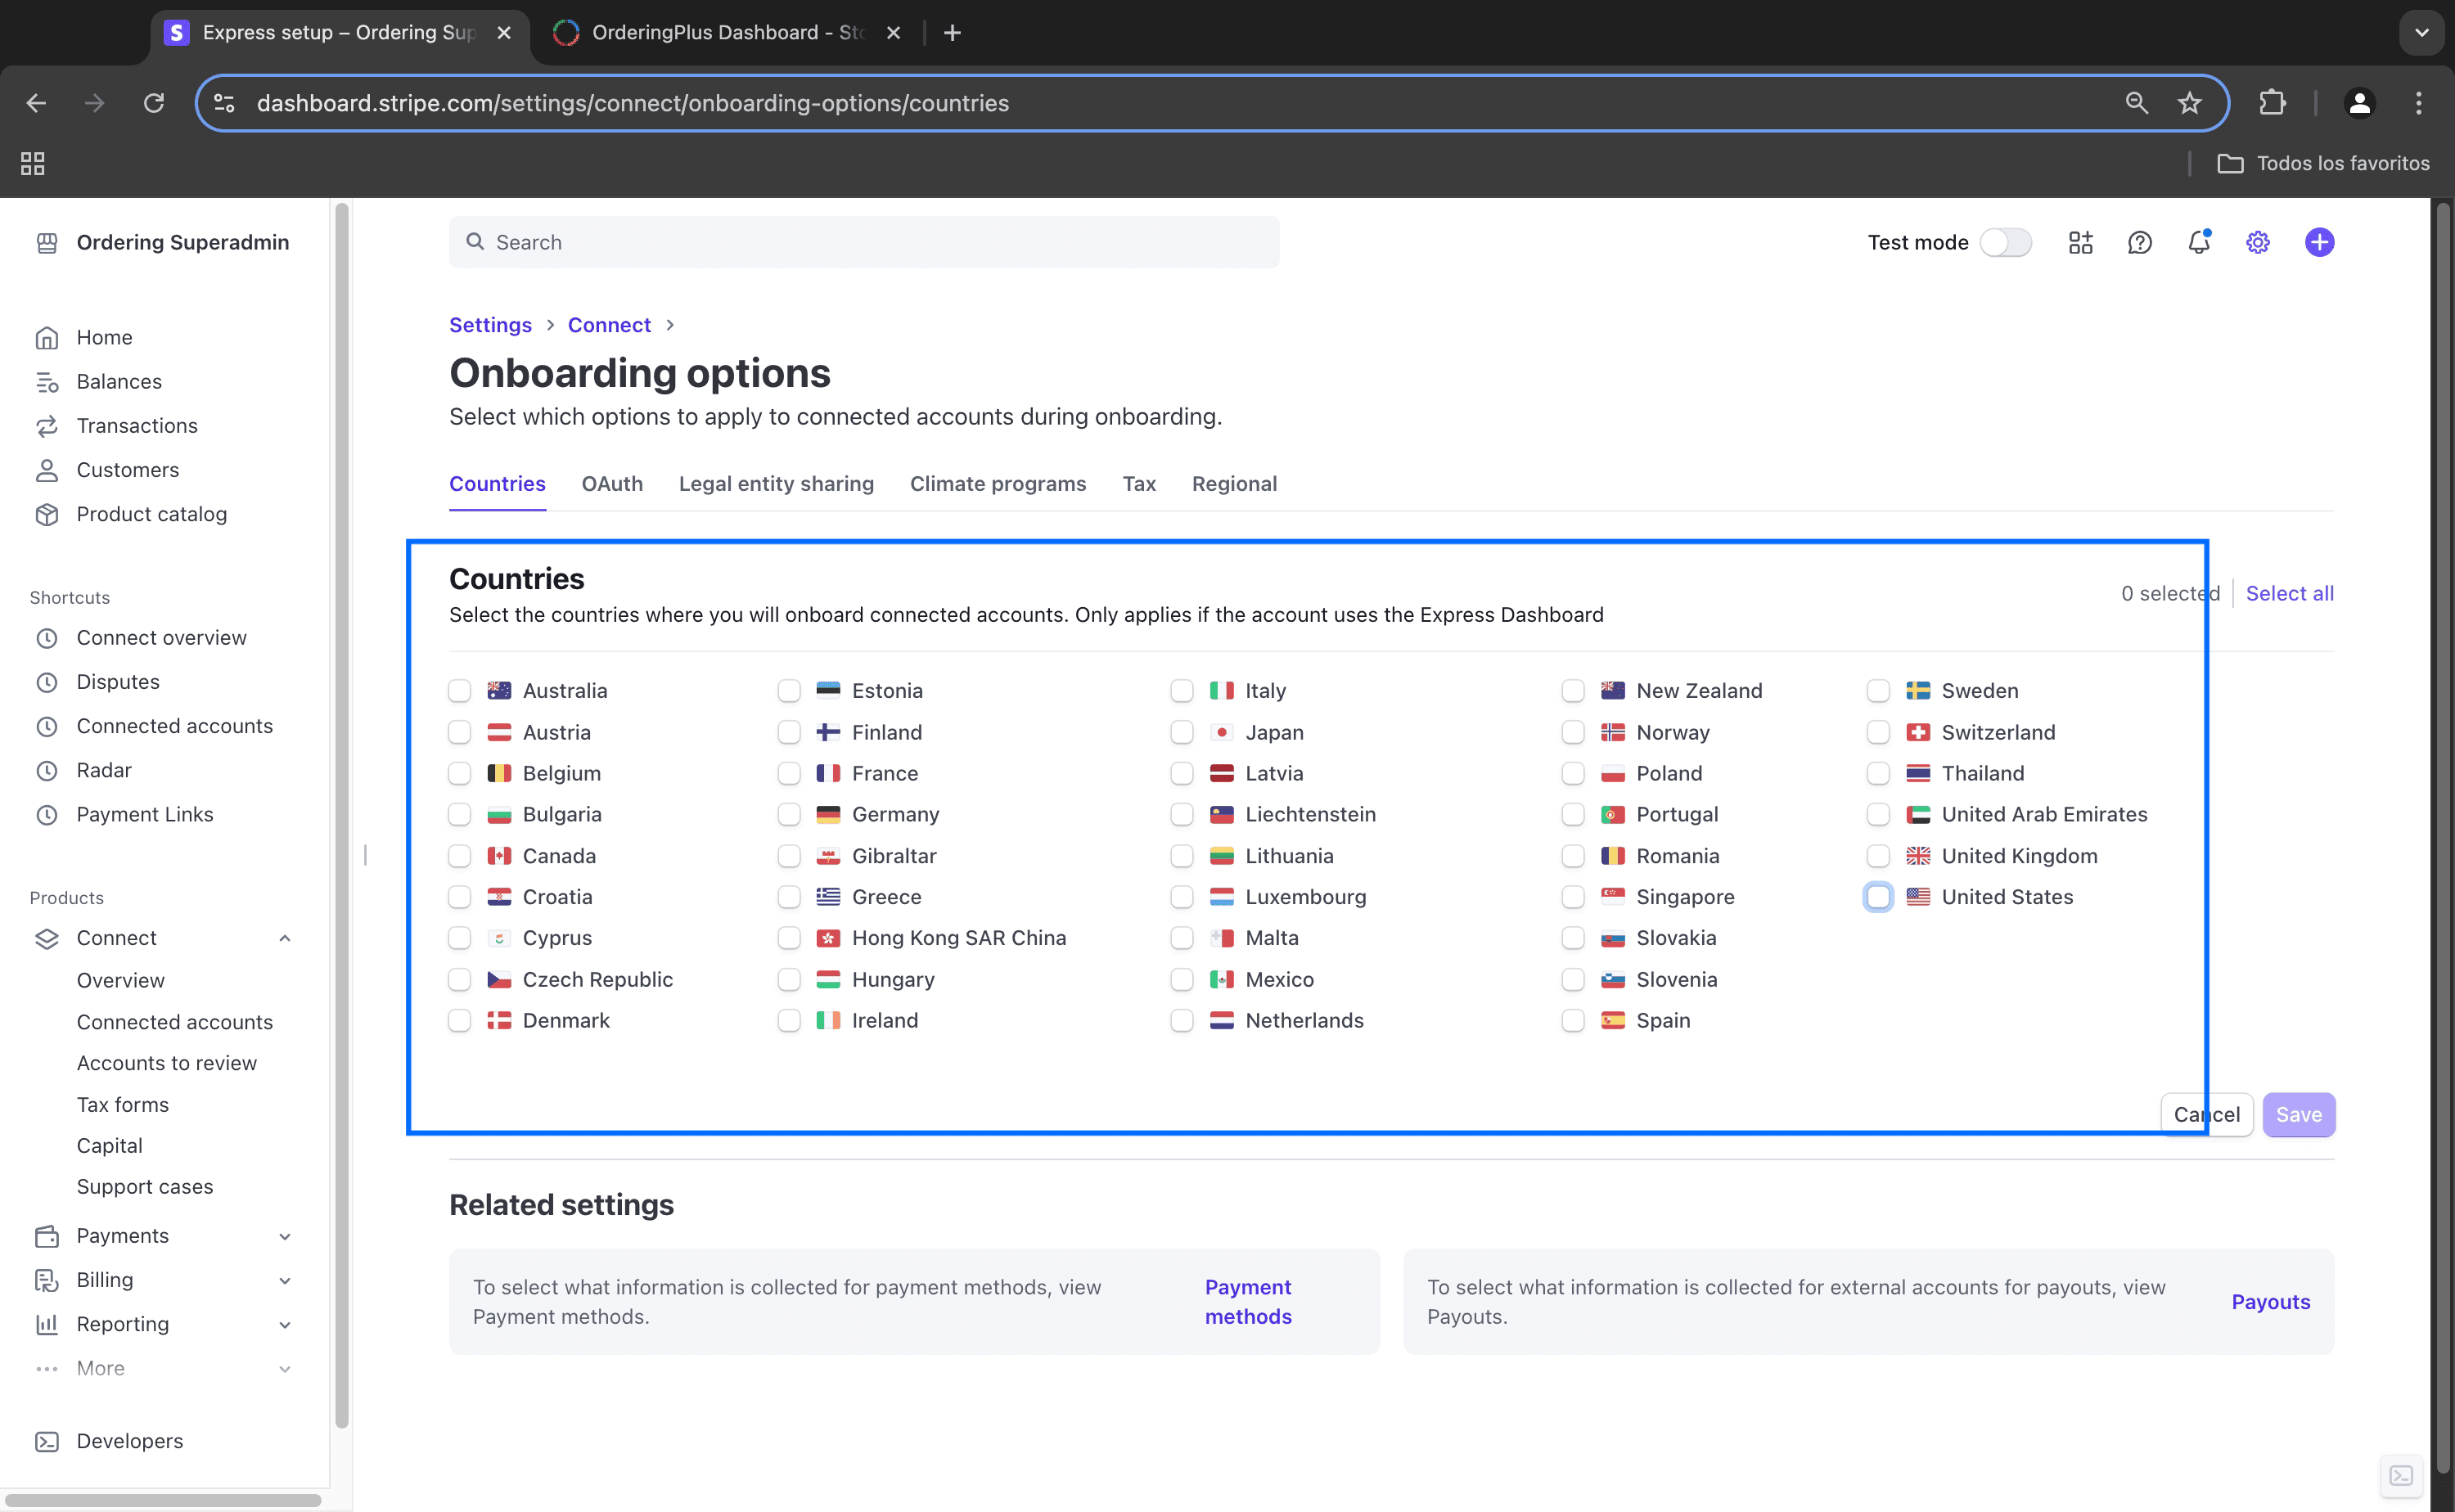
Open the historical full-size reference
Preserve the legacy callback only when applicable
The captured OAuth flow instructs an existing integration to register this callback URI, replacing <project> with the approved project identifier:
https://api.orderingplus.com/v400/en/<project>/payments/stripe_connect/callback
The source says to register it in both live and sandbox modes. Confirm the actual callback, mode, and OAuth availability with the integration owner before changing anything; this document does not establish that the legacy endpoint is deployed or appropriate for a new setup.
The same source says its legacy flow enabled OAuth for Standard Accounts. Keep that label only as historical context for an approved existing integration; it does not verify a current OAuth setting, account type, authorization path, or availability.
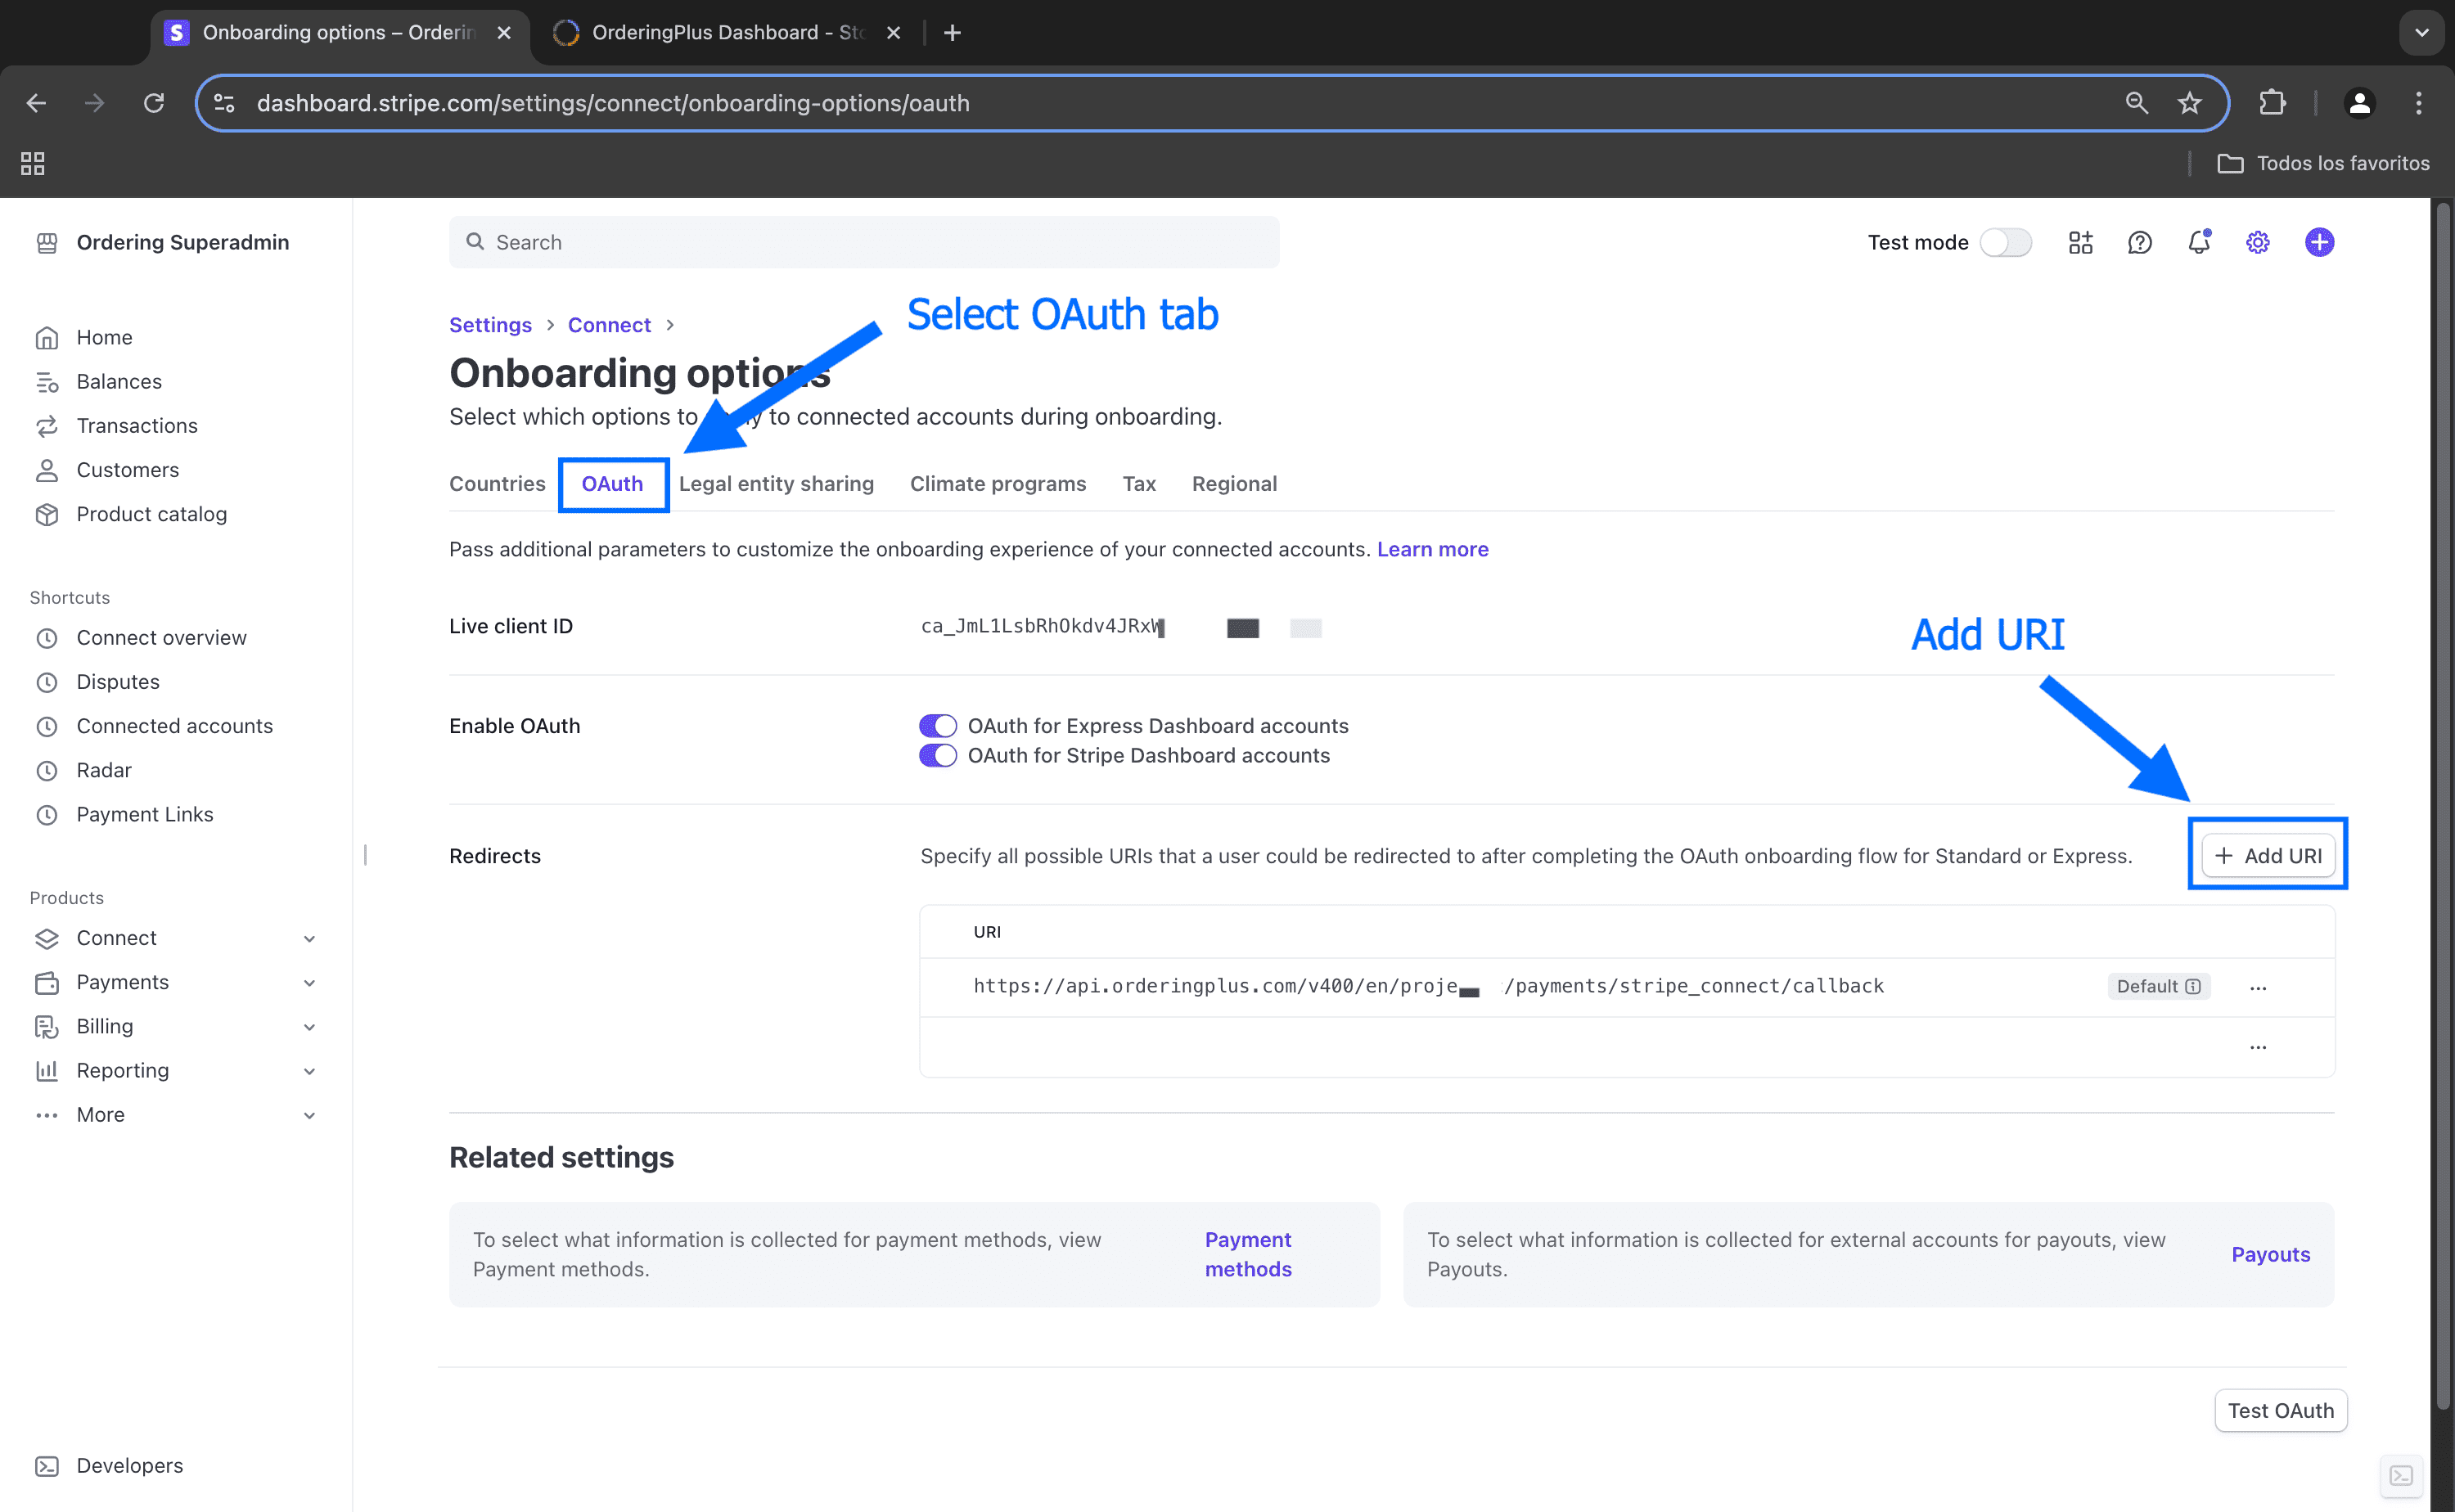
Open the historical full-size reference
Store the approved client identifiers
The historical flow captures a Live Client ID and places the matching live and sandbox client identifiers in the Stripe Connect add-on settings. Use only approved values in the intended fields, and do not copy identifiers into tickets, messages, screenshots, or source control.
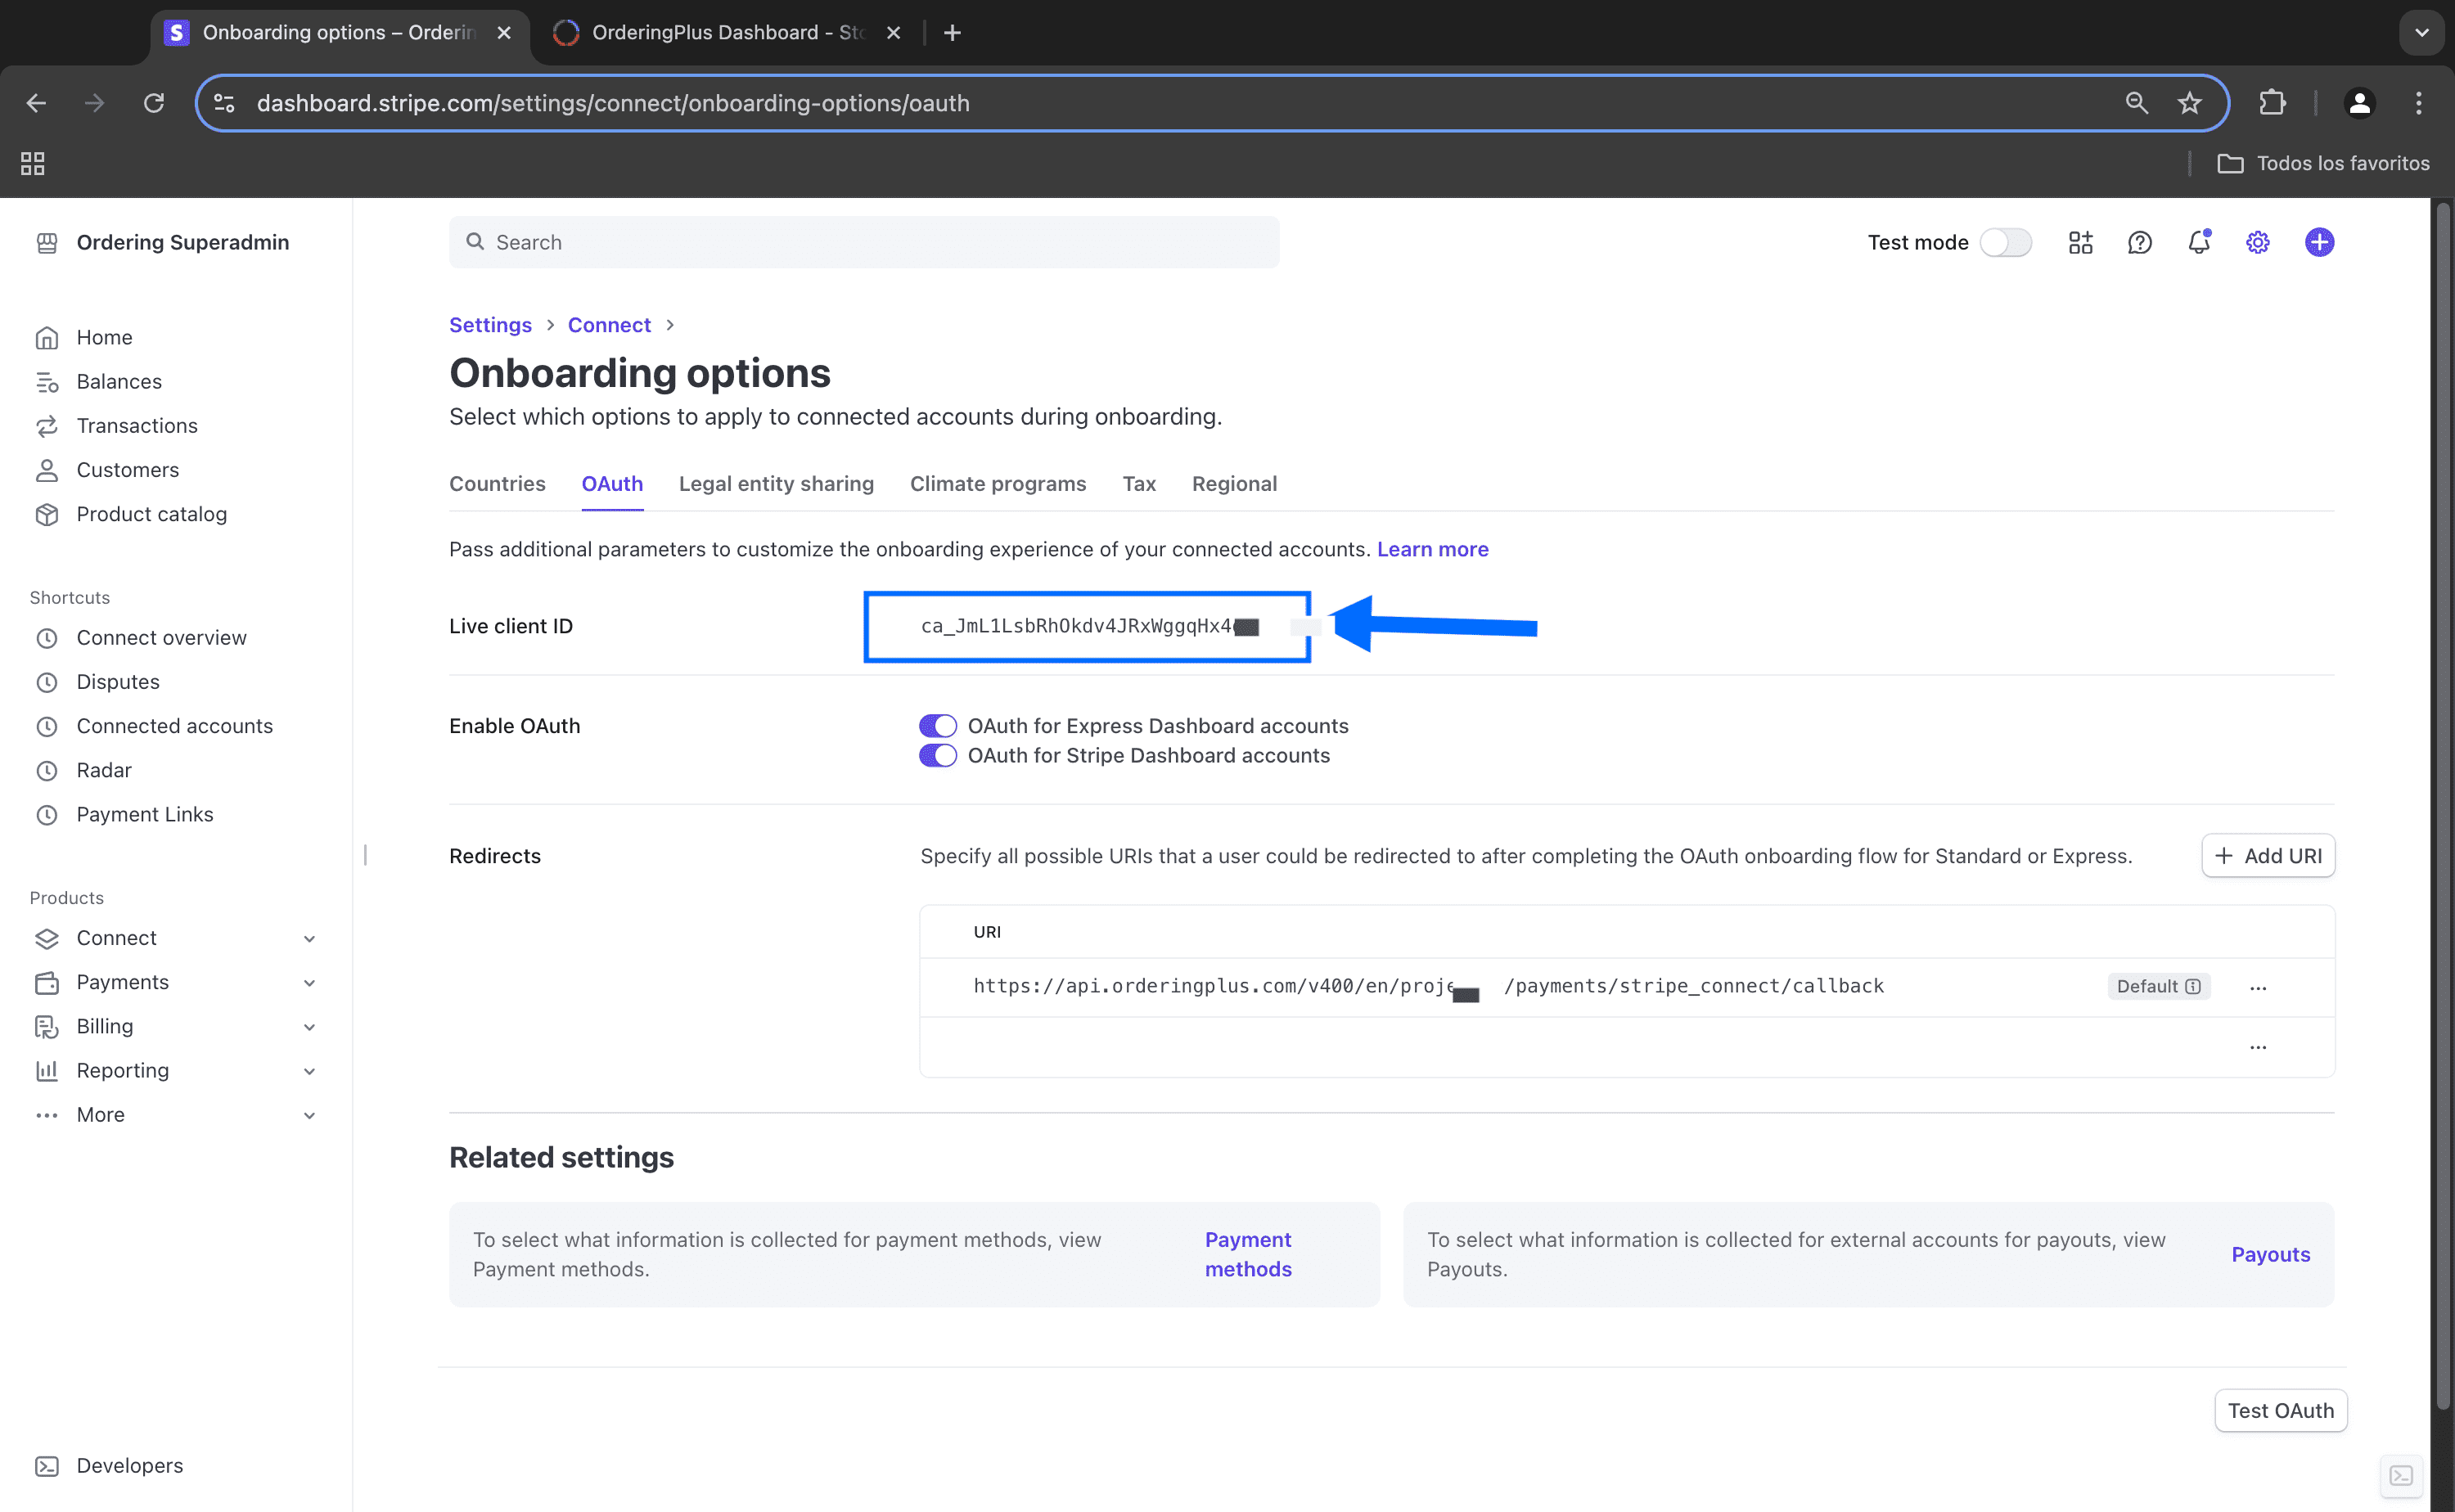
Open the historical full-size reference
The captured Dashboard URL is https://dashboard.orderingplus.com; retain it only as a historical technical endpoint. In the captured UI, the operator opens My Addons, selects Stripe Connect Addon, enters the approved live and sandbox client identifiers, then selects Save.
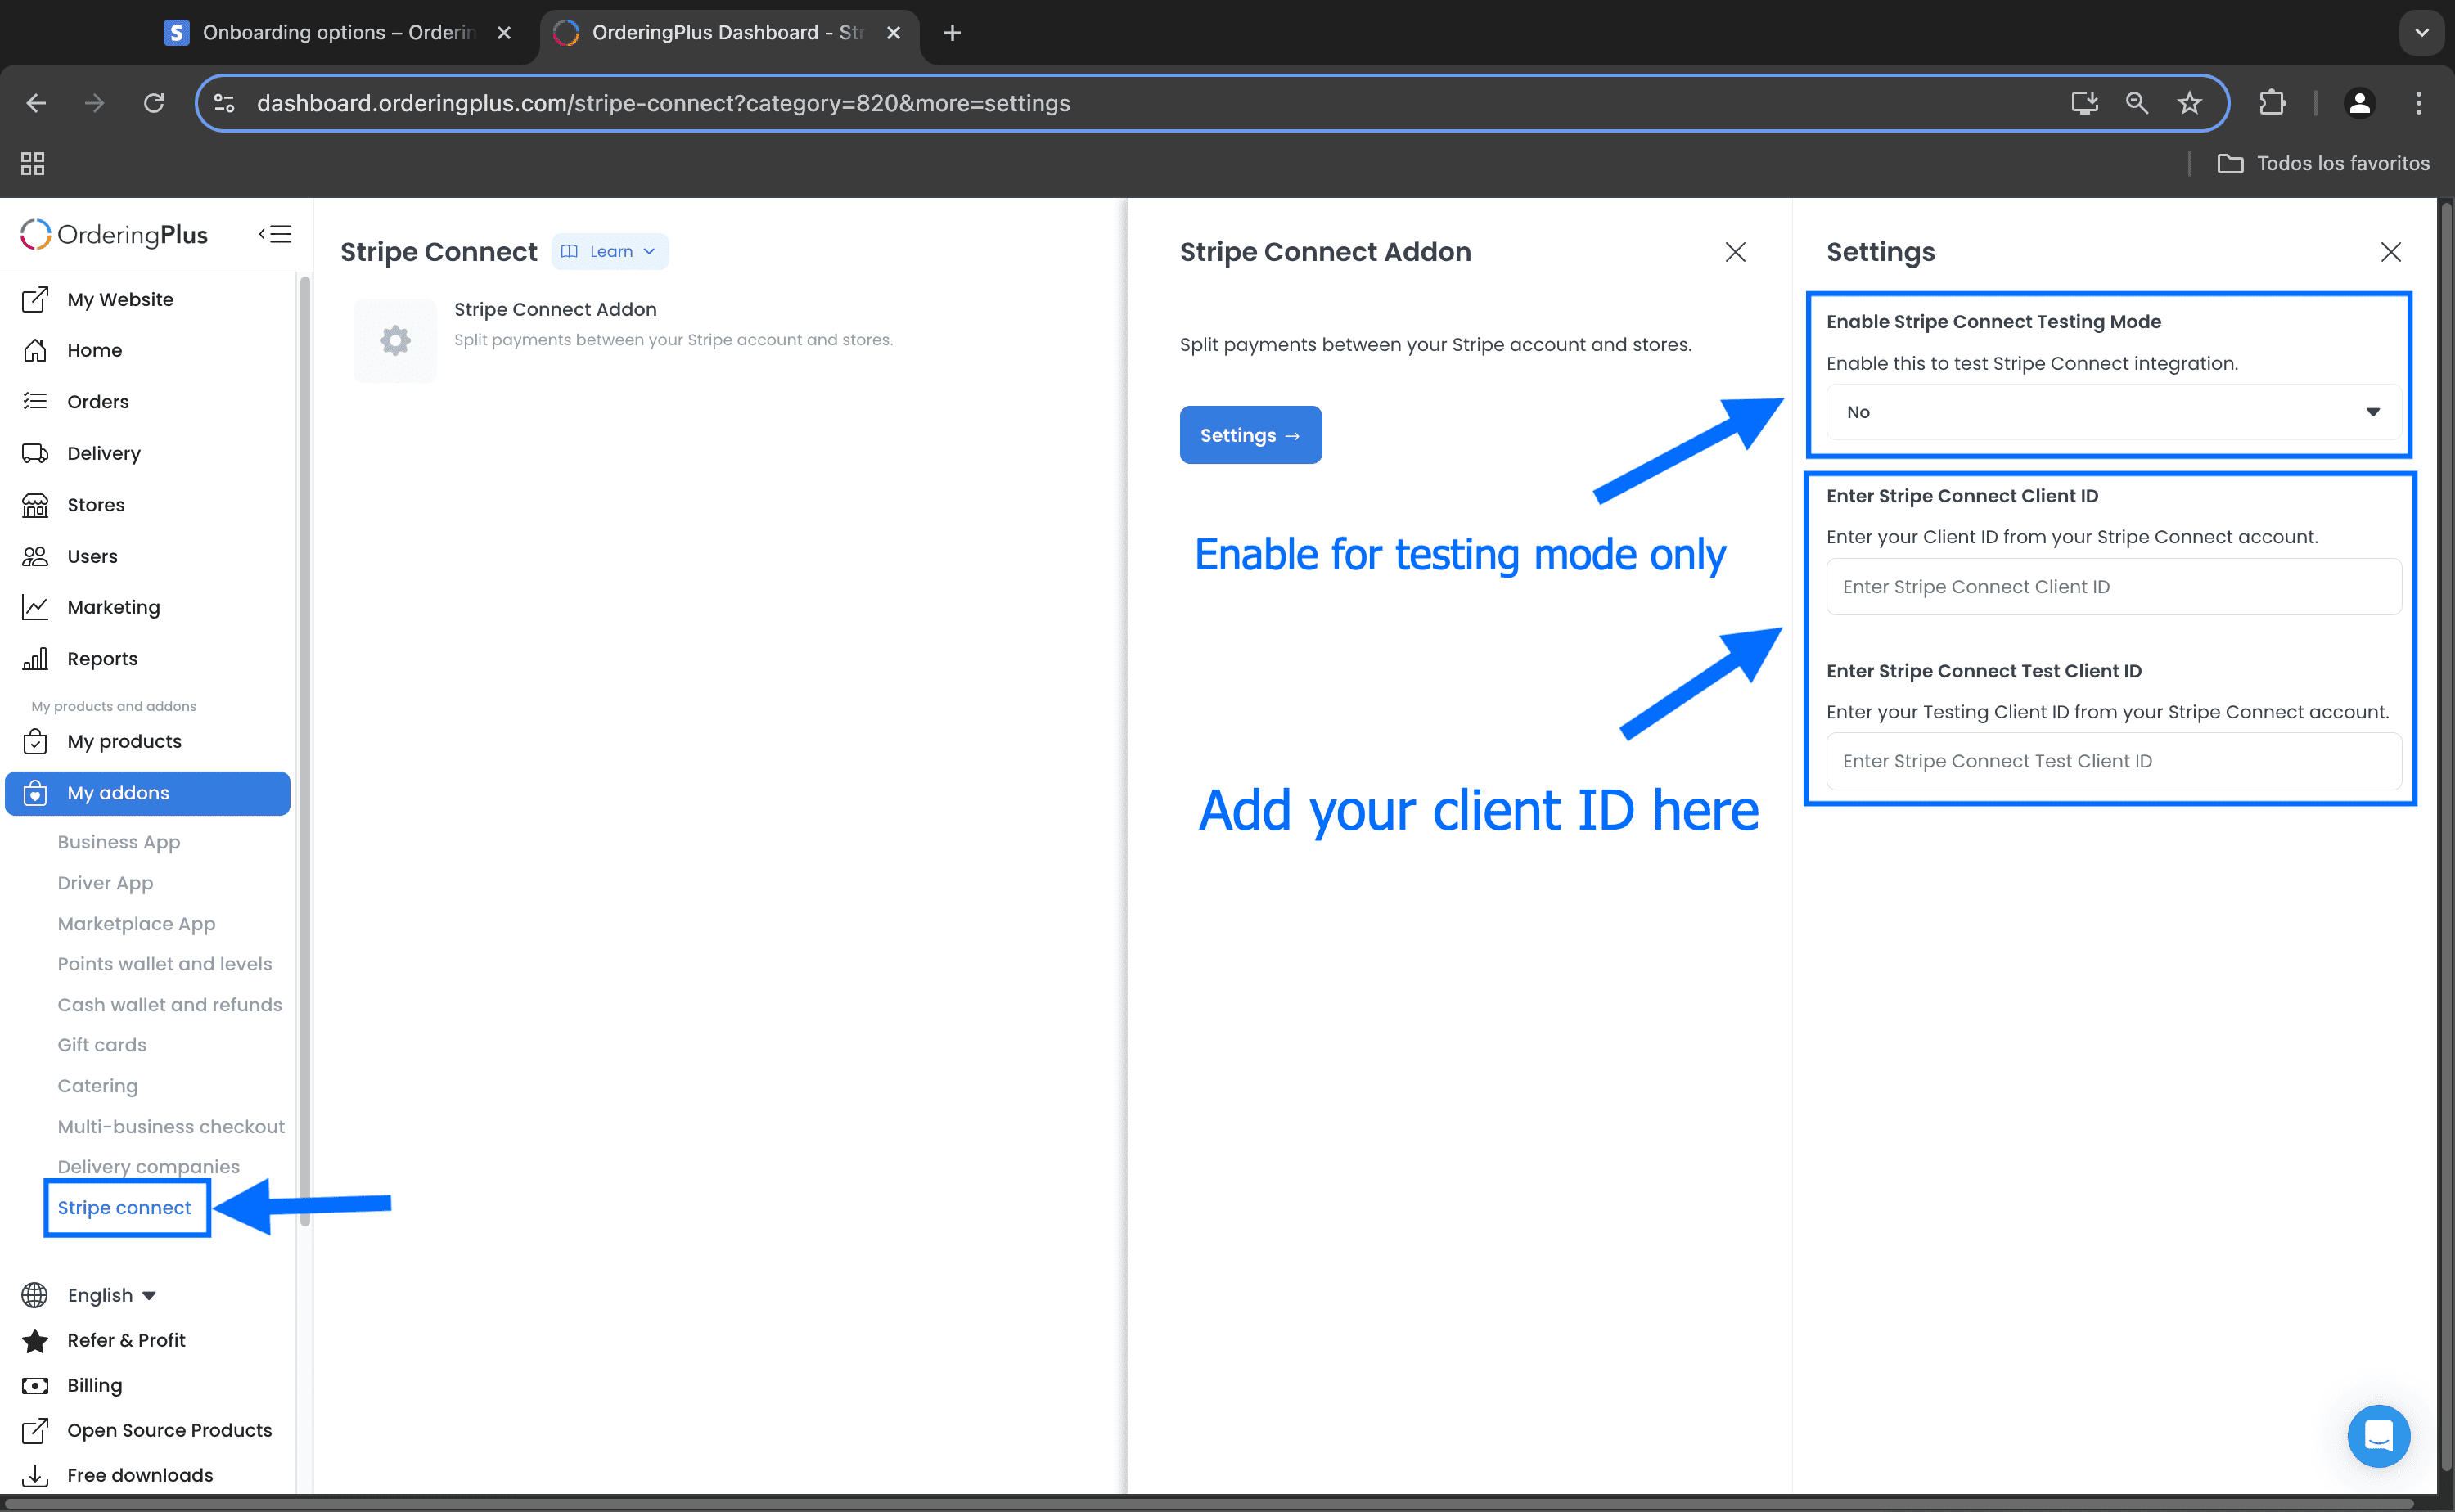
Open the historical full-size reference
Link a business account
The business owner (or another authorized account holder) opens the business payment-method settings, selects Stripe Connect, and uses the provider page to select the intended Stripe account. Return to the Dashboard and review any populated fields before saving. A populated field or saved view does not prove a connected account is onboarded or eligible for charges, transfers, or payouts.
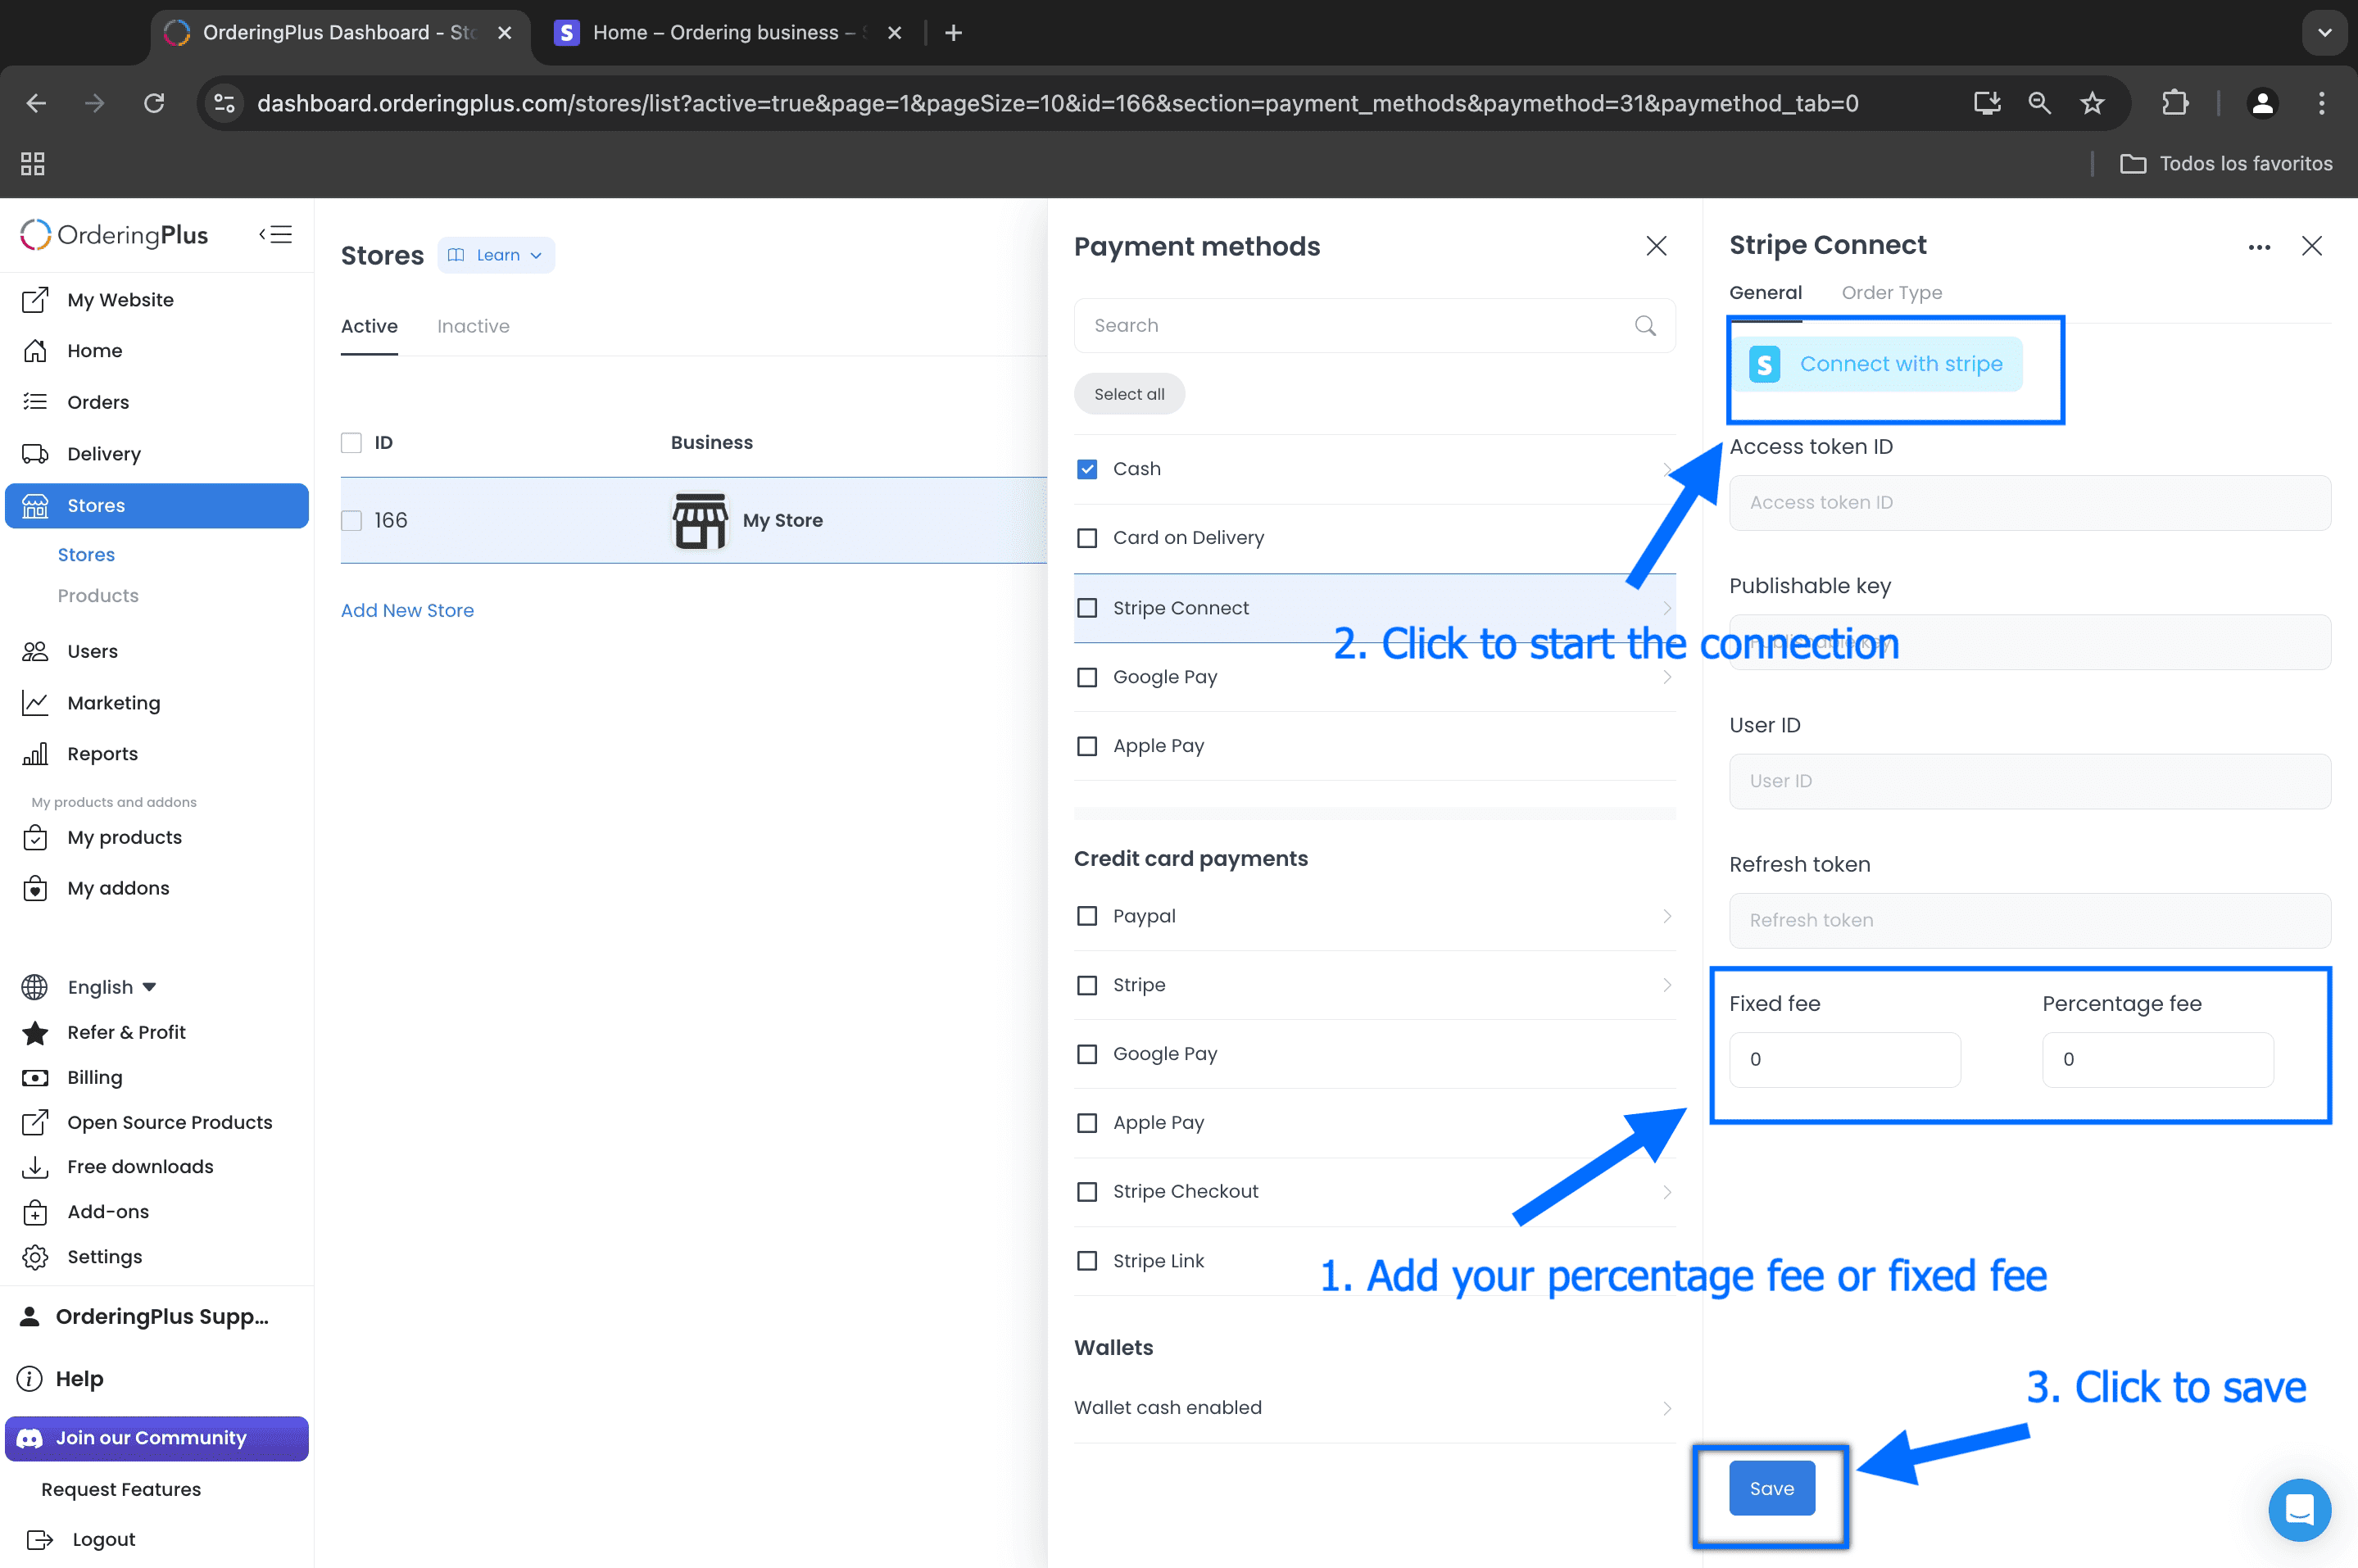
Open the historical full-size reference
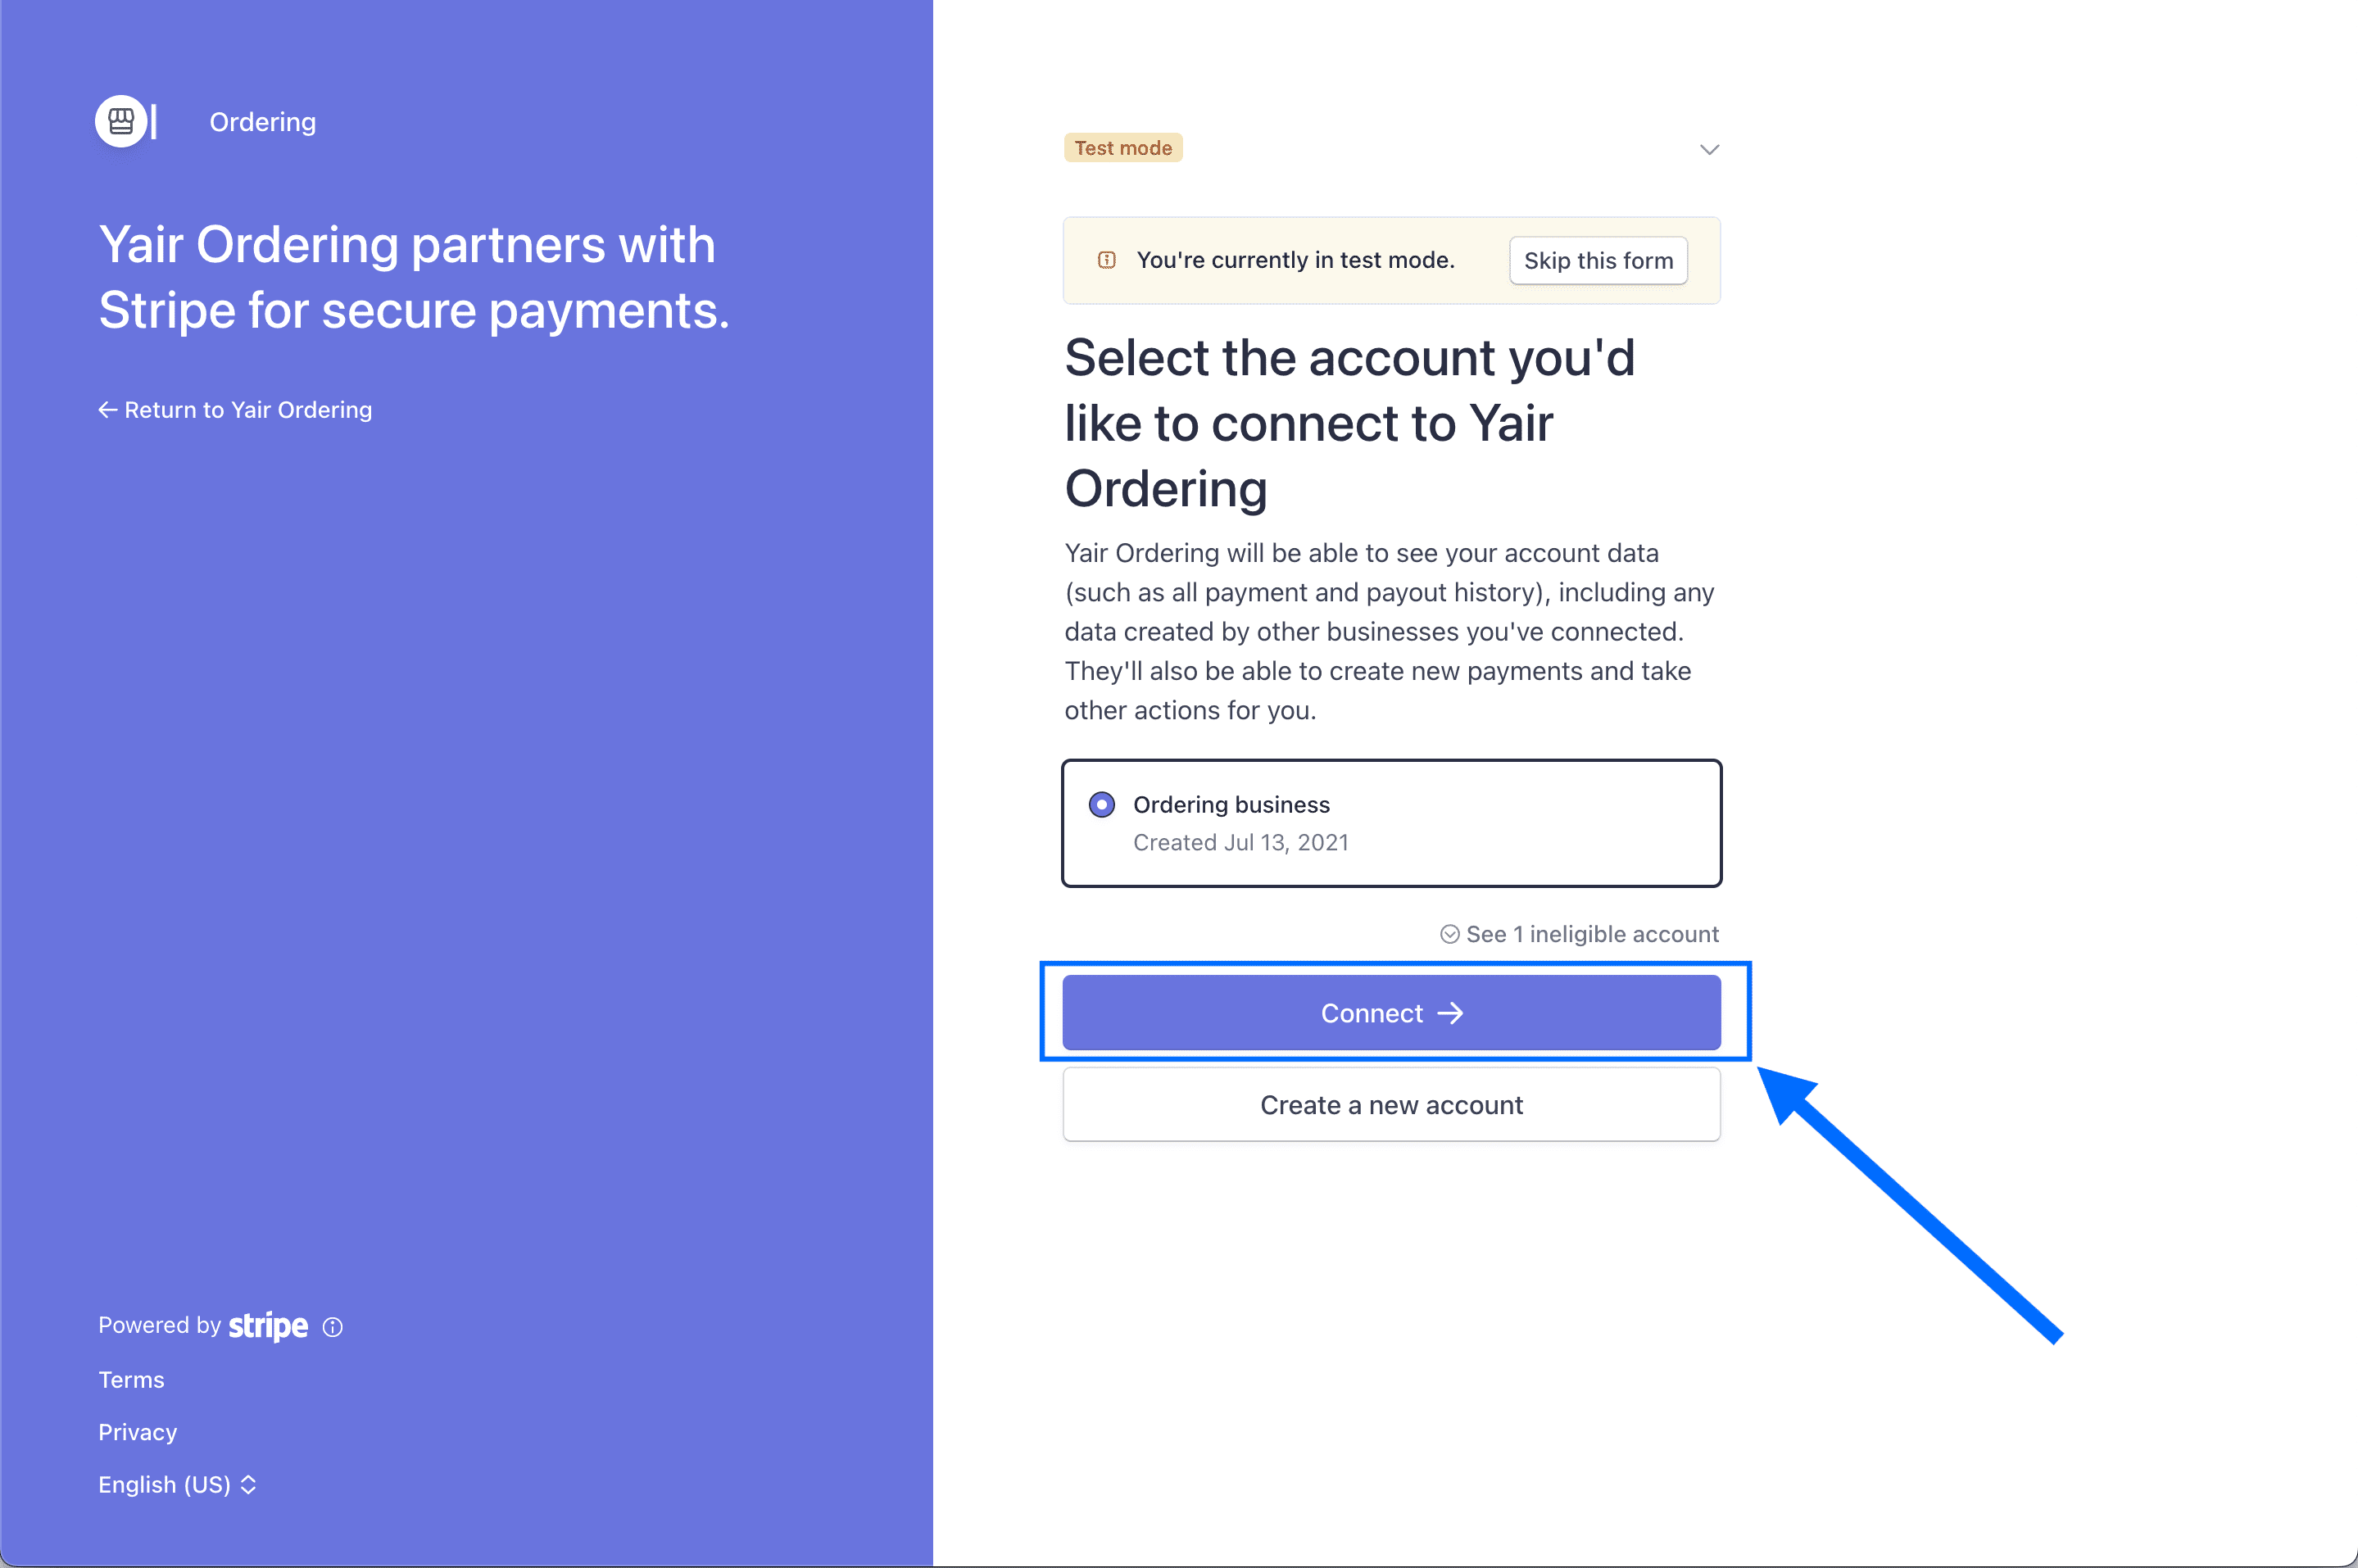
Open the historical full-size reference
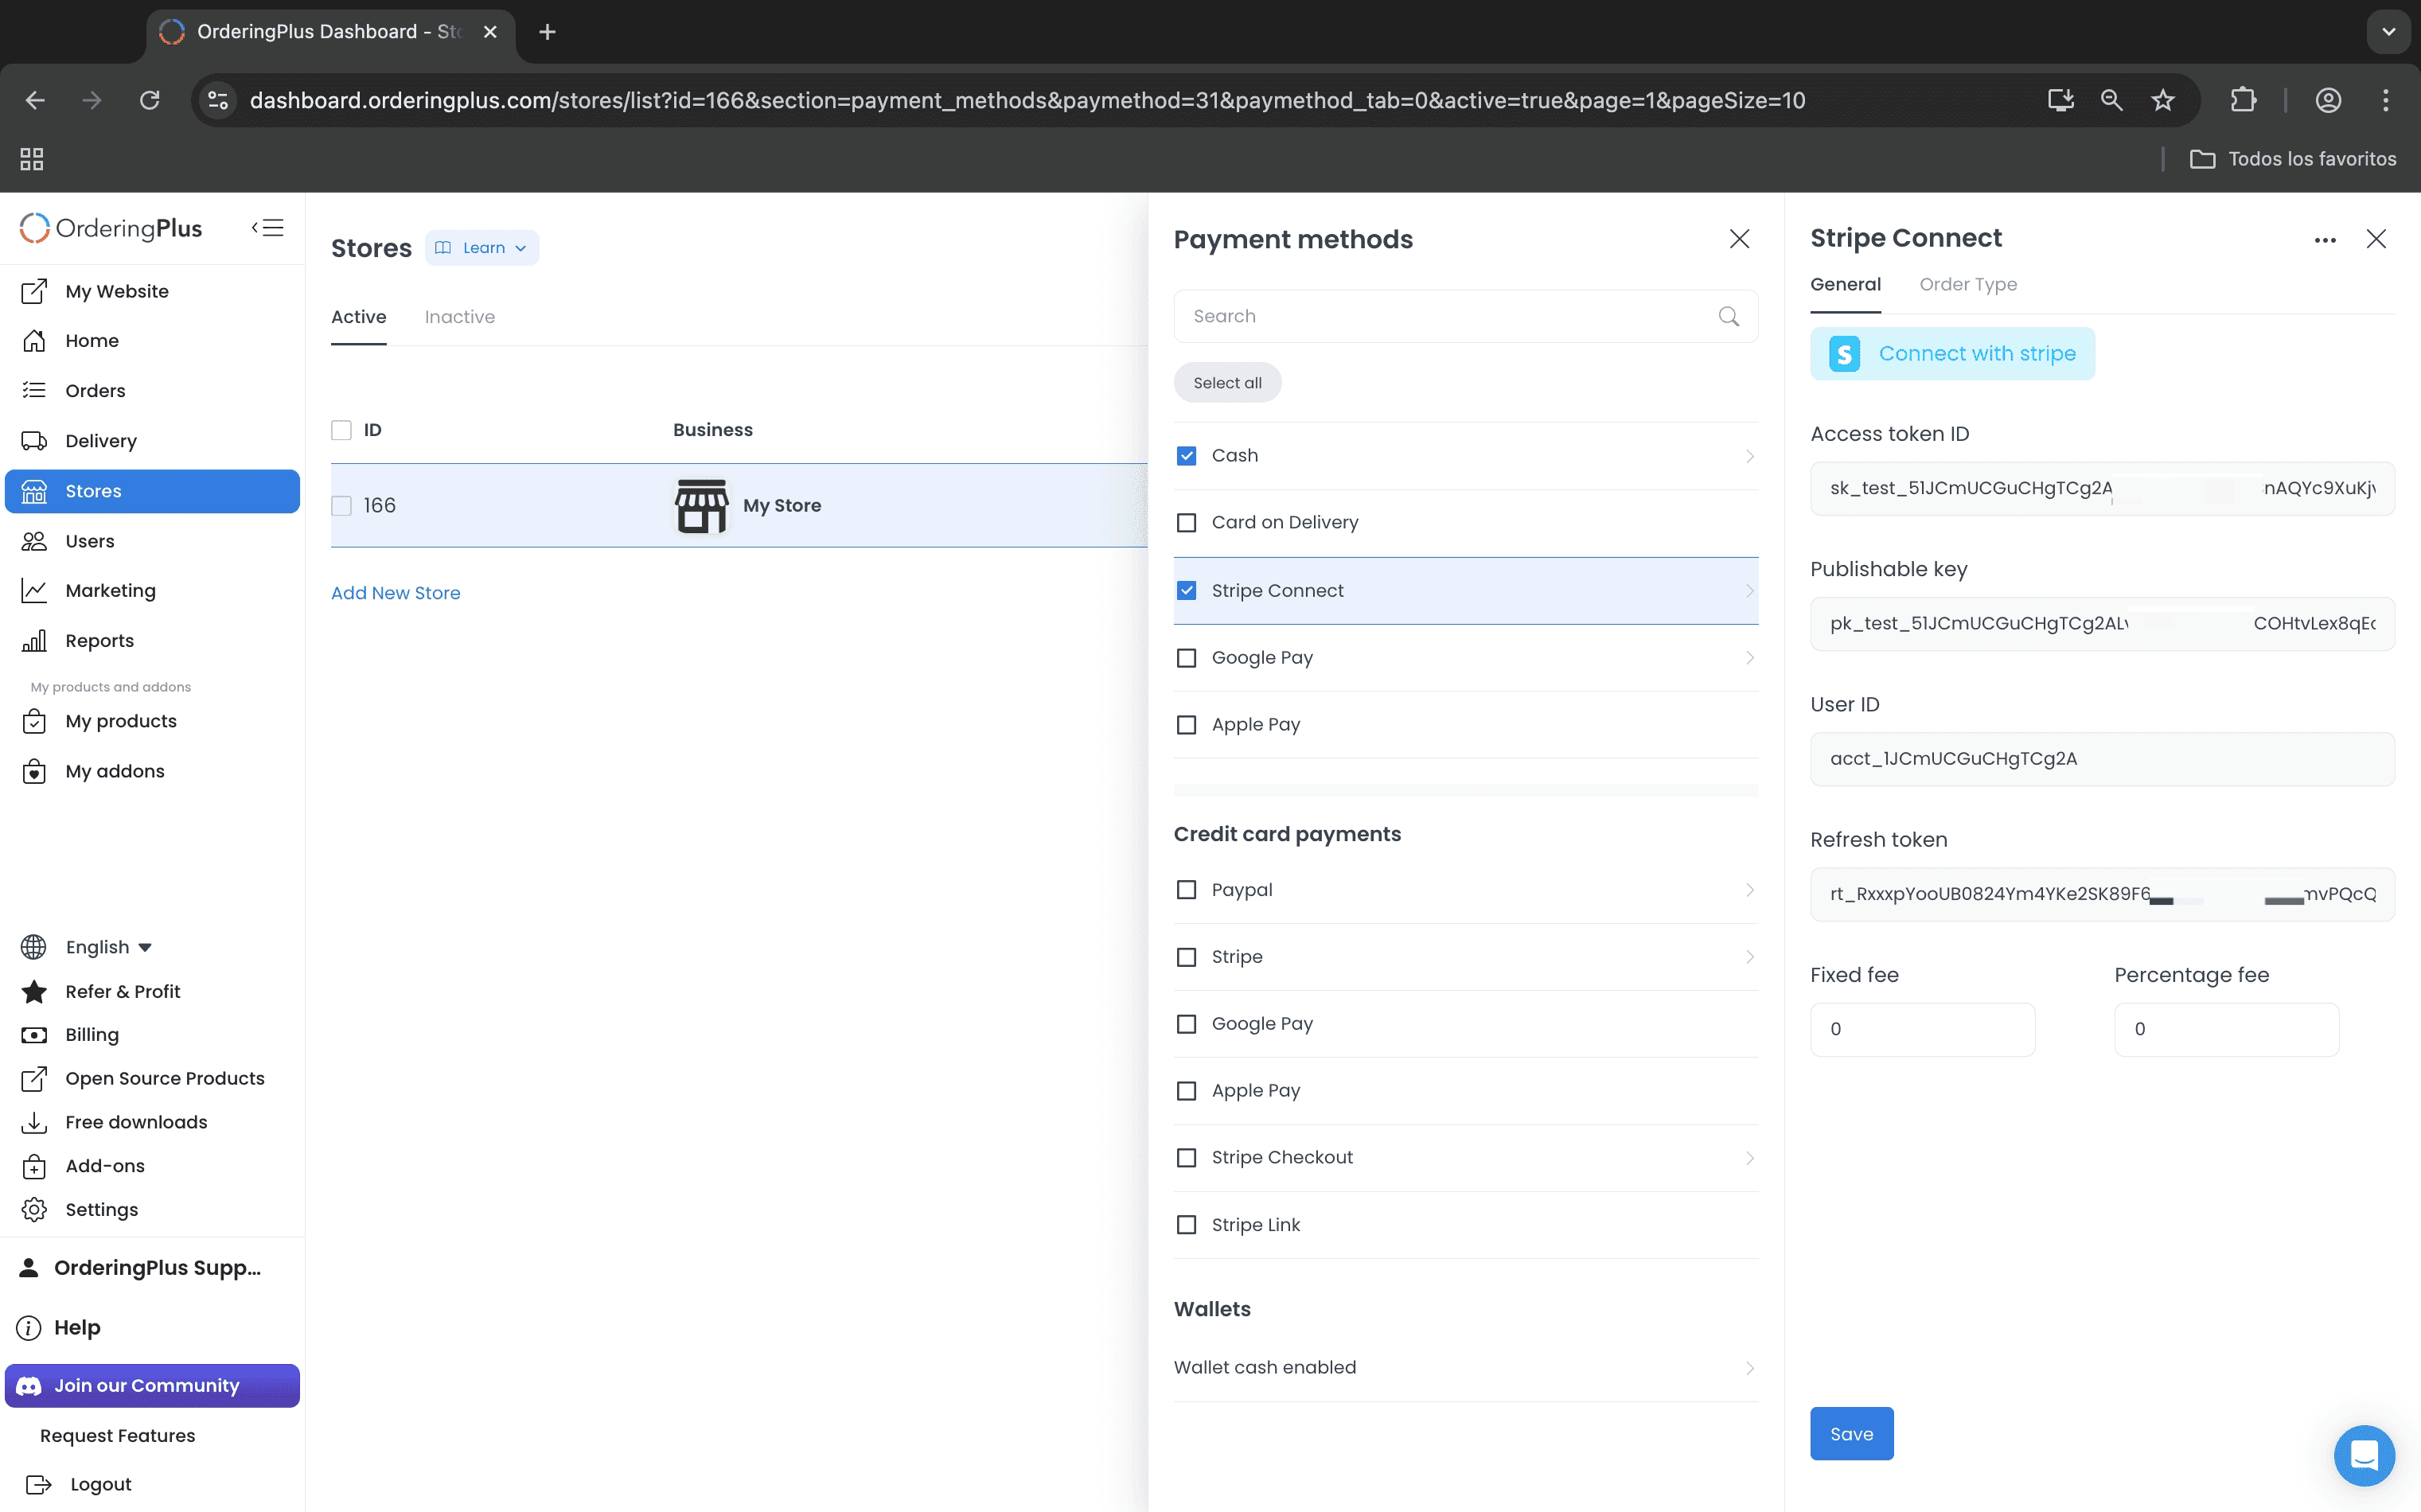
Open the historical full-size reference
Verify readiness separately
After the connection step, inspect the provider’s current account requirements and requested capabilities in the approved test environment. Do not infer payment readiness from the redirect, a client identifier, or a saved Dashboard field.