Connect DoorDash
Use this workflow to prepare a DoorDash Drive or DoorDash Drive Classic configuration in the Dashboard. It separates provider-account setup, plugin configuration, credential entry, delivery-company and Driver-group settings, callback configuration, and provider approval. Completing any one step does not prove that DoorDash is connected, that an order is synchronized, or that a delivery has been completed.
Adding a plugin, entering credentials, selecting stores or payment methods, and saving callback settings can change project configuration. Do not use a live customer order or an unapproved provider account to test this workflow.
Confirm the intended DoorDash workflow
This guide covers workflows identified for the United States, Australia, and Canada. Confirm current DoorDash availability, account eligibility, and the correct Drive product with DoorDash before changing your project configuration.
Use one of these plugin URLs:
DoorDash Drive is the usual option in this workflow, while DoorDash Drive Classic is a separate configuration. Choose the option DoorDash has approved for the account; do not add both simply to test which one appears.
Add and confirm the plugin
- Open the Dashboard's Plugins area.
- Add the approved DoorDash Drive or DoorDash Drive Classic plugin URL.
- Confirm that the corresponding plugin entry appears in the list.
- Open the plugin's settings only when you have the approved provider account data ready.
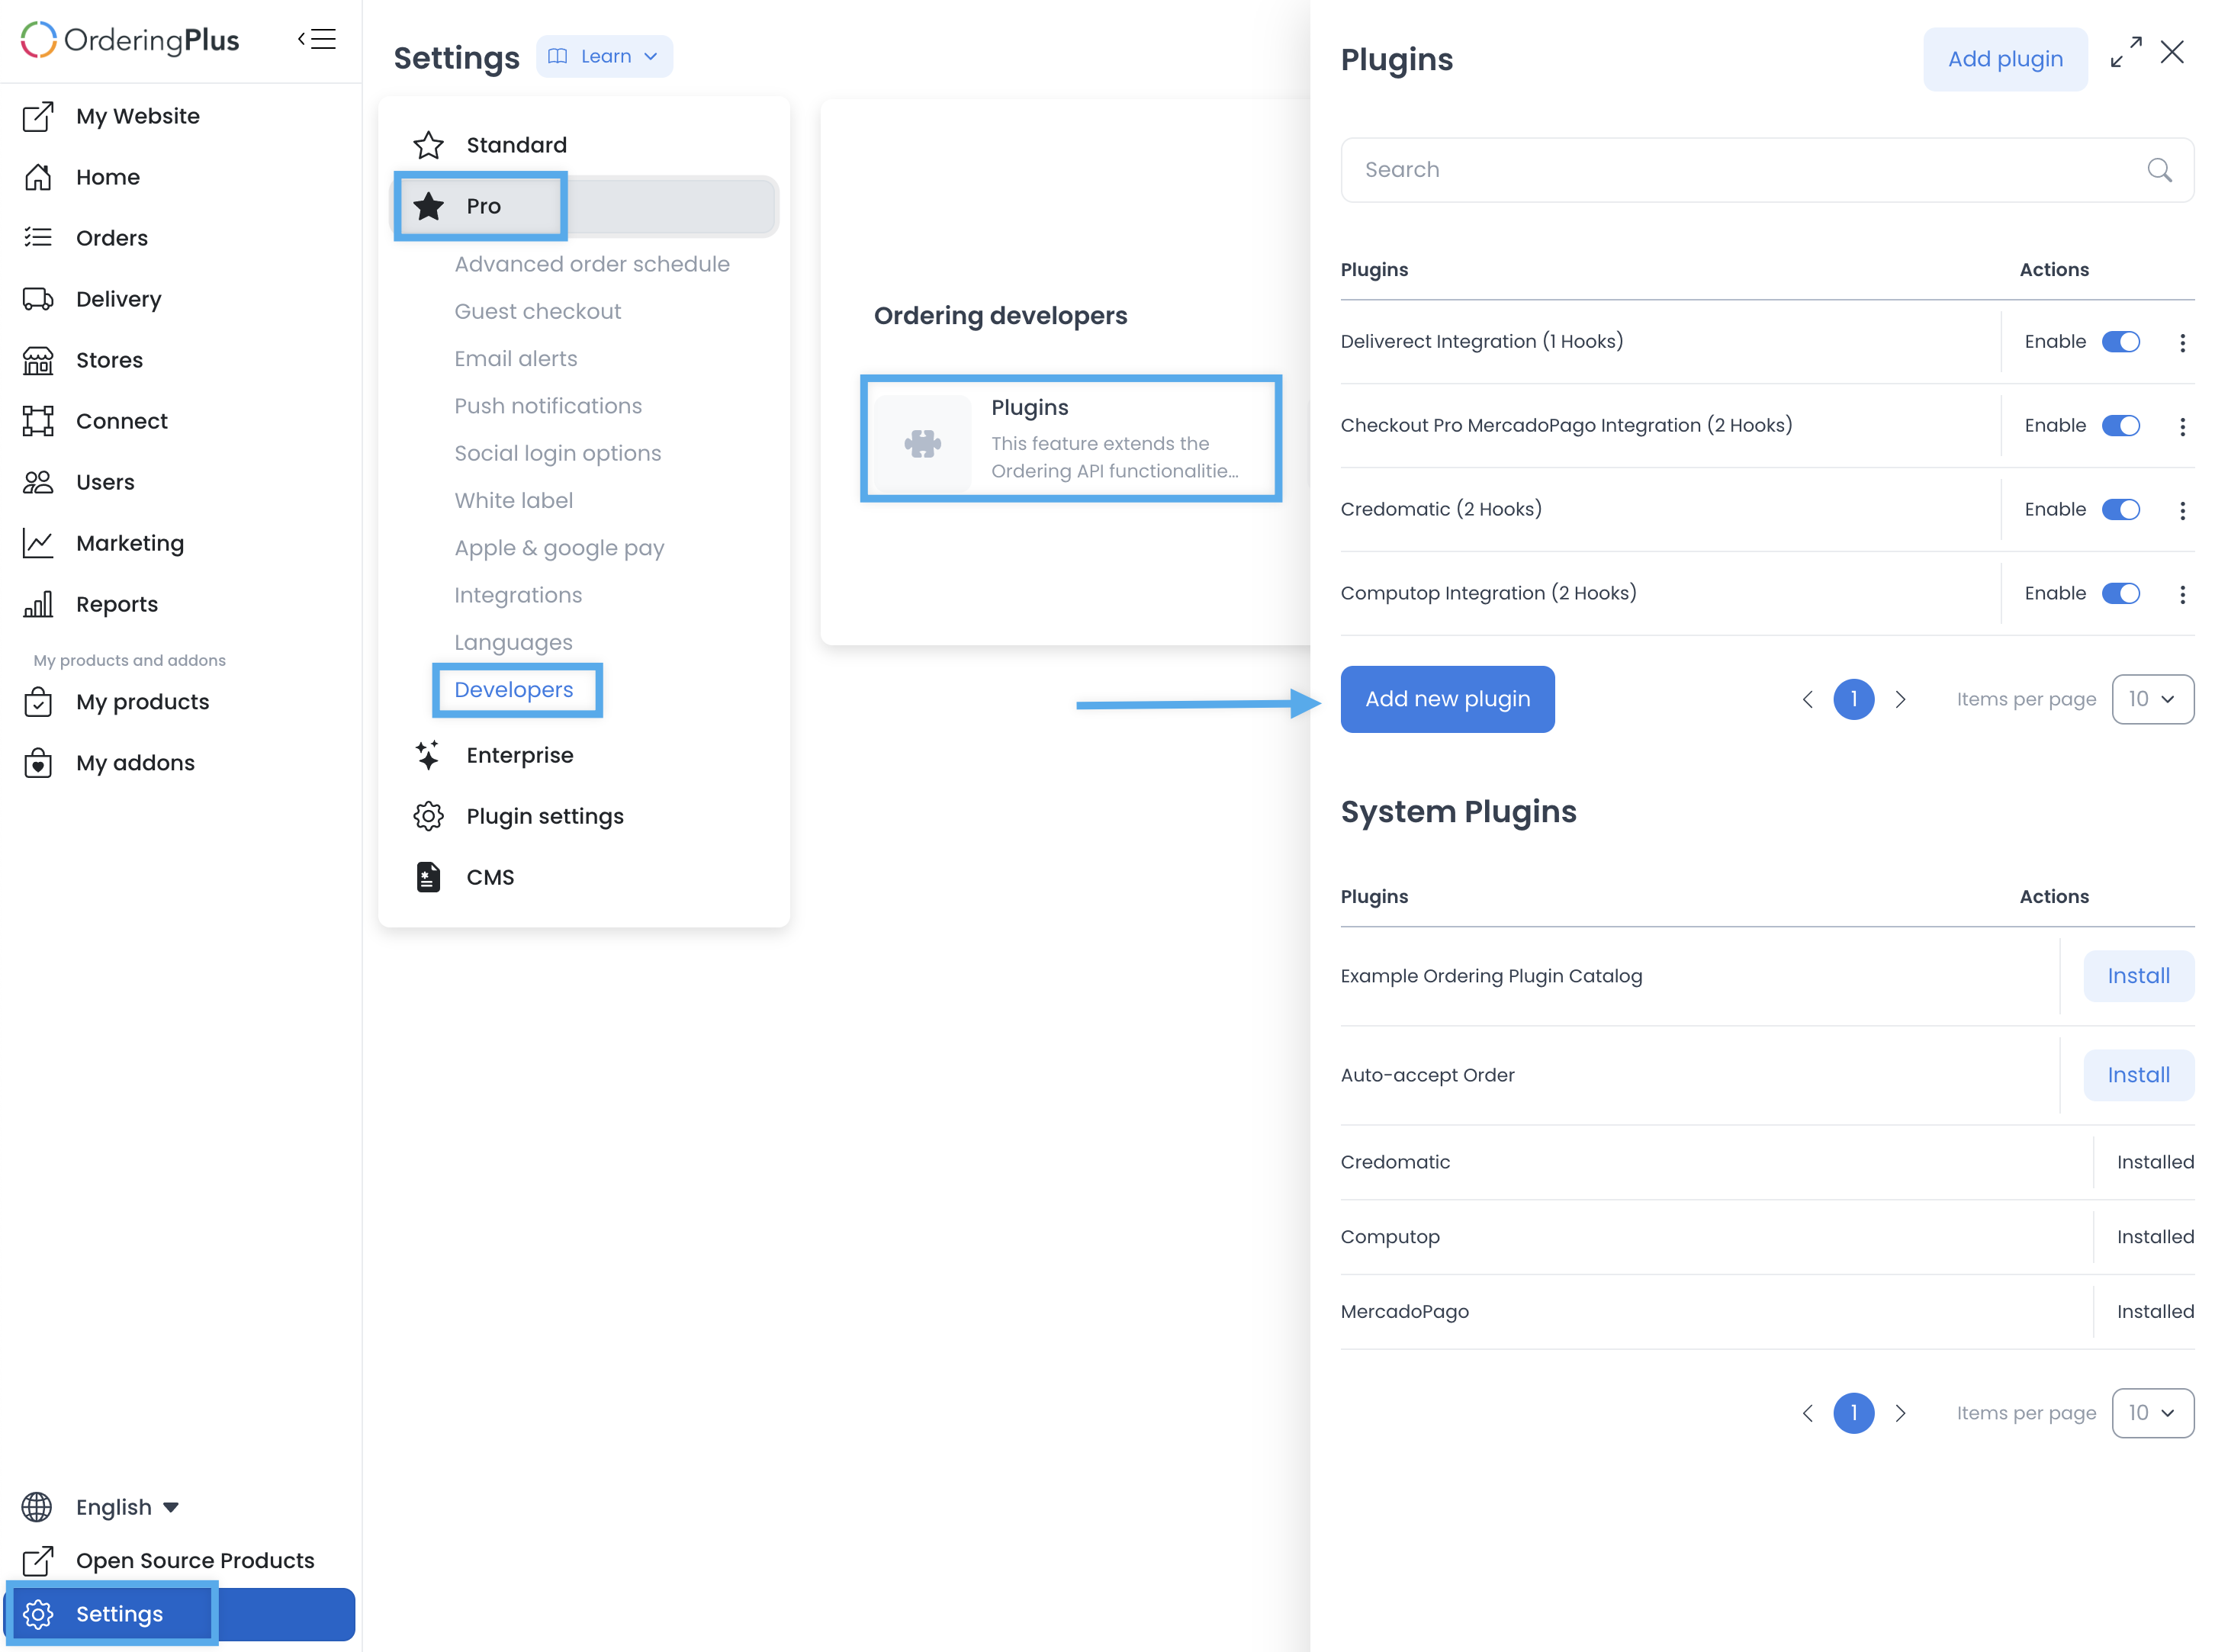
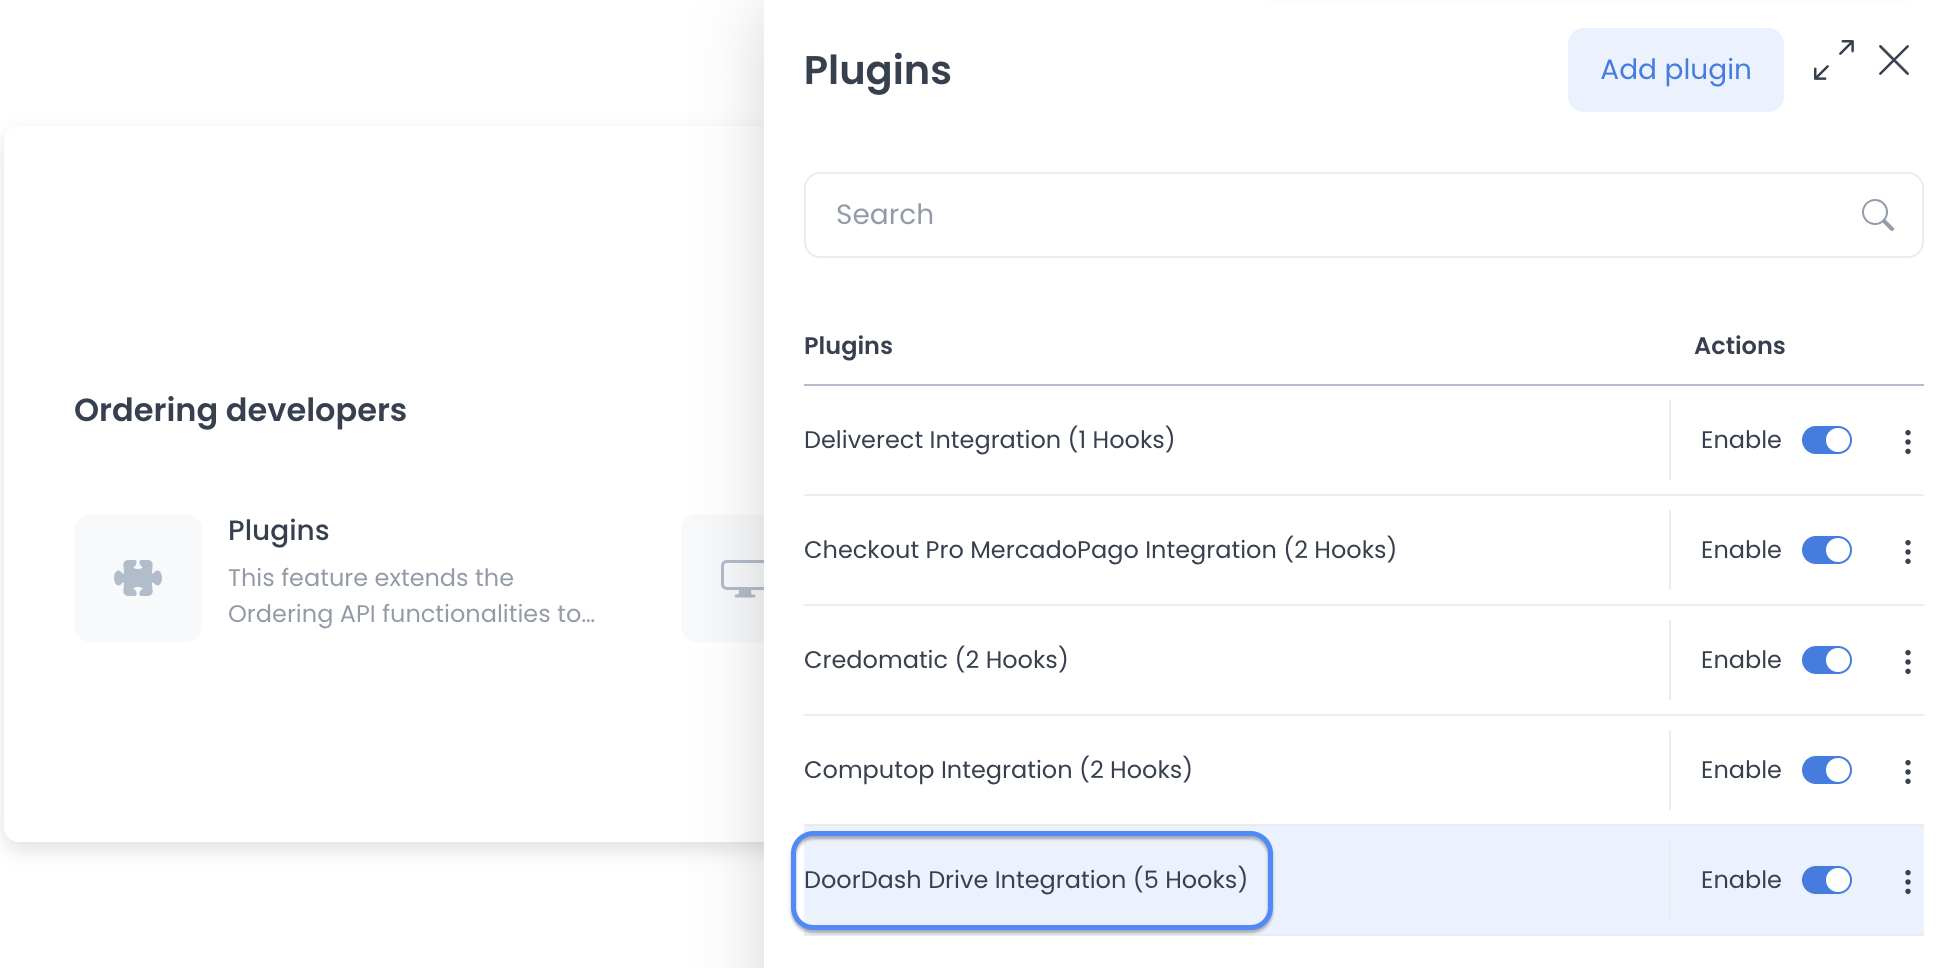
An installed plugin entry is a project configuration state. It does not confirm provider acceptance, credentials, order transfer, or dispatch.
Enter DoorDash account credentials
Collect the credentials from the approved DoorDash developer account. The workflow begins with developer or sandbox credentials. Follow DoorDash's access-key instructions for the account that DoorDash has authorized.
- Open the selected DoorDash plugin's settings.
- Enter only the credentials issued for the intended environment.
- Review the selected environment before saving; test and live credentials are separate provider account data.
- Keep every credential, secret, and two-factor authentication code private.
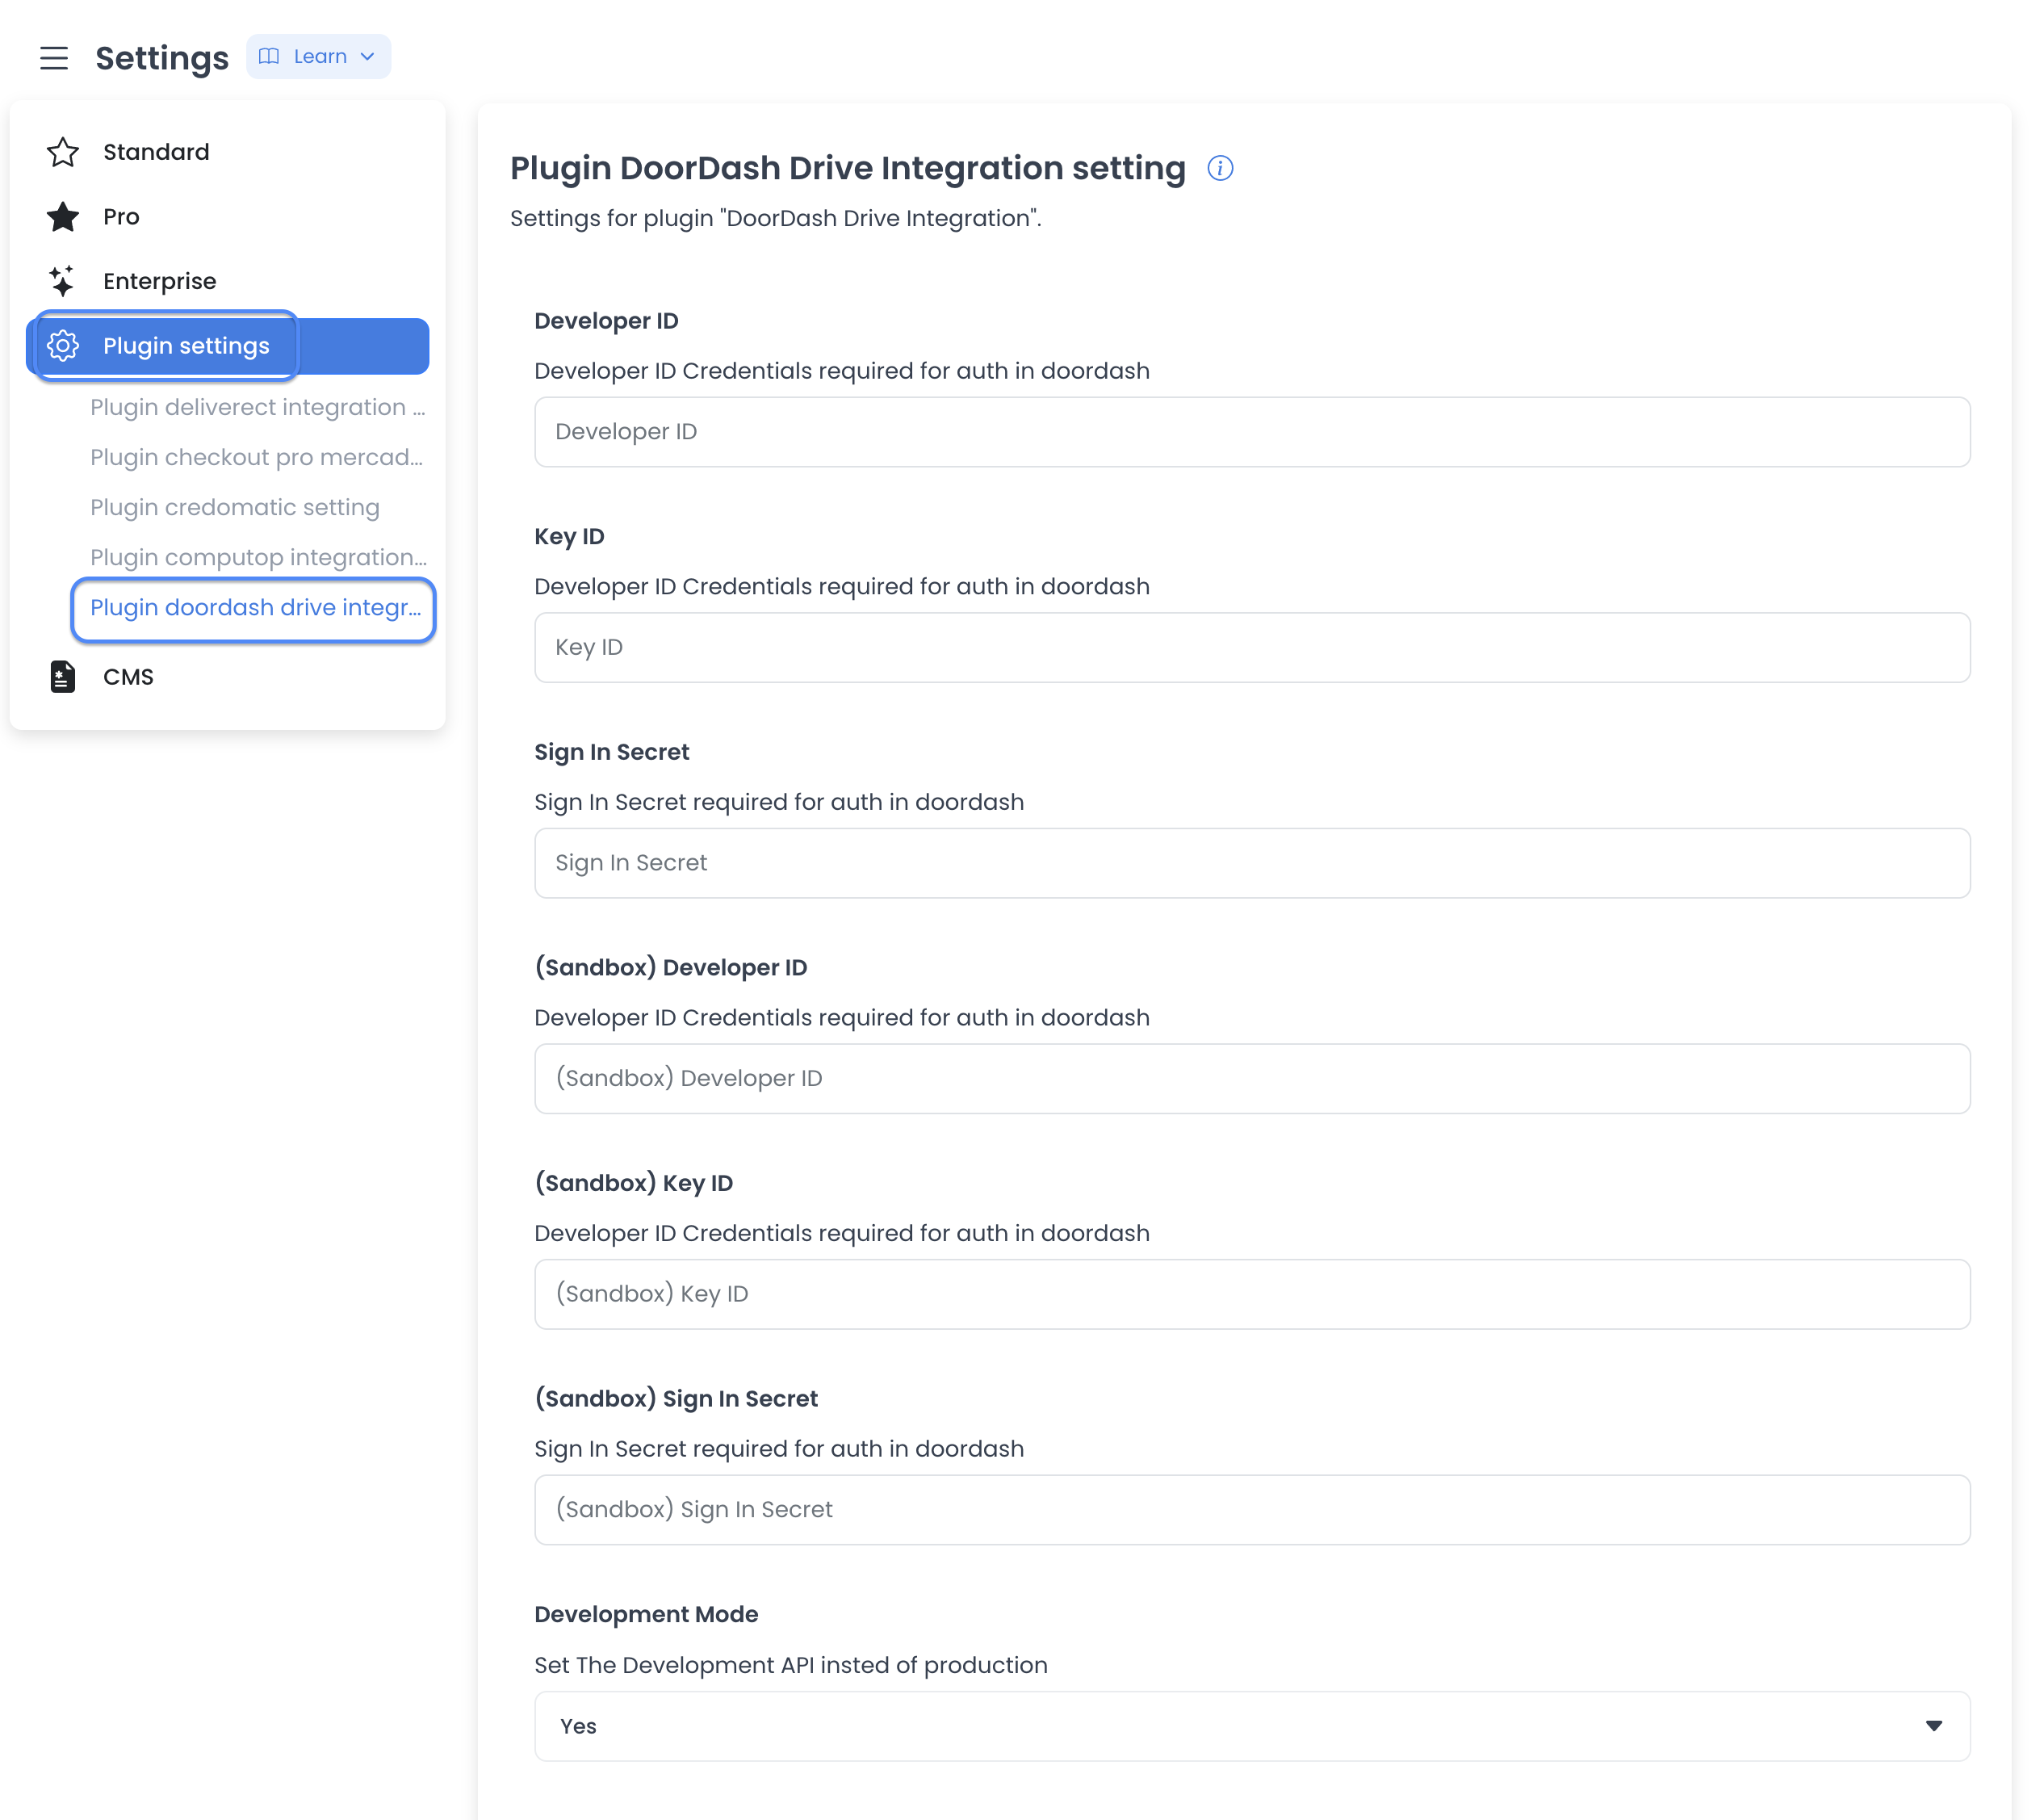
Avoid repeated two-factor authentication retries. The workflow warns that four unsuccessful code entries can block the DoorDash account. Never copy a key, secret, authentication header, or code into this guide, a ticket, chat, screenshot, or recording.
Review the delivery company and Driver group
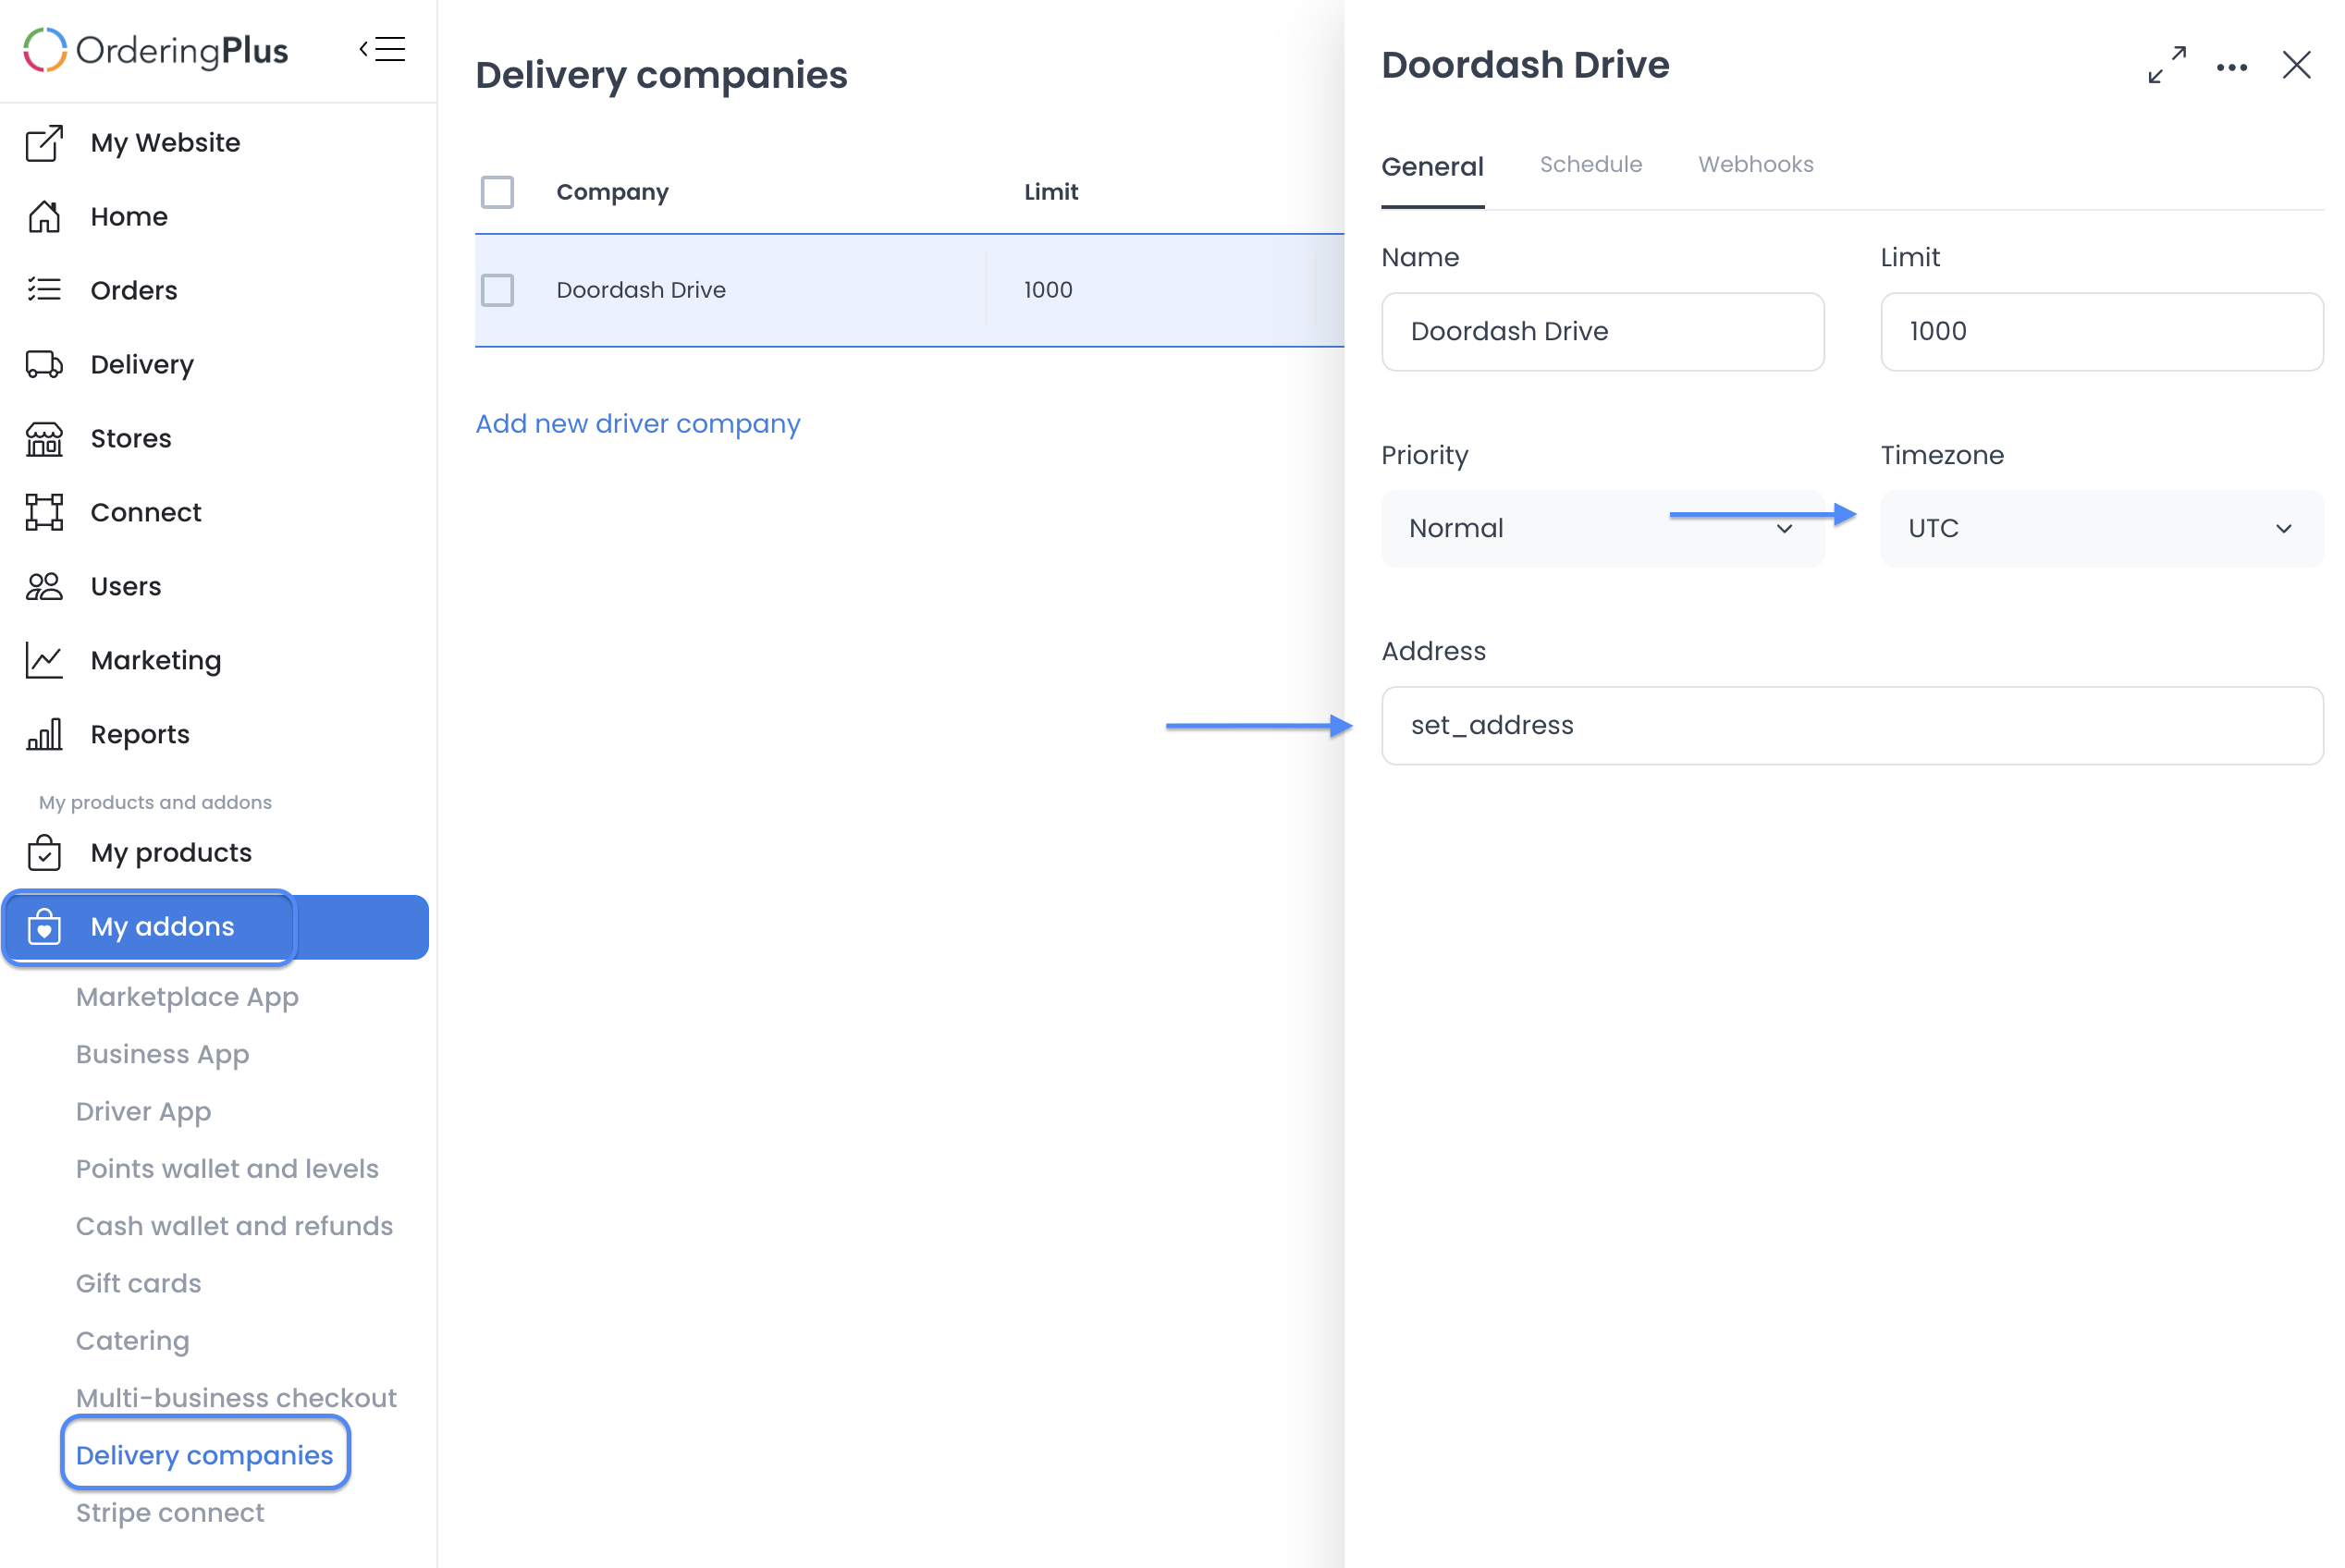
The plugin workflow can create or associate a DoorDash delivery company and a related Driver group. Review the records that appear in your project, then update the business address and time zone only when they are correct for the approved setup.
Select the stores and payment methods that are allowed for the related Driver group. These selections define configuration scope; they do not prove that DoorDash has accepted the account, that a payment will be processed, or that a Driver will be assigned.
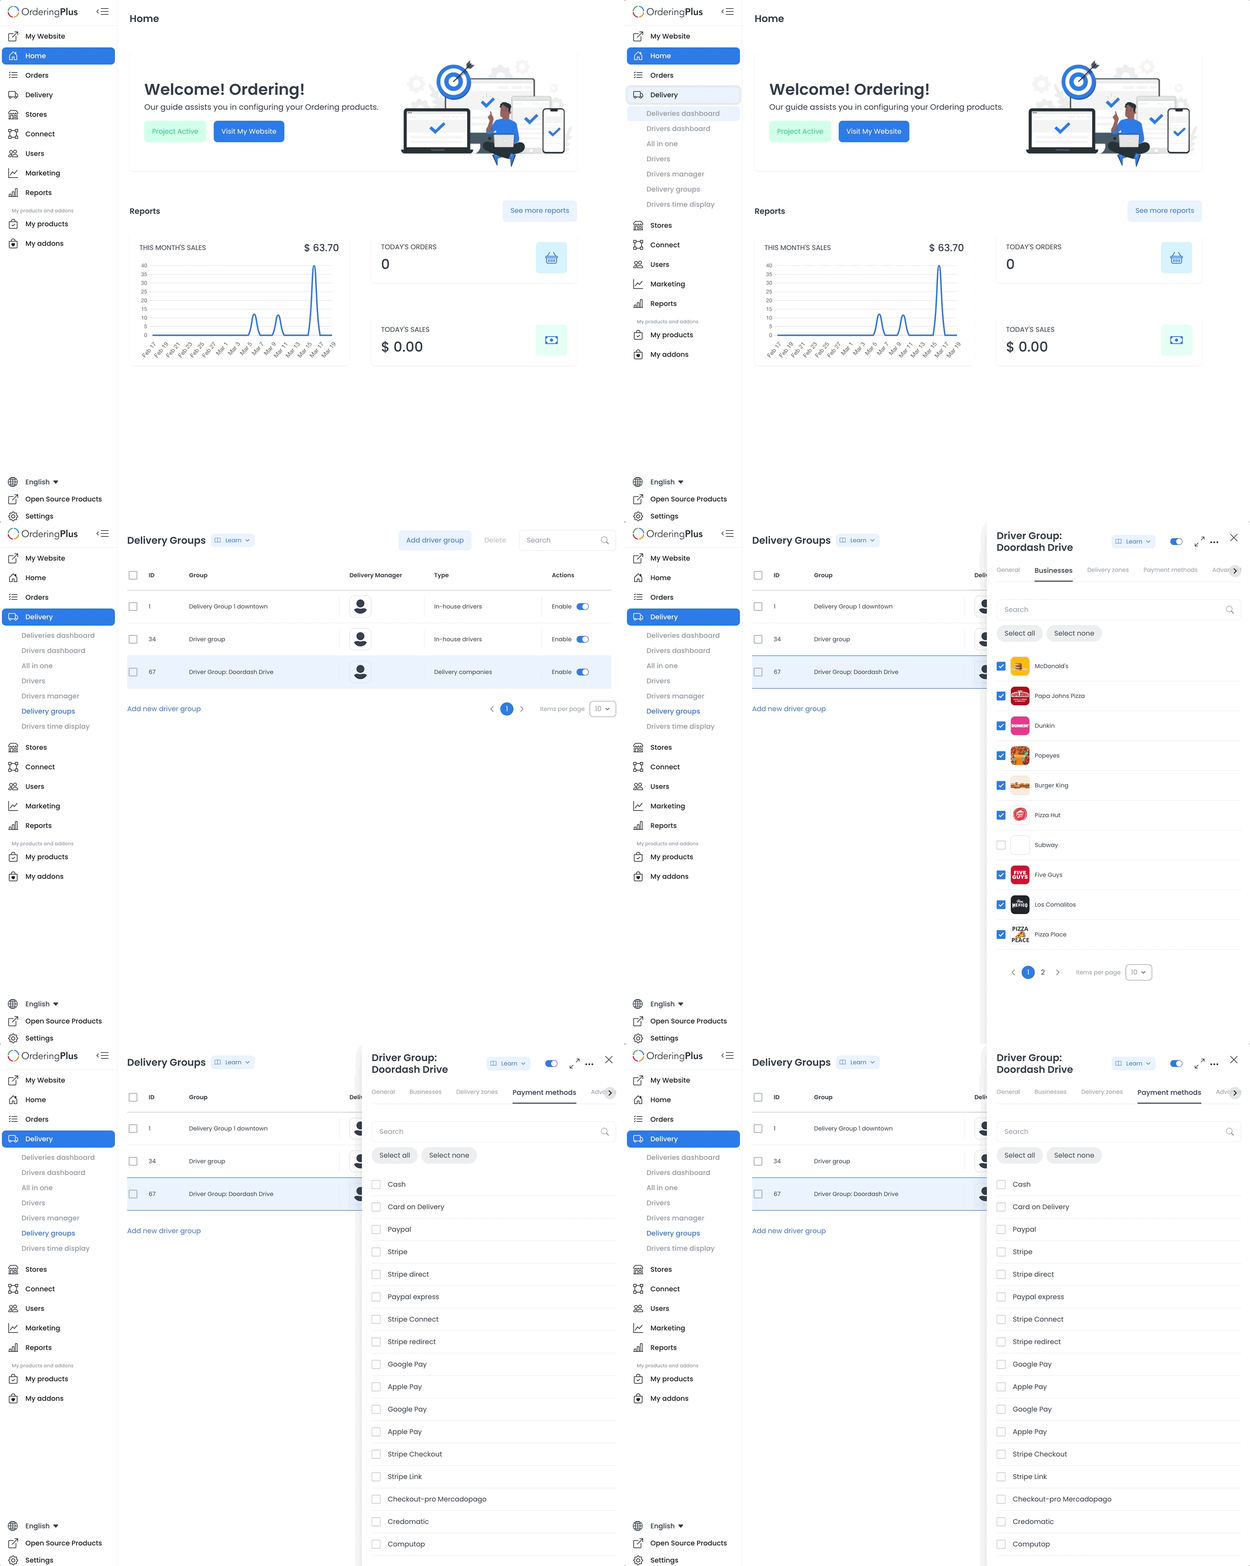
Before an approved delivery handoff, confirm that the selected store and customer profile have the valid phone-number data DoorDash requires. A stored number is required data for the configured workflow, not proof that DoorDash received an order or that a notification was delivered.
Configure DoorDash status updates
The documented setup procedure identifies separate status-update destinations for the two DoorDash variants:
Configure the endpoint that matches the selected plugin. The documented procedure names Drive > Webhooks as the callback area in DoorDash. This guide does not verify that the current provider UI uses the same labels, so confirm them with the approved configuration owner before changing them.
Use a Dashboard administrator to review or create the required key in Settings > Pro > Developers > API Keys. For the documented authorization header, use a template only:
Bearer <project-identifier>:<API-key>
The documented format specifies a capital B, one space after Bearer, and a colon between the project identifier and API key. The available procedure contains conflicting authentication-type labels, so this guide does not select an authentication type. Use your organization's secret-handling process; do not copy, display, or share an actual credential value.
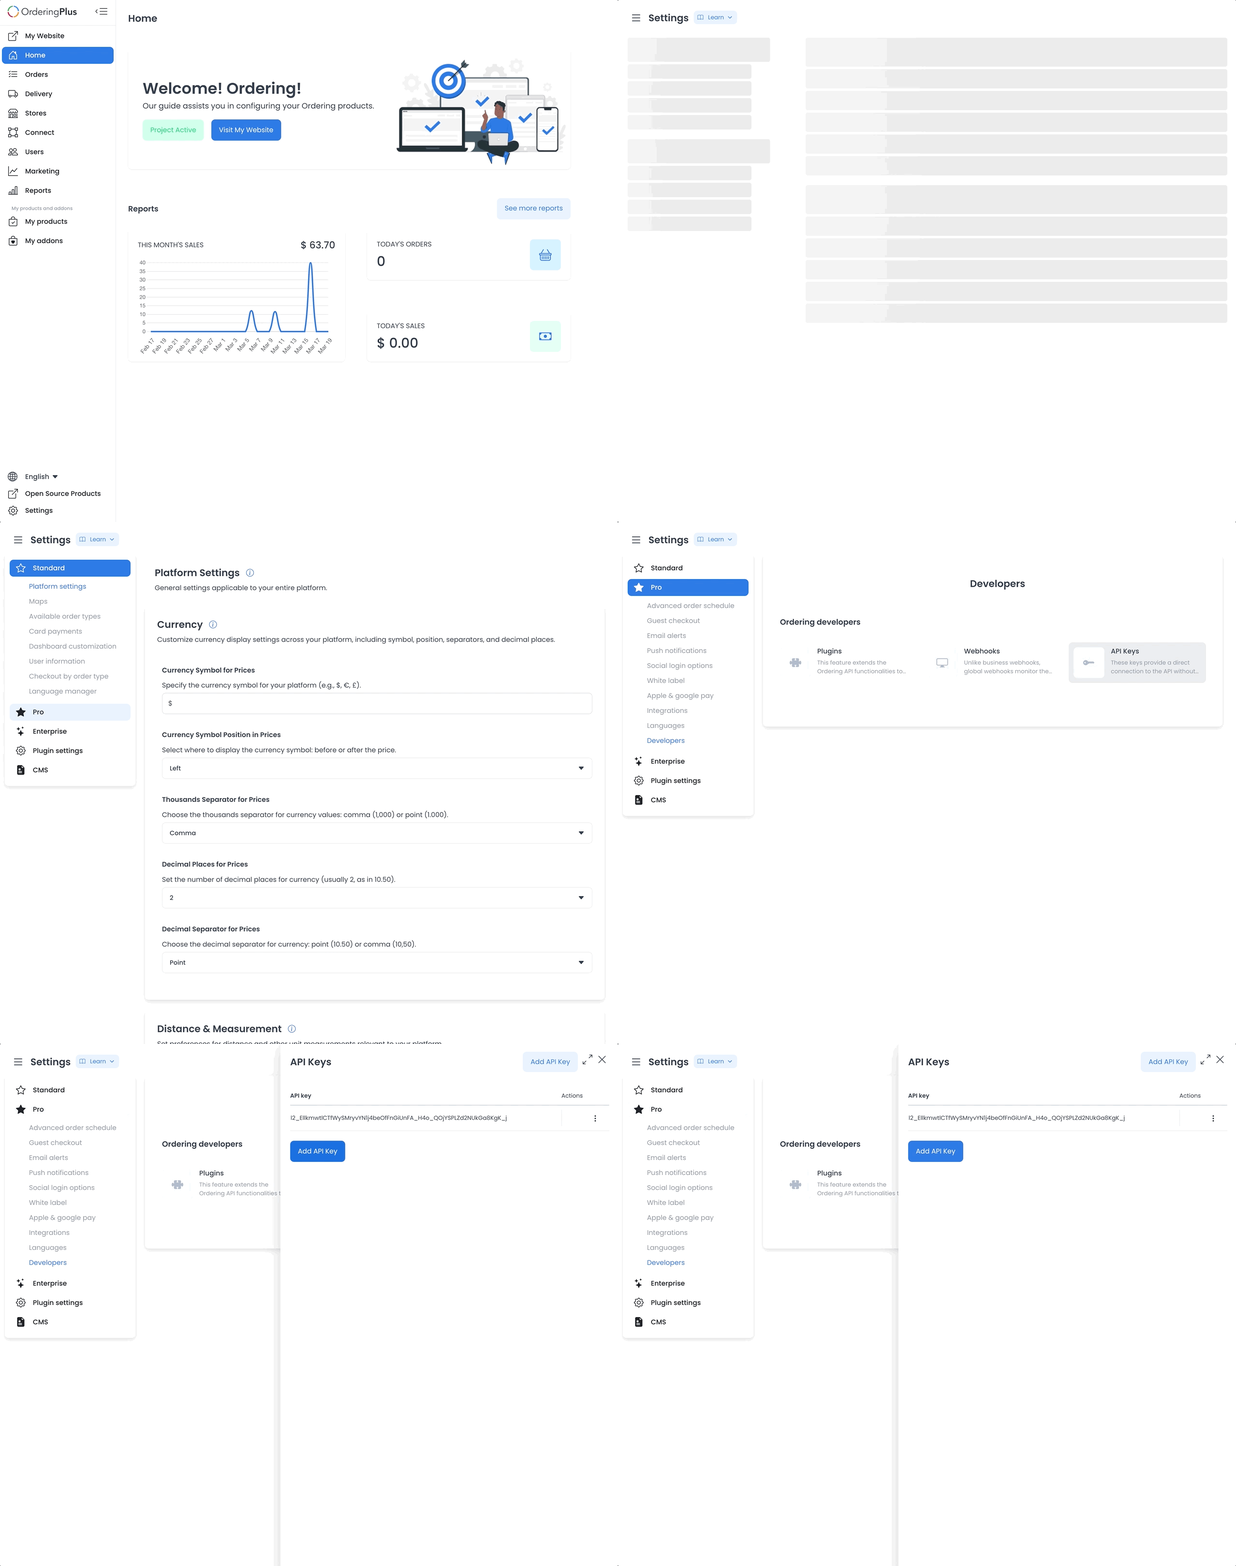
Configuring a callback destination prepares a notification path. It does not prove that DoorDash sent a status update, that the Dashboard processed it, or that live tracking is available.
Test and obtain provider acceptance
Use only an approved provider test environment and a synthetic order when a designated test owner has confirmed that it is safe to do so. If the intended workflow includes Driver tips, include them only in that approved synthetic test. A test should separately observe whether the provider receives the order and whether an allowed status update returns to the Dashboard.
Do not dispatch a real customer order as a configuration test. After the approved test workflow is complete, request the provider review or live-mode acceptance required by DoorDash. Provider acceptance is a separate decision and is not implied by a saved plugin or delivery-company record.
The workflow also includes a DoorDash configuration walkthrough video. Opening external media can contact a third-party service; use it only when your organization's policy permits.
Know what this setup does not prove
This workflow prepares an order-handoff configuration. It does not configure menu synchronization, and it does not by itself prove that an order synchronized, a delivery quote was returned, a dispatch occurred, tracking started, a payment completed, a notification was delivered, a physical delivery happened, or a customer received an order. Verify each outcome through the approved provider and order-operation records.
Related guides: Delivery companies · Configure a delivery service · Assign and manage a delivery
Ordering.co integration page: DoorDash Drive