Create a business
Add a business, store details, and a product catalog.
Build your business with store manager
Ordering.co provides a comprehensive Store Manager designed to help you build and configure your business from the ground up.
This guide walks you through the exact process of creating a new business profile, establishing your location and operating hours, and structuring your digital menu with products and customizable modifiers.
By understanding how these core features work together, you can launch a fully functional, highly customized online store tailored to your specific operational needs.
Step-by-step guide: creating your store and menu
The process in Ordering.co is divided into two main phases: building the administrative profile of the store, and populating your customer-facing catalog.
Phase 1: Creating the business profile
- Initiate Store Creation: Navigate to the Store Manager tab on the left-hand menu and select Stores. Click the blue + Create Business button. While you can use Google Maps to auto-fill details, selecting Skip Manual allows for precise, step-by-step control over your data.
- Basic Information: Enter the fundamental details of your business. This includes your Business Name (e.g., Pizza Plaza), a dedicated administrator Email, and a contact Phone number. Ordering.co will automatically generate a URL-friendly slug based on your business name.
- Address and Location: Input your street address. As you type, the system searches for the location and updates the interactive map preview. This ensures delivery drivers and customers can find your exact geographic coordinates. The time zone is auto-detected based on this address.
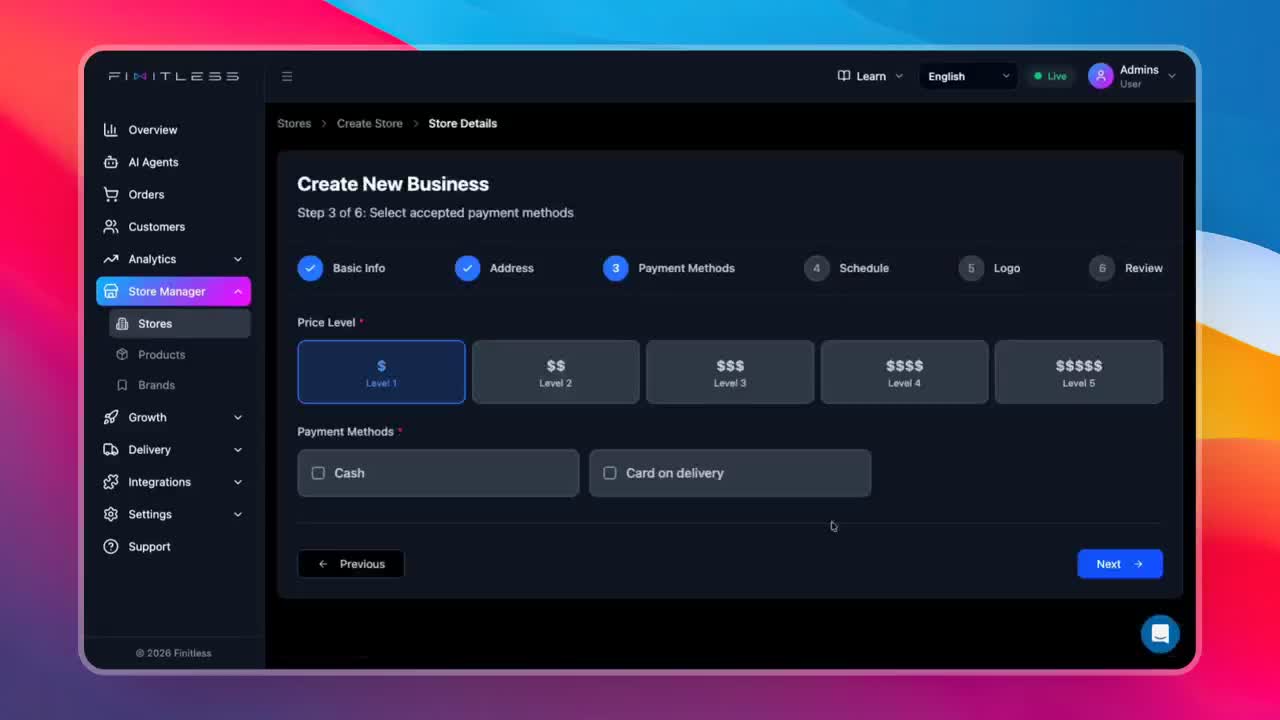
- Payment Methods: Define your store's pricing tier (e.g., $$) and select the payment options you want to accept, such as Cash or Card on delivery.
- Business Hours: Configure your operating schedule. You can easily set open and close times for each day of the week, ensuring customers only place orders when your team is ready to fulfill them.
-
Upload Logo: Attach your brand's visual identity. Click the image placeholder to upload a custom business logo from your local files. Ensure your file is in an accepted format (PNG, JPG, JPEG, WEBP) and under the 512KB size limit.
-
Review and Publish: The final step is a review screen summarizing your inputs. Verify your contact details, location, and configurations. Click Create Business to finalize the setup and push your store live to your dashboard.
Phase 2: Building your product catalog
Once your store exists, you need to give customers something to buy. Ordering.co manages this through the Products section.
- Create Categories: Navigate to Products and search for your newly created store. Click + Add Category to logically organize your menu. For example, create separate categories for Pizzas and Drinks.
- Add Products: Select a category and click + Add Product. Give the item a name. If the item has a fixed price (like a $5 Sprite), enter it here.
- Configure Modifiers (Extras): For items with variable pricing based on size or type (like a pizza), set the base price to $0. Save the product, then open its settings and navigate to the Extras tab.
- Add Options to Extras: Click + Add Extra and name the modifier group (e.g., "Size"). Then, add specific Options under that extra (e.g., "Small"). You can set minimum and maximum selection limits to control exactly how the customer builds their order.
- Advanced Settings: Within a product's settings, configure Upselling and Tax Assignments, then test the resulting checkout totals.
Tips and tricks
- Zero-Dollar Base Pricing: When selling an item with highly variable sizes or add-ons (like custom pizzas), set the main product's base price to $0. Handle the actual cost entirely through the "Extras" options. This prevents pricing confusion and keeps your main menu clean.
- Image Optimization: If your logo upload fails, it is likely exceeding the maximum file size. Keep your images compressed below 512KB. Using the WEBP format often provides the best balance of high visual quality and low file size.
- Fast Navigation: Use the search bar in the Stores and Products menus. As your Ordering.co dashboard grows to host multiple locations, searching by name is much faster than scrolling through visual cards.
Best practices
- Logical Menu Hierarchy: Group items into categories that customers and operators can understand, such as Appetizers, Mains, Sides, and Beverages.
- Strict Selection Limits: When creating "Extras," carefully define your Min and Max values. If a customer must choose a pizza size, set the Min to 1. If they can only choose one size, set the Max to 1. This prevents order errors before they reach your kitchen.
- Consistent Branding: Use the approved business logo and confirm that it appears correctly in customer-facing surfaces.
Conclusion
Review business details, categories, products, extras, taxes, and availability before making the store available to customers.